Railings protect people, support movement on stairs or decks, and improve the overall appearance of a home. Many homeowners install railings but forget small details that make them stronger and safer.
When I work on railing projects, I always notice that simple tricks improve the result. A few smart adjustments during installation or maintenance can extend the life of a railing by many years.
In this guide, I share practical railing tips and tricks that help you build stable, attractive, and long-lasting railings without complicated tools or expensive upgrades.
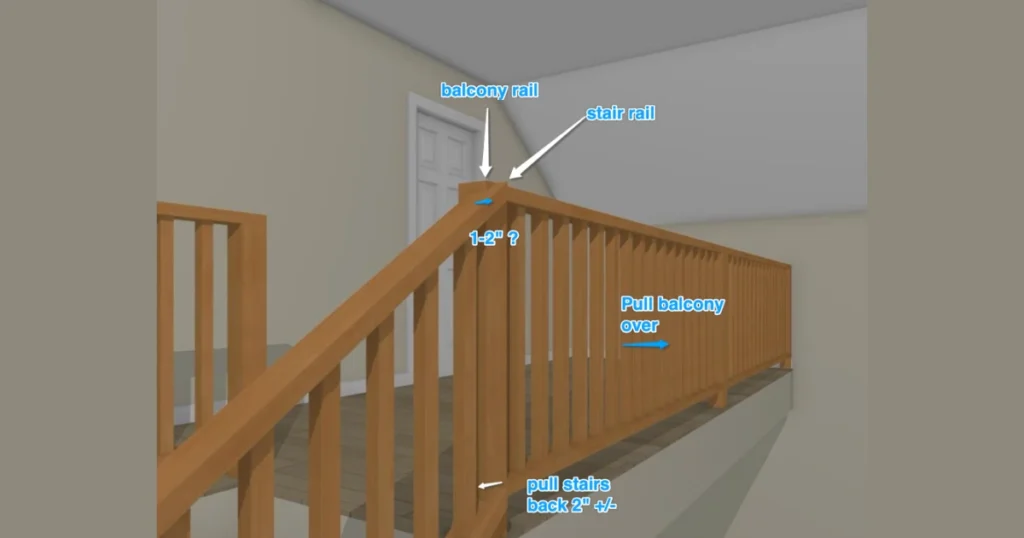
Tip 1: Measure the Correct Railing Height First
Correct railing height keeps people safe and prevents accidents on stairs, balconies, or decks. If the railing height is wrong, even a strong railing becomes unsafe.
Most building guidelines recommend 36 to 42 inches railing height depending on location. Deck railings usually sit around 36 inches while stair railings often reach 42 inches for better grip.
I always measure the railing height before installing posts. This simple step avoids reinstalling sections later and ensures the railing feels comfortable for everyone using the stairs.
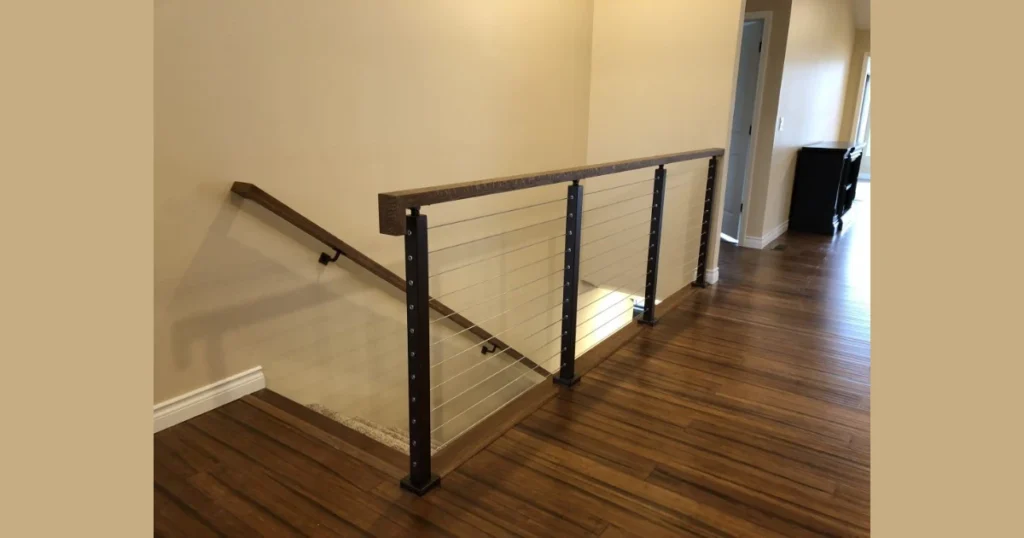
Tip 2: Install Strong Railing Posts for Stability

Strong railing posts create the foundation of a safe railing system. If the posts move or loosen, the entire railing becomes unstable.
Posts should connect directly to the structural frame instead of only attaching to deck boards. Secure them using lag screws or heavy structural bolts to prevent movement.
I always test each post by pushing it firmly after installation. If it moves even slightly, I tighten the connection immediately before adding the rest of the railing.
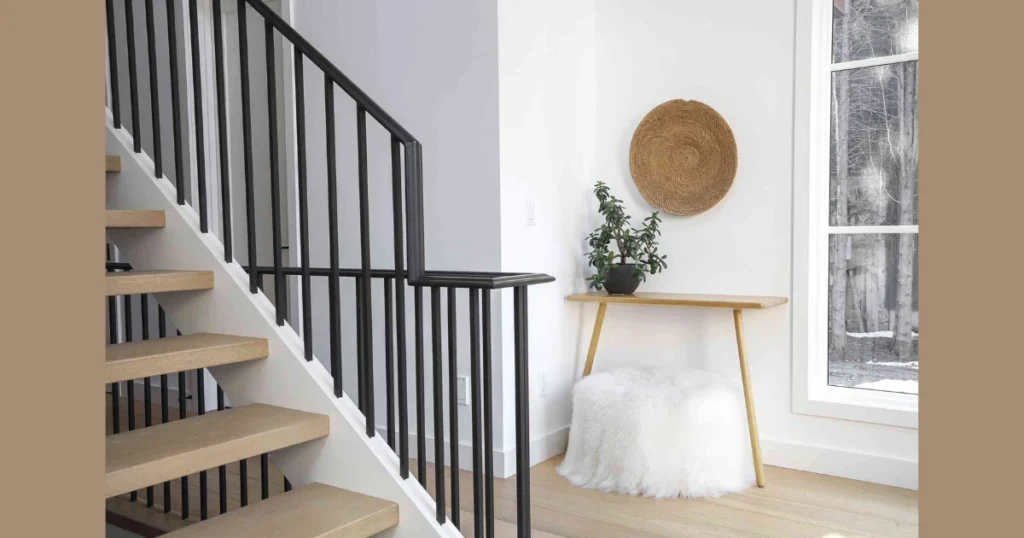
Tip 3: Maintain Proper Baluster Spacing
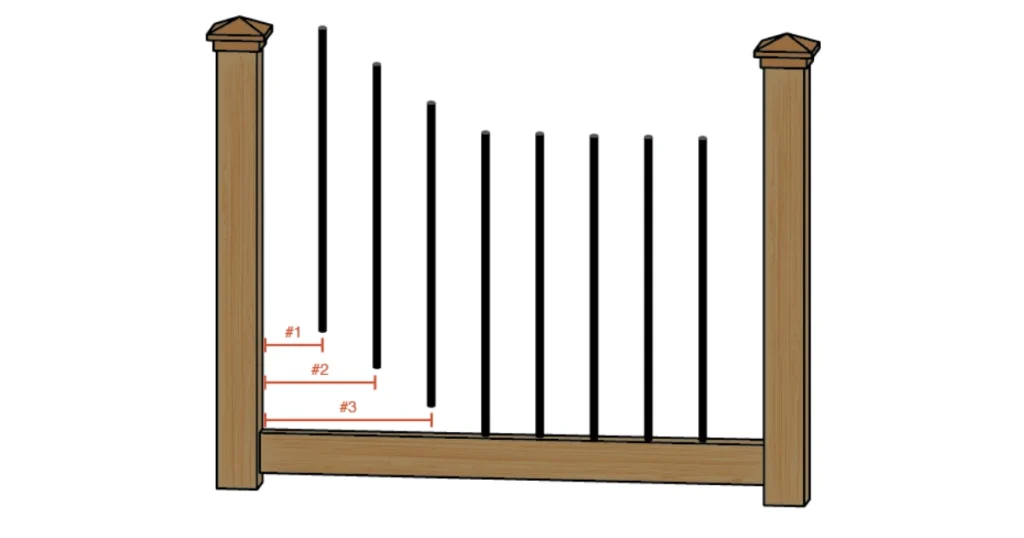
Balusters are the vertical bars between the top rail and bottom rail. Proper spacing improves both safety and appearance.
Most safety standards recommend baluster spacing of less than 4 inches. This spacing prevents children or pets from slipping through the railing.
When I install balusters, I use a simple spacer block to keep every gap consistent. This trick saves time and keeps the railing looking clean and balanced.
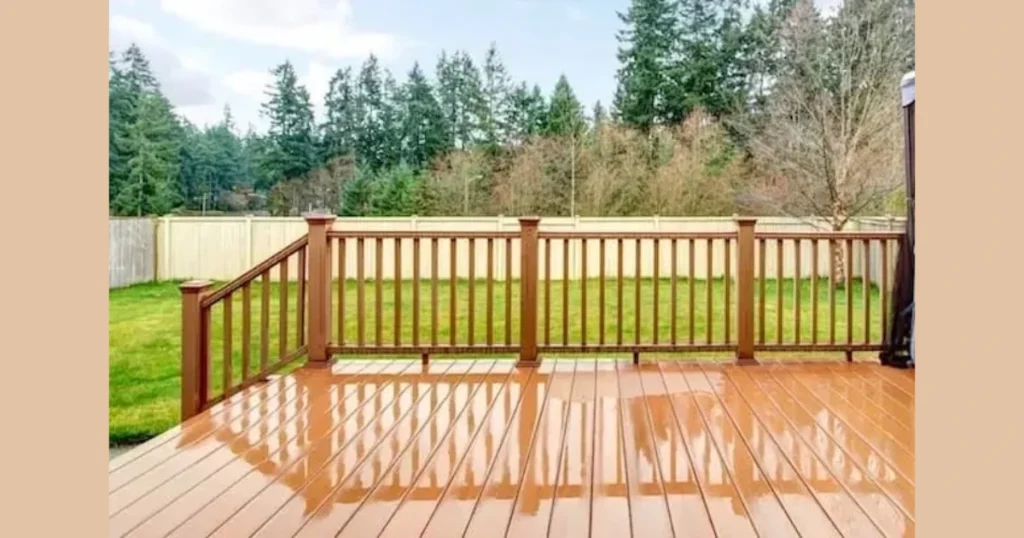
Tip 4: Use Weather-Resistant Railing Materials
Outdoor railings face sun, rain, and temperature changes every day. Using the right material helps railings last much longer.
Wood railings look warm and natural but require sealing or staining. Metal railings resist damage well but need rust protection.
Composite and aluminum railings require very little maintenance. I often suggest these materials for homeowners who want a durable railing without constant upkeep.
Tip 5: Always Check Alignment With a Level
A crooked railing looks unprofessional and can weaken the structure over time. Even a small tilt becomes noticeable when the railing runs along a long staircase.
Using a spirit level during installation ensures every rail sits straight. Check both horizontal rails and vertical posts.
I check the level several times while installing railing sections. It takes only seconds but saves hours of correction later.
Practical Guide for Installing Strong Railings
Installing a railing correctly involves more than attaching a few boards together. Careful planning and the right tools help prevent common installation problems.
| Tool | Purpose | Why It Matters |
|---|---|---|
| Measuring Tape | Measure railing height and spacing | Ensures accurate installation |
| Spirit Level | Check straight alignment | Prevents crooked railings |
| Power Drill | Secure screws and bolts | Strengthens railing joints |
| Post Anchor | Stabilizes railing posts | Improves structural support |
| Spacer Block | Maintain baluster spacing | Creates consistent design |
I always keep these tools ready before starting a railing project. Preparation makes installation smoother and prevents unnecessary mistakes.
Tip 6: Secure Railings With the Right Fasteners
Strong fasteners hold every railing component together. When people choose weak screws or nails, railings loosen quickly and create safety risks.
I always use galvanized or stainless steel screws for railing installation. These fasteners resist rust and keep the railing stable for many years.
Nails may look easier to install, but screws create stronger connections. When I install railings, I always tighten screws firmly so each joint stays solid.
Tip 7: Protect Wooden Railings With Sealing or Staining
Wood railings look beautiful, but they require protection against moisture and sunlight. Without sealing, wood absorbs water and begins to crack or warp.
A good wood sealant or exterior stain protects the railing surface from rain and temperature changes. This protective layer also improves the appearance of the wood.
I usually apply sealant once every one or two years. This small maintenance habit keeps wooden railings strong and prevents expensive repairs later.
Tip 8: Reinforce Railings in High Traffic Areas
Railings near stairs, entry decks, and balconies experience frequent use. Constant pressure from hands and movement can weaken the structure over time.
Extra reinforcement helps these railings stay strong. Adding additional brackets or support blocks improves stability and reduces movement.
Whenever I install stair railings, I double-check the handrail brackets. A secure handrail provides better support for people walking up or down stairs.
Tip 9: Use Hidden Fasteners for a Clean Railing Design
Hidden fasteners help railings look neat and professional. Visible screws or nails can make even a well-built railing look unfinished.
I prefer using hidden brackets or concealed screws when installing modern railing systems. These fasteners stay out of sight while still holding the structure firmly.
A clean railing design improves the visual appeal of stairs, balconies, or decks. Small details like concealed fasteners make the railing look carefully built rather than rushed.
Tip 10: Inspect Railings Regularly to Prevent Problems

Regular railing inspection keeps the structure safe and stable. Many railing problems start small and grow worse if no one notices them.
I usually check railings every few months for loose screws, cracked wood, or rust spots. Quick repairs prevent larger structural damage later.
A simple five minute inspection can extend the life of a railing. Preventive care always costs less than replacing a damaged railing.
Simple Railing Maintenance Tips for Long-Lasting Results
Regular maintenance keeps railings safe and attractive. Small inspections help detect problems before they become serious.
Below are simple checks I follow to keep railings in good condition.
Basic railing maintenance checklist
- Check railing posts for looseness
- Tighten screws and bolts regularly
- Clean railing surfaces to remove dirt
- Inspect metal railings for rust spots
- Reapply paint, stain, or sealant when needed
Performing these checks a few times each year helps prevent damage and improves railing lifespan.
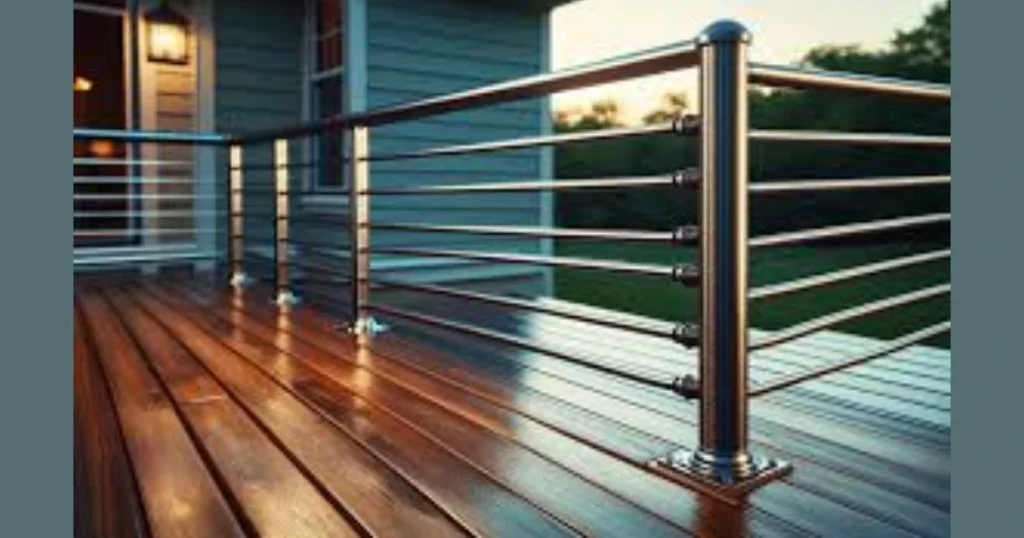
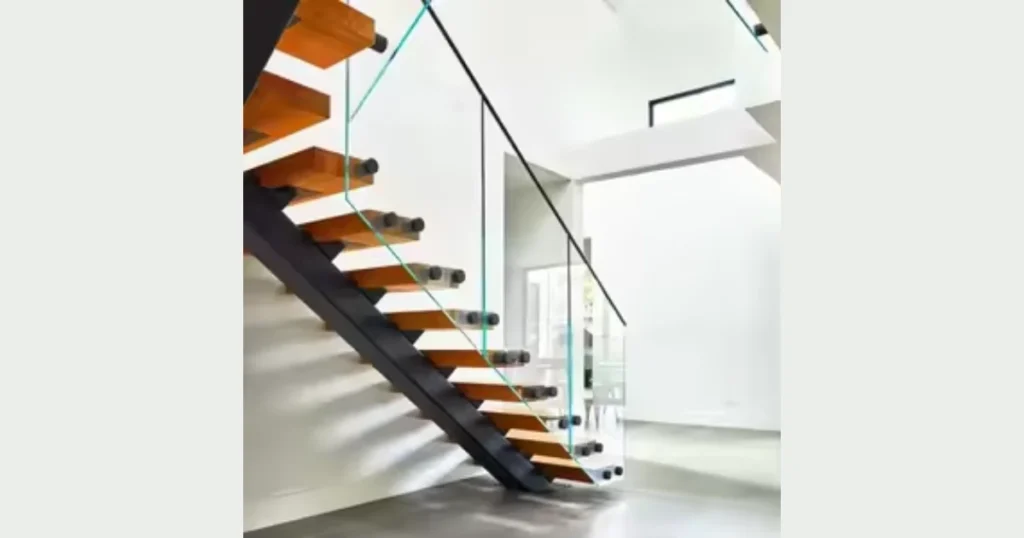
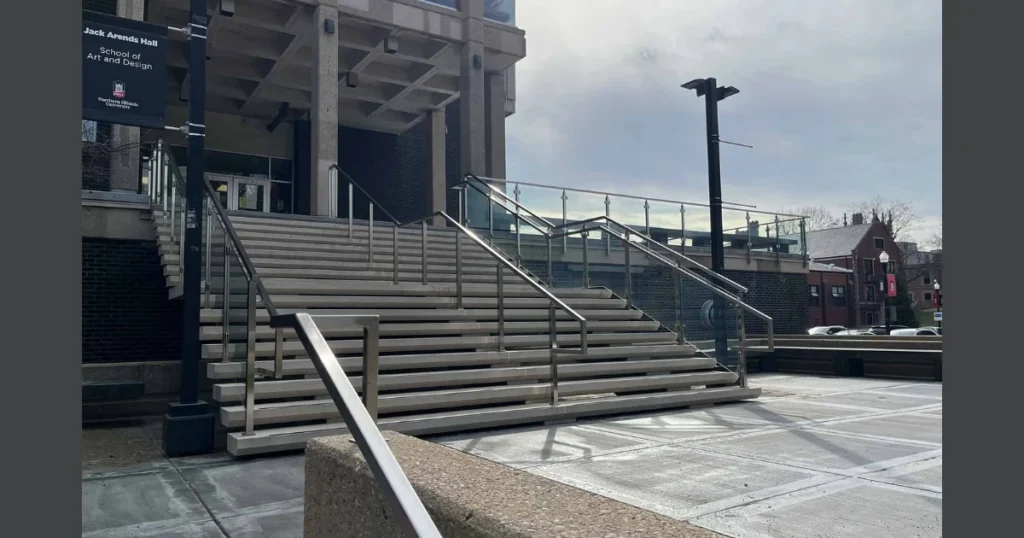
Common Railing Materials and Their Benefits
Different railing materials offer different advantages. Choosing the right material depends on the location, design style, and maintenance preference.
| Railing Material | Best Use | Maintenance Level | Main Advantage |
|---|---|---|---|
| Wood | Decks and stairs | Medium | Natural appearance |
| Aluminum | Balconies and patios | Low | Rust resistant |
| Steel | Modern staircases | Medium | Very strong |
| Composite | Outdoor decks | Low | Weather resistant |
| Glass Panels | Balconies and terraces | Medium | Clear view |
I usually suggest selecting railing materials based on climate and usage. Outdoor areas benefit from materials that resist moisture and sunlight.
Small Tricks That Improve Railing Appearance
A railing should not only be safe but also look attractive. Small design choices can make a big difference in how the railing fits with the home style.
Here are a few simple tricks that improve railing appearance.
- Choose railing colors that match doors and window frames
- Keep baluster spacing even for a clean design
- Use decorative caps on railing posts
- Paint or stain railings to match the house exterior
These small design adjustments make railings look more finished and visually appealing.
Key Safety Rules for Installing Railings
Following safety rules during installation improves both comfort and protection. Railings must support body weight and provide a secure grip.
Below are a few safety guidelines I always follow when installing or repairing railings.
Important railing safety rules
- Install railings at the correct height between 36 and 42 inches.
- Keep baluster spacing under 4 inches for safety.
- Secure posts directly to the structural frame.
- Use corrosion-resistant screws and bolts.
- Check railing stability before regular use.
These basic rules help homeowners create safe railings that last for many years.
Comparison Chart | Choosing the Best Railing Material
Selecting the right railing material improves durability and appearance. The chart below compares common railing options.
| Material | Durability | Maintenance | Best Location |
|---|---|---|---|
| Wood | Moderate | Needs sealing or staining | Decks and stairs |
| Aluminum | High | Low maintenance | Balconies and patios |
| Steel | Very high | Needs rust protection | Modern stair railings |
| Composite | High | Very low maintenance | Outdoor decks |
| Glass panels | Moderate | Regular cleaning | Balconies and terraces |
I usually suggest aluminum or composite railings for homeowners who prefer low maintenance. Wood railings remain a popular choice because of their classic appearance.
Conclusion
Railing tips and tricks help homeowners build railings that stay safe, strong, and attractive for years. Small details such as correct measurements, strong posts, and proper spacing make a big difference.
I always remind people that good railing installation is not complicated. Careful planning, strong materials, and regular maintenance keep railings stable and reliable.
If you apply these simple railing tips, your stair, deck, or balcony railing will provide safety and comfort while also improving the appearance of your home.
FAQs
Most residential railings range between 36 and 42 inches in height. This height allows comfortable hand support and meets common safety guidelines.
Balusters should remain less than 4 inches apart. This spacing prevents children or pets from slipping through the railing.
Aluminum and composite railings require the least maintenance. These materials resist weather damage and do not require regular sealing.
I recommend inspecting railings two to three times per year. Regular checks help identify loose screws, rust, or structural damage early.
Yes. Outdoor railings should receive paint, sealant, or protective coating to prevent moisture damage and extend their lifespan.
Yes. Tightening screws, replacing damaged fasteners, or reinforcing posts usually fixes loose railings without replacing the entire structure.