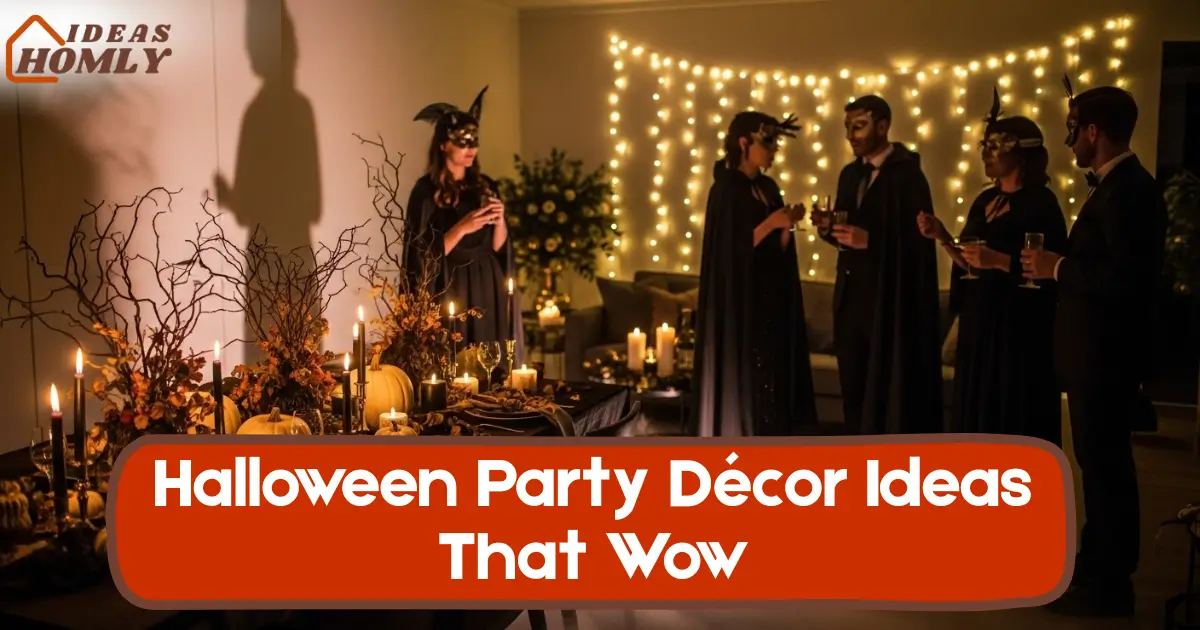
When it comes to Halloween, décor makes or breaks the mood. You can have the best snacks and music, but if the space doesn’t look right, the party falls flat.
I’ve learned that guests remember how a place feels,the flickering lights, the eerie glow, and even the smell of cinnamon candles. In this guide, I’ll share my favorite Halloween party décor ideas that always get compliments and photos flooding in.
From an enchanted forest table setup to a UV glow snack bar, these ideas are a mix of style and fun. They don’t just look great, they’re easy to put together using things you probably already have or can grab from your favorite stores or Amazon picks.
Whether you’re planning a small get-together or a full-blown haunted bash, these décor setups will help your space stand out and feel truly magical.
Planning Your Theme & Mood
Before decorating, it’s important to set a theme and mood. This step shapes everything from your color palette to your lighting choices.
I usually start with three questions: What vibe do I want? What’s my space like? And how much time do I actually have?
A color palette helps keep the décor cohesive. Black, gold, and deep green give off a vintage haunted look, while white and silver create a ghostly, elegant feel.
For something unique, try cosmic or galaxy-inspired décor, think purple LED lights and star garlands.
Lighting plays a huge role. Soft amber lights work best for cozy indoor spaces, while string lights and candles can make outdoor setups feel warm yet mysterious.
For bigger parties, I use layered lighting, overhead glow mixed with hidden candles or spotlights for drama.
Here’s a quick guide I’ve found useful:
| Theme | Color Palette | Lighting Tip | Mood Created |
|---|---|---|---|
| Haunted Forest | Deep green, brown, gold | Warm string lights + fog machine | Mysterious & immersive |
| Vintage Glam | Black, ivory, gold | Candlelight & antique bulbs | Classy & nostalgic |
| Cosmic Vibe | Purple, silver, blue | UV lights & shimmer décor | Futuristic & playful |
A clear theme makes decoration easier. You’ll instantly know which props or materials will fit—and which ones to skip.
1. Enchanted Forest Tables
If you want your Halloween dinner or snack table to feel like something out of a dark fairytale, this idea is my go-to. The goal is to make guests feel like they’re dining deep in an enchanted forest.
I usually start by layering the table with moss runners, artificial vines, and a few LED fairy lights tucked underneath. Then I add wooden trays or bark chargers for a natural texture.
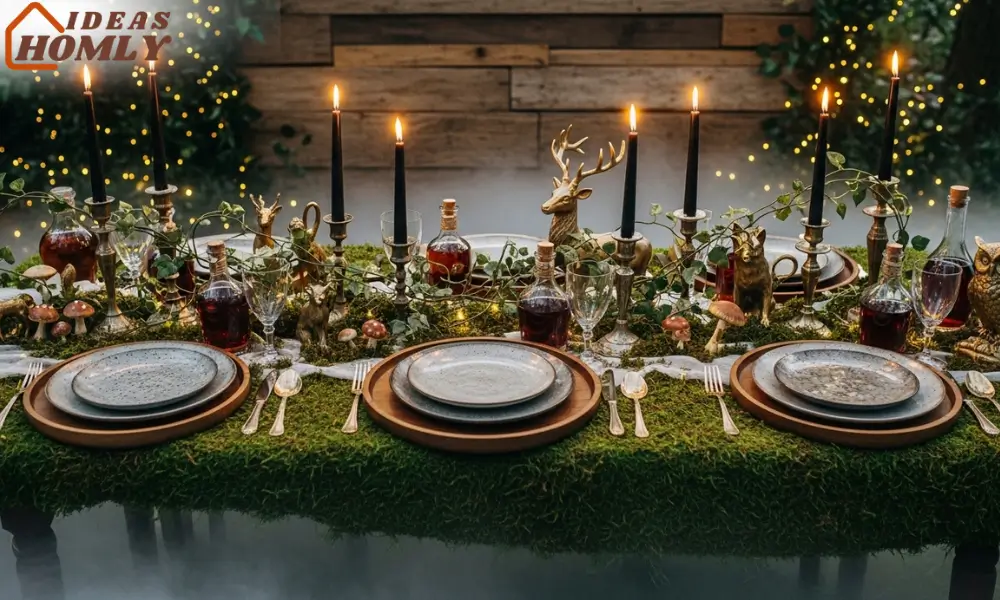
To give it a mystical edge, scatter tiny gold or bronze accents, like candle holders shaped like leaves or small animal figurines.
For the centerpiece, tall black candles in antique holders add depth, while a few artificial mushrooms or dried flowers bring in earthy tones.
If you’re serving drinks, swap glass pitchers for rustic potion bottles, it’s a small detail that makes guests curious.
A quick pro tip: play with height. Mix tall candlesticks with shorter ones and use different levels for plates or stands. This makes your table look layered instead of flat.
Key décor elements:
- Faux moss table runner
- LED fairy lights
- Black taper candles
- Wooden or bark-textured serving boards
- Artificial vines and dried foliage
You can complete the look by using soft instrumental background music, something forest-like or ethereal, to make the ambiance feel alive.
2. White-Pumpkin Flower Centerpieces
When I want a break from the usual orange-and-black Halloween palette, I switch to white pumpkins. They give such an elegant, modern twist to any setup and pair beautifully with floral arrangements.
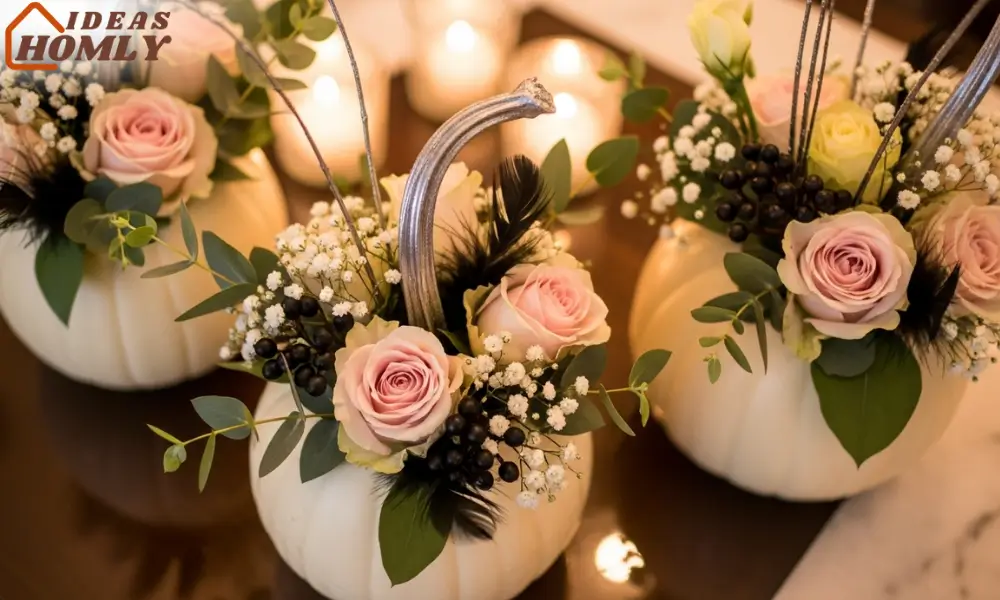
Start with small or medium white pumpkins, real or faux both work. Cut the tops off, hollow them slightly, and insert floral foam. Then, arrange flowers like roses, baby’s breath, or eucalyptus in muted tones. Cream, pale pink, or deep burgundy flowers look stunning together.
For a minimalist look, I keep the flowers monochrome. But if I’m going for something more eye-catching, I add small dark berries or black feathers for contrast. These pumpkins work perfectly as table centerpieces, mantel décor, or even shelf displays.
If you’re planning a larger party, group three pumpkins of different sizes together on a tray with scattered petals or mini candles. It gives a professional touch without spending hours arranging.
Pro tips:
- Spray-paint faux pumpkins if you can’t find natural white ones.
- Add glitter or metallic paint on the stems for extra charm.
- Keep them refrigerated if using real flowers to last longer during the night.
I’ve used these centerpieces for both Halloween dinners and fall-themed gatherings, and guests always take photos of them first. They blend sophistication with seasonal charm exactly the balance I love for festive décor.
3. Vintage Mask Wall
One of my favorite décor tricks that instantly sparks conversation is the vintage mask wall. It’s artsy, a little creepy, and ridiculously easy to pull off. You just need a blank wall, a few props, and a bit of imagination.
Start by collecting old-style masks, think Venetian masquerade masks, porcelain faces, or classic papier-mâché designs. You can easily find replicas online or at local thrift shops.
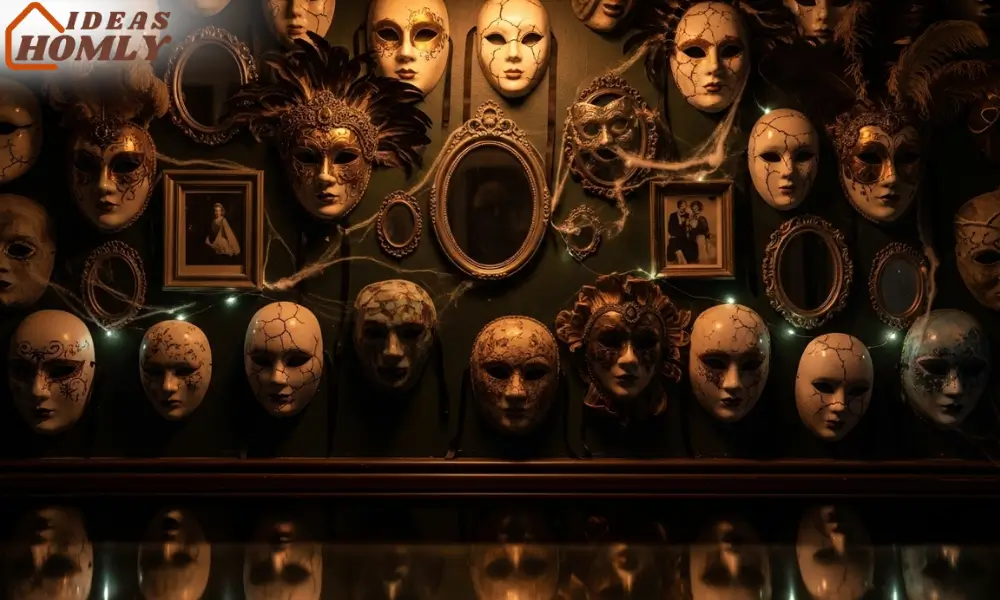
Arrange them at different heights using clear hooks or strings, and mix in small mirrors or framed photos for a gallery-like look.
For extra atmosphere, add dim wall lighting or hang fairy lights behind sheer fabric to cast soft shadows. I’ve also tried lightly spraying fake cobwebs around the edges; it gives a touch of eerie realism without being over the top.
If you want to make it interactive, leave a basket of extra masks nearby so guests can pick one to wear. It turns a décor piece into a fun activity.
Pro Tip: Stick to a limited color palette; black, cream, and gold always look classic. Too many colors can make it look cluttered instead of hauntingly stylish.
| Mask Type | Where to Use | Style Vibe |
|---|---|---|
| Venetian Masks | Center wall | Elegant Gothic |
| Papier-Mâché | Side clusters | Artistic Vintage |
| Porcelain Faces | Top or corners | Creepy Antique |
A well-styled mask wall not only decorates your space but also gives guests the perfect photo backdrop.
4. UV Glow Snack Bar
This one’s for anyone who wants a modern, high-energy vibe. The UV glow snack bar is basically a neon dream come to life, and it works great for both adult and teen Halloween parties.
Start by covering your snack or drink table with a black or dark cloth, then place UV-reactive tape or neon-painted props across the edges.
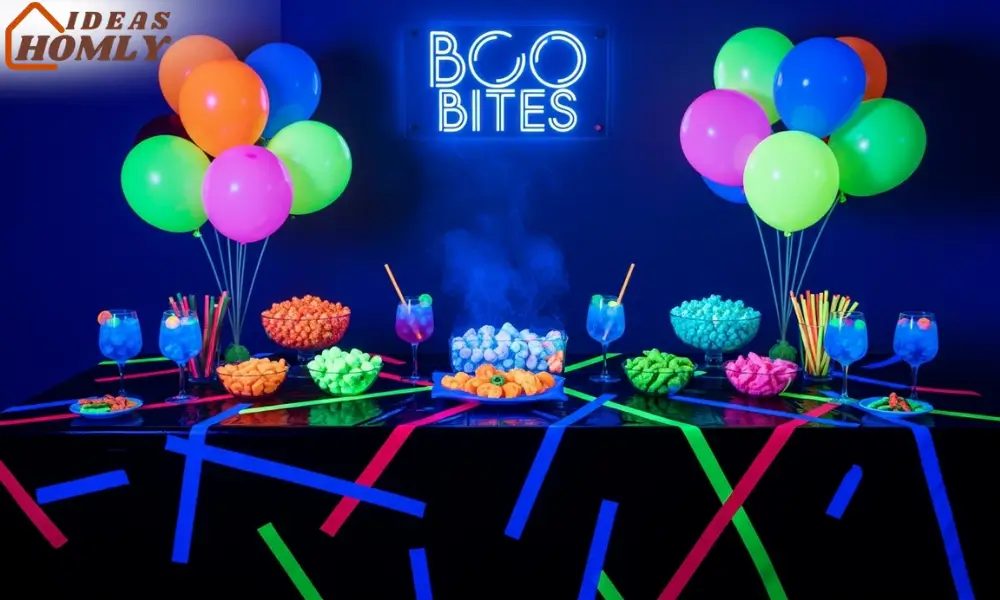
Black lights do all the magic here, making white snacks, drinks, and labels glow like something from a sci-fi movie.
To make it practical and stylish, I use clear acrylic trays and transparent bowls so the glow spreads evenly. Snacks like popcorn, marshmallows, and white chocolate treats look amazing under UV.
For drinks, use tonic water, it glows naturally because of quinine! Mix it with colorful juices for glowing cocktails or mocktails.
Here’s how I usually set it up:
| Element | Color/Type | Effect Under UV Light |
|---|---|---|
| Neon tape | Green, pink, blue | Glowing outlines |
| Drinks | Tonic water + juice | Fluorescent glow |
| Decor | Clear balloons, streamers | Reflect light dramatically |
| Table surface | Black fabric | Increases contrast |
To make it even better, hang glow sticks or use neon acrylic signage that says something cheeky like “Boo Bites” or “Glowing Goodies.”
I recommend placing this bar in a slightly darker corner of your space, it enhances the glow and instantly becomes the highlight of the night.
5. Crystal Ball Drinks Station
Nothing says “mystical Halloween” like a crystal ball drinks station. It’s dramatic, slightly theatrical, and perfect for parties where guests love taking photos.
For this setup, I use a large glass punch bowl or a clear round vase as the centerpiece, it becomes the “crystal ball.” Surround it with smaller bowls of ice or fog using dry ice (carefully handled, of course) to create that floating mist effect.
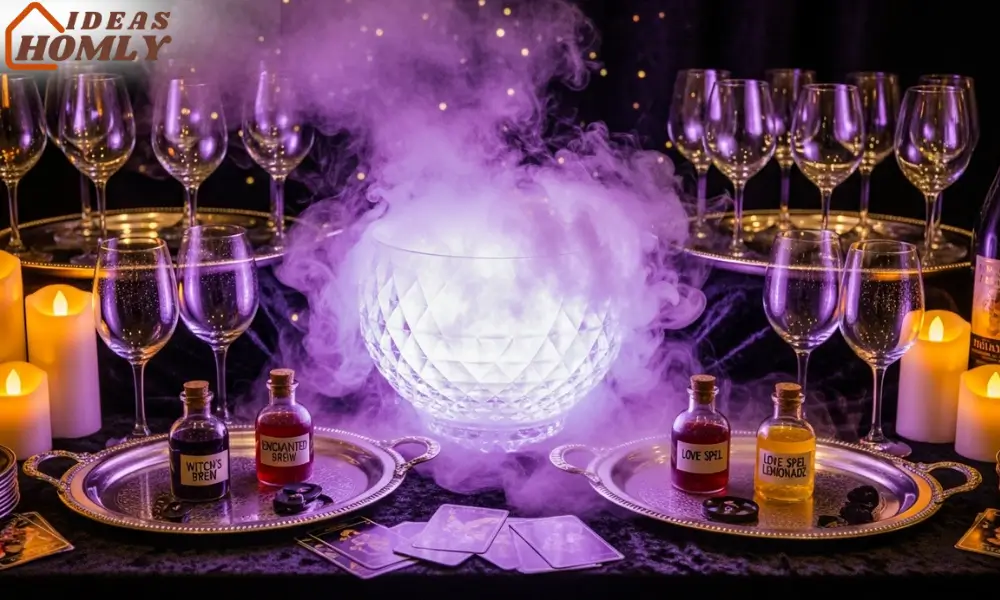
You can fill the main bowl with your favorite punch or themed drinks, purple berry juice or orange sherbet punch both look magical. Add floating eyeball candies or black straws for an eerie twist.
Decorate the table with silver trays, dark velvet fabric, and LED candles to mimic the glow of fortune-telling rooms. Small tarot cards, glitter, or fake crystals add extra flair.
For a more refined look, label each drink like a potion, Witch’s Brew, Enchanted Elixir, or Love Spell Lemonade. These tiny details turn a simple drink table into a story-worthy setup.
Pro Tips:
- Use a fog machine nearby if dry ice isn’t available.
- Stick to transparent glassware, it amplifies the mystical light effect.
- Keep lighting warm (amber or purple) for that otherworldly glow.
This idea always gets guests hovering around the station, not just for refills but for selfies too. It’s equal parts spooky and glamorous, and it adds a visual anchor to your party’s theme.
6. Oversized Entry Arch
Every unforgettable Halloween party starts with an entrance that wows. That’s where the oversized entry arch comes in, it’s dramatic, fun, and sets the entire mood before guests even step inside.
I’ve seen people try balloon arches or flimsy tinsel curtains, but the best results come from something with structure.
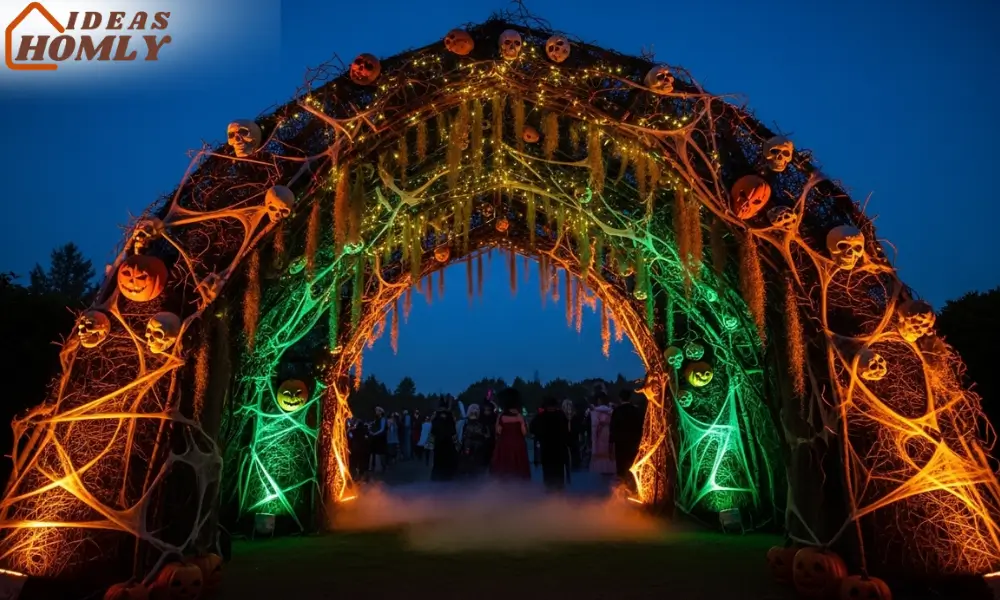
You can use PVC pipes or lightweight frames, then wrap them with creepy fabric, black mesh, or artificial vines. Add foam skulls, bats, or pumpkins for texture.
If your party has a specific theme, match the arch to it. For example, for a haunted forest theme, use branches, moss, and twinkle lights.
For something more modern, try a black-and-white balloon arch with neon cobwebs or a metallic skeleton standing guard at each side.
Lighting tip: Place spotlights or colored LED strips at the base pointing upward. It creates a dramatic glow that looks incredible in photos.
A good arch doesn’t need to cost much; some of the best ones I’ve made were under $40 using a mix of thrifted fabric and dollar-store props.
| Theme Style | Materials Used | Lighting Color |
|---|---|---|
| Haunted Forest | Branches, moss, fairy lights | Warm amber |
| Modern Neon | Balloons, mesh fabric, glow sticks | Purple or green |
| Gothic Castle | Draped velvet, skulls, fake chains | Red or gold |
The entry arch instantly tells guests, “This is going to be a night to remember.”
DIY vs Purchased Components
I often get asked whether it’s better to buy Halloween décor or make it yourself. Honestly, it depends on your time, patience, and budget. I like mixing both; it keeps things affordable while still looking professional.
If you enjoy crafting, DIY pieces like painted pumpkins, handmade banners, or custom drink labels add a personal touch that store-bought items can’t match.
Plus, guests love hearing that you made something yourself; it adds a bit of storytelling to the décor.
But for big showstopper pieces, purchased components can save time and stress. Things like UV lights, fog machines, or realistic props are worth investing in because they last for years.
Here’s how I usually balance the two:
| DIY Items | Store-Bought Items |
|---|---|
| Table runners, garlands, centerpieces | Lights, machines, figurines |
| Painted pumpkins or signs | Durable backdrops |
| Custom name tags or labels | Fabric props and masks |
A smart mix gives you the creativity of handmade décor with the polish of professional touches.
Photo & Instagram-Ready Tips
If you want your Halloween setup to be camera gold, lighting and background are everything. I’ve tested dozens of combinations, and these simple tweaks make a massive difference.
- Avoid harsh white light. Warm tones or dim amber bulbs create flattering shadows.
- Use props with reflective surfaces like mirrors, metallic pumpkins, and glass bottles make photos look lively.
- Create focal zones. Every area should have one highlight piece like a centerpiece, wall display, or dessert table. It helps photos look intentional.
- Add movement. Flowing fabric, hanging candles, or small fans near lightweight décor add subtle animation in videos.
- Keep clutter minimal. Clear table corners and avoid overcrowding props; it helps every photo look editorial.
If your décor looks great on camera, it looks great in real life too. And honestly, when guests start posting your setup online, it becomes free marketing for your next event.
Flow & Guest Experience
One of the most underrated aspects of Halloween décor is how it affects guest flow. You can have stunning decorations, but if people feel cramped or lost, the vibe disappears.
I always design the space in a loop. Guests should move from one focal area to another naturally like from the entry arch to the drink station, then to the snack bar or photo wall. Use lighting to guide them: bright areas attract attention, dim ones create mystery.
Music also ties everything together. Keep spooky instrumentals near décor-heavy zones and switch to upbeat tracks near activity areas.
And never underestimate the importance of scent. Subtle pumpkin spice or cedarwood diffusers instantly make a space feel intentional and warm.
Conclusion
Halloween décor doesn’t need to be expensive or complicated to look incredible. The real secret is planning a cohesive theme and layering textures, lights, and moods that match it.
From enchanted forest tables to UV snack bars, every idea in this list brings personality and wow factor to your space.
Whether you’re crafting on a budget or splurging on standout pieces, remember it’s all about creating an experience guests will remember. And when the lights dim and your fog machine hums, you’ll know every detail was worth it.
So, pick your favorite idea (or mix them all), grab your glue gun, and start creating a Halloween setup that truly wows.
FAQs
White-pumpkin centerpieces or the vintage mask wall are great low-cost options. You can reuse materials from previous parties and still make it look stylish.
I recommend starting at least a week before the event. This gives you time to test lights, adjust layouts, and fix any last-minute issues.
Absolutely. Many neutral elements like white pumpkins, lights, and glassware can be reused for Thanksgiving or fall dinners.
Stick to a consistent color palette and mix textures. Avoid overusing orange; add black, gold, or natural tones for balance.
Warm LED string lights or diffused colored lamps work best. They add ambiance without washing out the colors in photos.