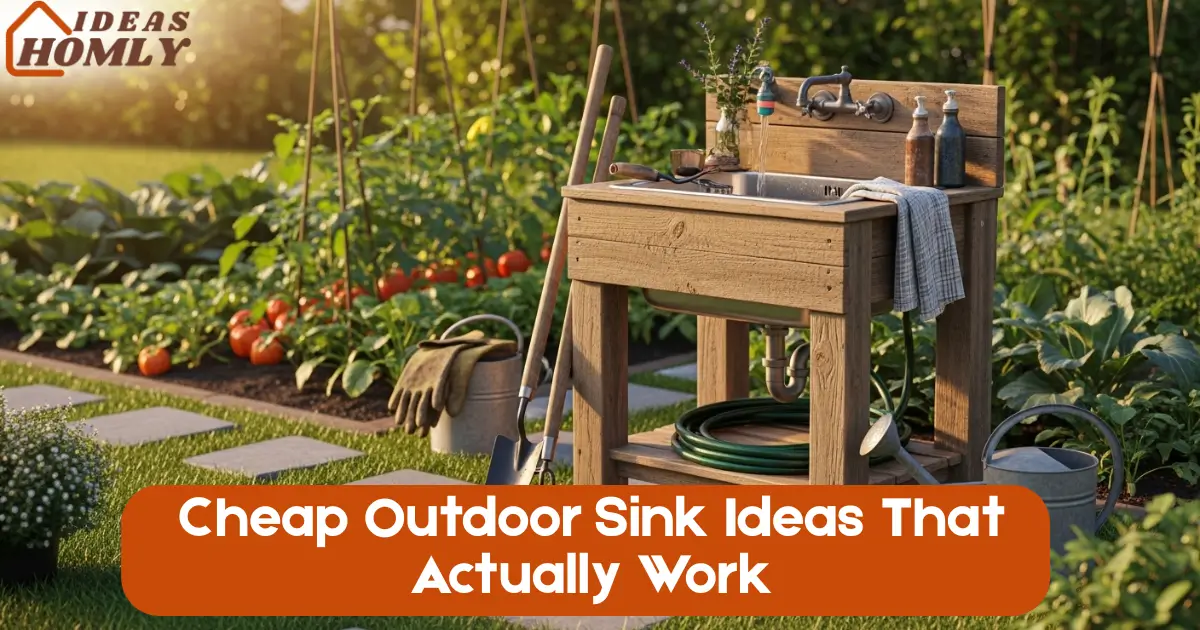
If you’ve ever been knee-deep in a gardening project, elbow covered in potting soil, and suddenly realized you had to march all the way inside just to wash your hands yeah, I’ve been there too. That’s exactly why I started experimenting with outdoor sink setups that actually make sense… and don’t cost a fortune.
Over the years, I’ve tested, tweaked, and helped friends build these types of setups in backyards, gardens, and patios. So, in this guide, I’m sharing six outdoor sink ideas that are super budget-friendly, ridiculously useful, and believe it or not, pretty good-looking too.
These DIY outdoor sinks are perfect for garden lovers, campers, BBQ champs, or anyone who just wants to keep indoor messes outside where they belong.
Why a Cheap Outdoor Sink is Actually Really Smart
I used to think an outdoor sink was just a luxury. Until I got tired of muddy shoes in my kitchen and dripping paint from messy DIY projects. That’s when I realized having a water station outside isn’t just “nice to have,” it’s practical.
Here’s what I love about it:
- I can rinse veggies from the garden before they come inside.
- No more tracking dirt through the house just to wash up.
- It’s amazing for backyard BBQs and parties.
- It keeps outdoor tools, pots, and even paint brushes out of the indoor sink.
Plus, you can build one on a tight budget. Some of these setups I built with stuff that was just lying around. So let’s get into the first two setups that have honestly saved me so many steps (and mop-ups).
1. Pallet-Frame + Recycled Basin
Let me tell you, pallets are gold when it comes to cheap DIY projects. I’ve built more things with old pallets than I can count including my very first outdoor sink.
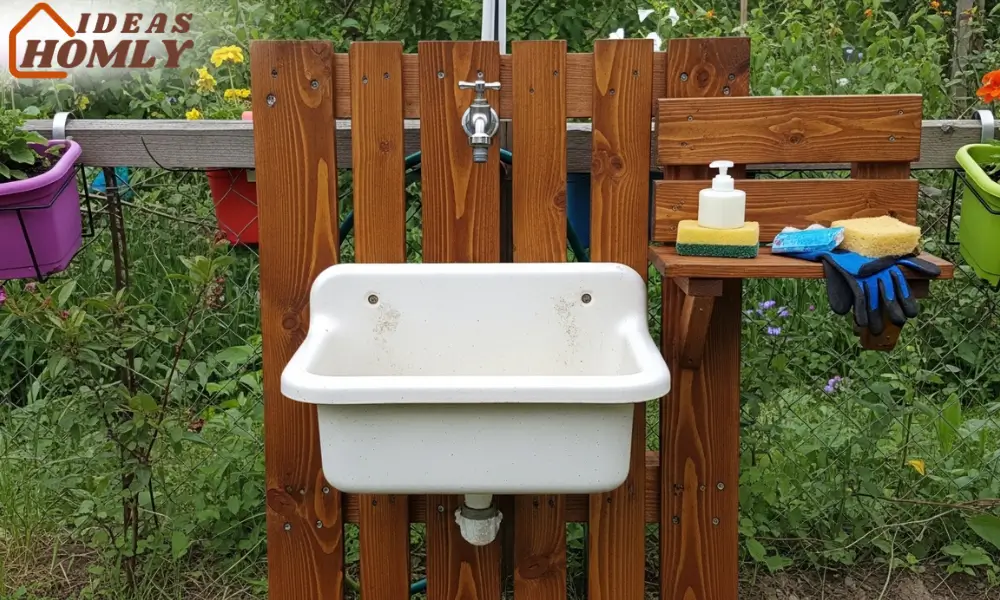
Here’s what I did: I grabbed a free wooden pallet, flipped it vertically, and attached an old sink basin I rescued from a neighbor’s kitchen reno. You can also use a metal bowl or even an old wash basin if you’ve got one.
What You’ll Need:
- 1 sturdy wooden pallet (free or under $10)
- A recycled sink basin or large metal bowl
- Hose hookup or a simple gravity-fed water jug
- Screws, brackets, and basic hand tools
I attached a shelf under the basin using more pallet wood for storing soaps and brushes. For the water, I rigged up a simple hose connection using a faucet attachment that costs about $5 at most hardware stores.
Cost:
| Item | Estimated Cost |
|---|---|
| Pallet (free to $10) | $0 – $10 |
| Recycled sink or basin | $0 – $20 |
| Hose connector/fittings | $5 – $10 |
| Misc. hardware | $5 |
| Total | Under $40 |
Why I Love It:
It’s rustic, eco-friendly, and customizable. It fits perfectly in a backyard or garden setup. And trust me, if you stain or seal the pallet, it’ll last through many seasons.
2. Galvanized Stock-Tank Sink
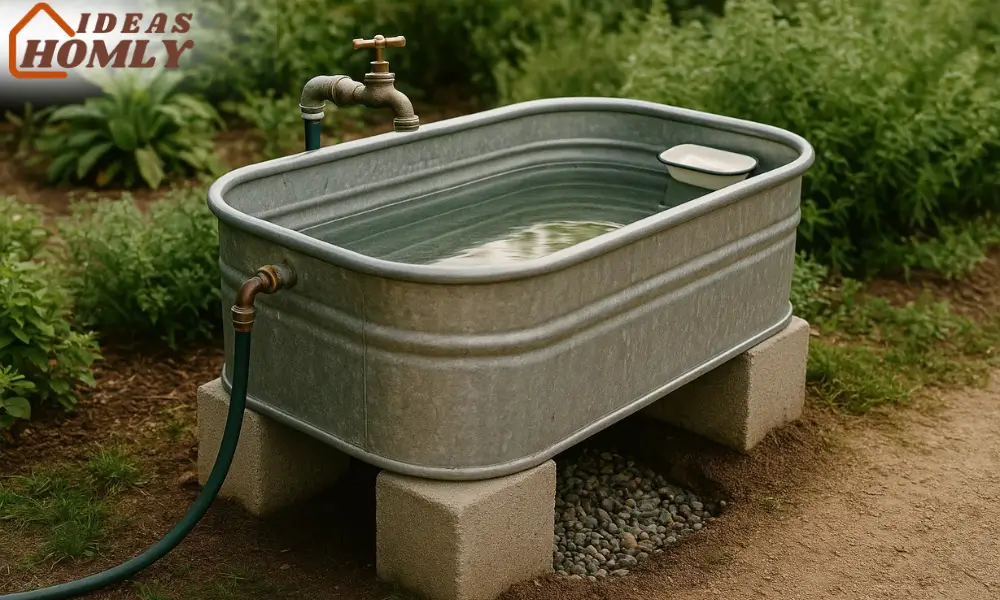
Okay, this one’s for those who love the farmhouse-meets-functional vibe. I used an old galvanized stock tank that used to hold animal feed. These things are sturdy, already watertight, and honestly look pretty cool.
I placed mine on a couple of stacked concrete blocks and cut a hole in the bottom for drainage. You can route the drain to a gravel pit or greywater bucket if you’re fancy like that. I hooked up a basic outdoor spigot with a hose, and boom, instant rugged wash station.
Why it works:
- The tank is deep enough for soaking tools or even hand-washing small laundry items.
- It’s weather-resistant and won’t rot or rust easily.
- Looks great with outdoor décor and doesn’t scream “makeshift.”
Materials checklist:
- Galvanized stock tank (small size) – around $30–$60
- Outdoor faucet connector or hose sprayer – about $10
- Drain fitting and pipe – $5–$15
- Concrete blocks or wood frame stand – optional, $10–$20
You can sometimes score used stock tanks from farms or Facebook Marketplace for a fraction of retail. And if you want it mobile, try placing it on a rolling garden cart.
3. Collapsible Camping Sink Station
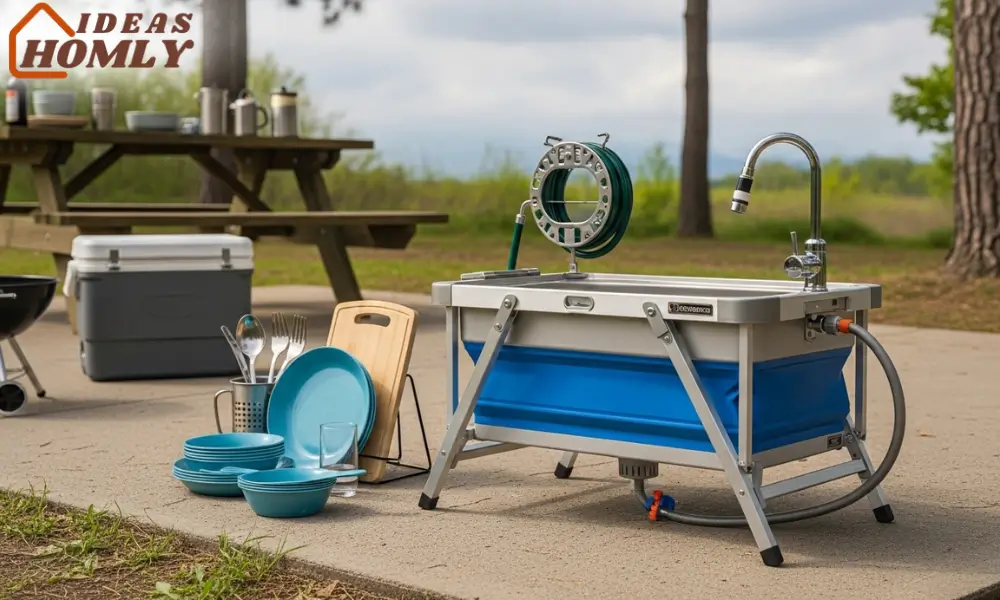
If you’re short on space or just want something you can store away when it’s not in use, let me tell you, camping sinks are underrated. I bought a collapsible camping sink table for under $50, and I’ve used it for everything from washing dishes at outdoor parties to potting plants.
Why I recommend it:
This setup is perfect for renters or small patios. It folds flat, sets up in seconds, and has compartments for storage and draining. Mine came with a faucet that connects directly to a garden hose, and it drains through a built-in tube. Super tidy.
What I loved most?
The convenience. I didn’t need to build anything, no drilling or screwing around. Just unfold, connect the hose, and boom water station ready.
Here’s a quick snapshot:
| Feature | Details |
|---|---|
| Setup time | Under 5 minutes |
| Space requirement | Minimal – folds for storage |
| Water supply | Hose or water container hookup |
| Drainage | Hose drain or direct ground drain |
| Average cost | $40–$60 |
And because the whole thing is plastic and aluminum, it’s rust-proof and lightweight. If you’re someone who wants something simple but efficient, this one’s a winner. I’ve used it at BBQs, beach days, and even camping trips.
4. Bucket + Tap Garden Sink
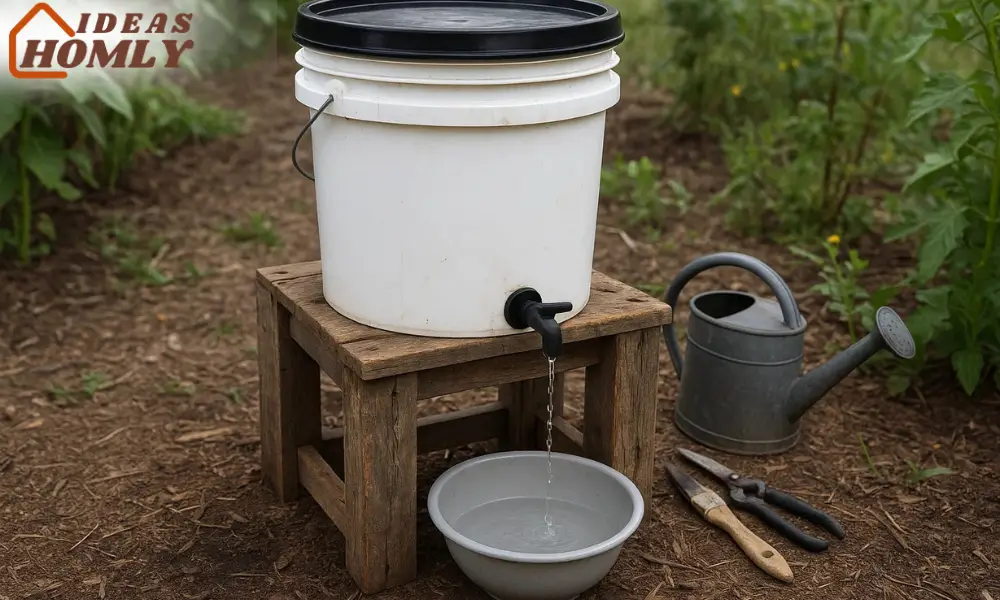
Now this one’s borderline genius in its simplicity. I call it the “bucket with benefits.” I made this setup using a 5-gallon bucket with a lid, a basic tap, and a little stand I built from scrap wood.
This is how it works: I drilled a hole near the bottom of the bucket, popped in a $3 tap from the hardware store, sealed it with a rubber washer and some silicone, and there it was my ultra-budget sink. I fill the bucket with water, and gravity does the rest.
Cost:
| Item | Approx. Price |
|---|---|
| 5-gallon bucket with lid | $5–$10 |
| Small plastic tap/spigot | $3–$5 |
| Wood stand or crate | Free–$10 |
| Basin or bowl underneath | Free–$5 |
| Total | $10–$25 max |
Why it’s great:
- Perfect for community gardens or remote spaces.
- Doesn’t need plumbing or a hose.
- Lightweight, portable, and totally DIY-friendly.
This setup saved me during a week of outdoor painting. I placed a bowl underneath to catch the water and reused it for cleaning brushes. Bonus? You can even upgrade the look by painting the bucket or using a metal stand to give it a vintage twist.
5. Cable-Spool Counter + Enamel Bowl
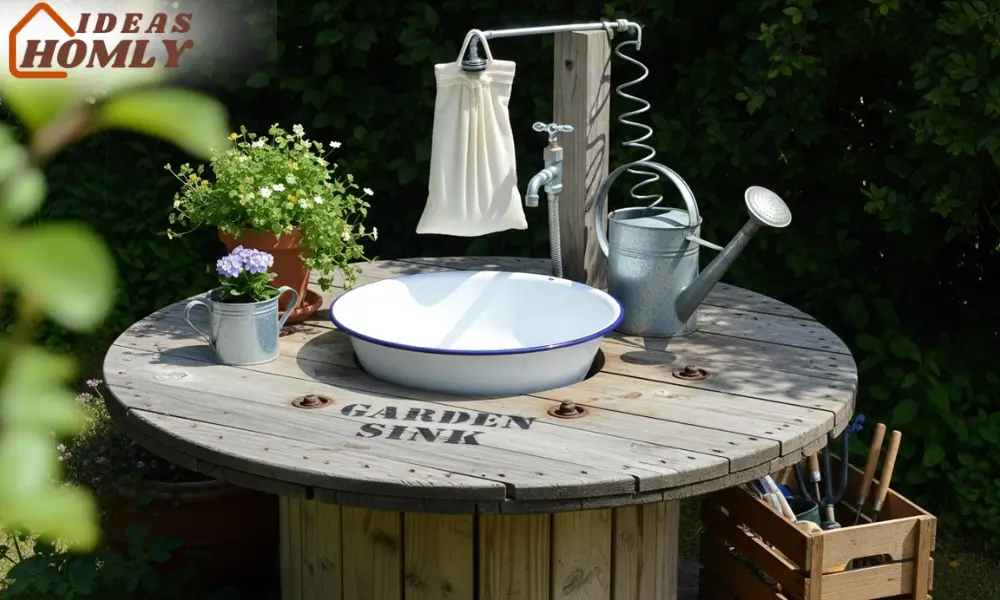
I’m a big fan of using what I already have. One day, I found a discarded wooden cable spool by a construction site. Instead of letting it go to waste, I turned it into one of the cutest outdoor sink stations I’ve ever made.
I flipped the spool on its side to use as a standing-height table. Then, I placed an old white enamel bowl in the center and cut a hole for drainage. To feed water in, I used a pressurized camping shower bag that I hung above the setup. It looked charming, almost like something out of an old farmhouse kitchen.
What makes this idea work so well?
- The cable spool gives you a solid and stable counter.
- The enamel bowl adds vintage charm and is deep enough for real washing.
- The round design lets you tuck it into corners or small garden spaces.
Cost Estimate:
| Item | Cost Range |
|---|---|
| Wooden cable spool (used) | Free–$20 |
| Enamel bowl (thrift/online) | $10–$15 |
| Drain pipe/fitting | $5–$10 |
| Optional shower bag | $15–$25 |
| Total Cost | $30–$60 |
Seal the spool with outdoor varnish to protect it from rain and rot. You can even stencil a label like “Garden Sink” to give it a Pinterest-worthy look (which is exactly what I did).
6. PVC Foot-Pump Sink for Events
Okay, this one might sound a little “mad scientist,” but trust me it works, and it’s a game-changer for outdoor events or off-grid living.
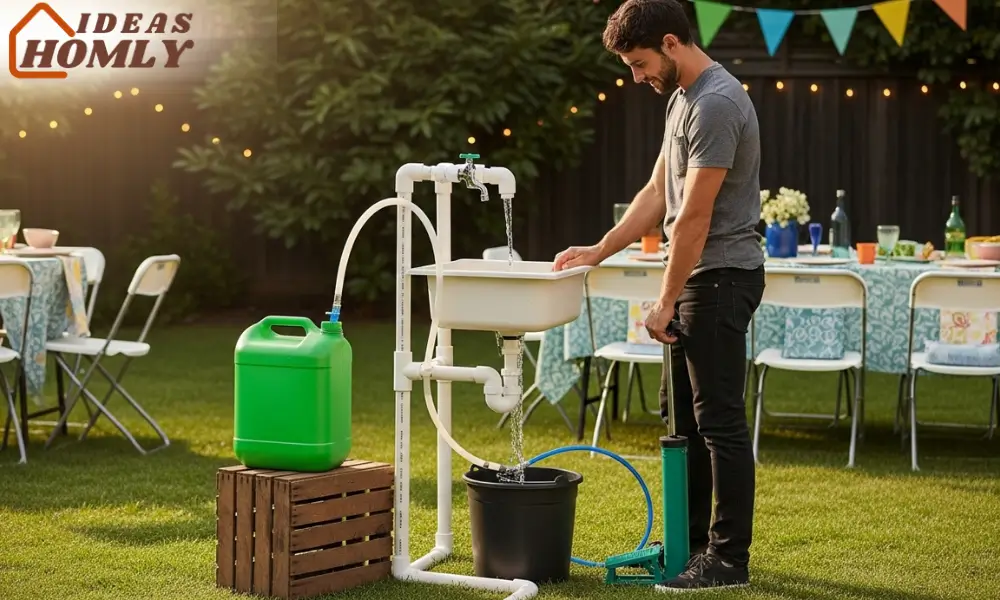
I built this foot-pump sink using a basic PVC frame, a camping-style foot pump, and two water containers: one for clean water and one for greywater. The best part? It’s hands-free and super hygienic.
Why I made it:
I needed a portable sink for a backyard birthday party, and I didn’t want people constantly touching the tap. So, I rigged this up with about $35 worth of parts and a few hours of trial and error.
What you’ll need:
| Item | Estimated Cost |
|---|---|
| PVC pipes and joints | $10–$15 |
| 1 clean water container | $5–$10 |
| 1 greywater container | $5–$10 |
| Foot pump (camping style) | $10–$15 |
| Faucet nozzle (optional) | $5 |
Total Cost: Around $30–$45
I built a square frame to hold the clean water tank on top, ran a hose to the foot pump on the ground, and used another hose for the water to come out the spout. Wastewater collects in a container below. It’s fully portable and great for handwashing stations at events.
What I love:
It’s hygienic, eco-friendly, and totally customizable. Plus, it gets people saying, “Wait… you built that?”
Drainage and Greywater Recycling Tips
Having an outdoor sink is awesome until you start thinking about where the water goes. Here’s what I do to keep things clean, safe, and eco-friendly.
1. Simple gravel soak pit
For garden or backyard use, I dig a shallow hole and fill it with gravel or stones. I run the drainpipe into it, and the greywater naturally filters into the soil. It works best for small, occasional use.
2. Greywater collection bin
Sometimes I attach a bucket under the sink to catch used water. I reuse that for watering non-edible plants or cleaning tools. Just don’t dump greywater that has strong detergents or grease in your garden.
3. Natural filtration barrel
One time, I got fancy and used a barrel with layers of sand, charcoal, and gravel. It filtered water from my outdoor sink before I reused it. It takes more effort, but it’s a cool DIY if you’re into sustainability.
If you’re using soaps, go for biodegradable ones. Regular dishwashing liquid can mess with your plants and soil over time.
Conclusion
Honestly, I didn’t realize how much I’d use an outdoor sink until I actually had one. From muddy gardening days to messy BBQ prep, it’s been one of the most helpful DIYs I’ve ever done and I’ve done a lot.
What I love most is that these ideas don’t break the bank. Most of them cost less than a dinner out, and they save time, mess, and a whole lot of indoor cleanups. Whether you’re a gardener, a host, or just someone who appreciates clean hands, you’ll thank yourself later.
So grab some scraps, get creative, and give one of these a try. And hey if you ever build one, send me a pic. I’d love to see how yours turns out.
FAQs
Not always. Many of the setups I shared (like the bucket tap sink or PVC foot-pump version) don’t require traditional plumbing. You can connect them to a garden hose or even use gravity-fed containers. It all depends on how permanent and fancy you want it.
Yes but with care. Only use biodegradable soap, and don’t dump greasy or chemical-heavy water. I usually direct greywater toward flower beds, shrubs, or compost piles not edible plants.
If you live where temperatures drop, definitely disconnect hoses and drain the system before winter hits. I usually store portable parts indoors and cover fixed setups with a tarp or waterproof cover.
Absolutely as long as your water supply is clean and your sink is regularly maintained. I always rinse out my sink after messy use and use fresh hose water or clean containers when prepping food.
Yes, and I do! Collecting rainwater in a barrel and using it for a foot-pump or bucket sink is a great eco-friendly choice. Just make sure your rainwater is stored safely and filtered if it’ll touch food.
Honestly? Most of the setups I mentioned took me between 30 minutes to 2 hours, depending on tools and materials. The hardest part is usually just gathering the parts. Once you have everything, it comes together quickly.

