


When I think about Halloween décor, nothing beats a hand-carved pumpkin. The beauty of DIY pumpkin carving is that you’re not just making decorations, you’re making memories.
Each cut, scrape, or stencil gives your pumpkin its own personality. In this article, I’ll share my favorite DIY Halloween pumpkin carving ideas that balance creativity with practicality.
These designs are doable for beginners but also flexible enough for seasoned carvers who want to experiment.
1. Negative-Space Portraits
One of the most satisfying techniques I’ve tried is carving with negative space. Instead of cutting clean holes, I remove just enough skin from the pumpkin so that light passes through in shades. It feels almost like sketching with a knife.
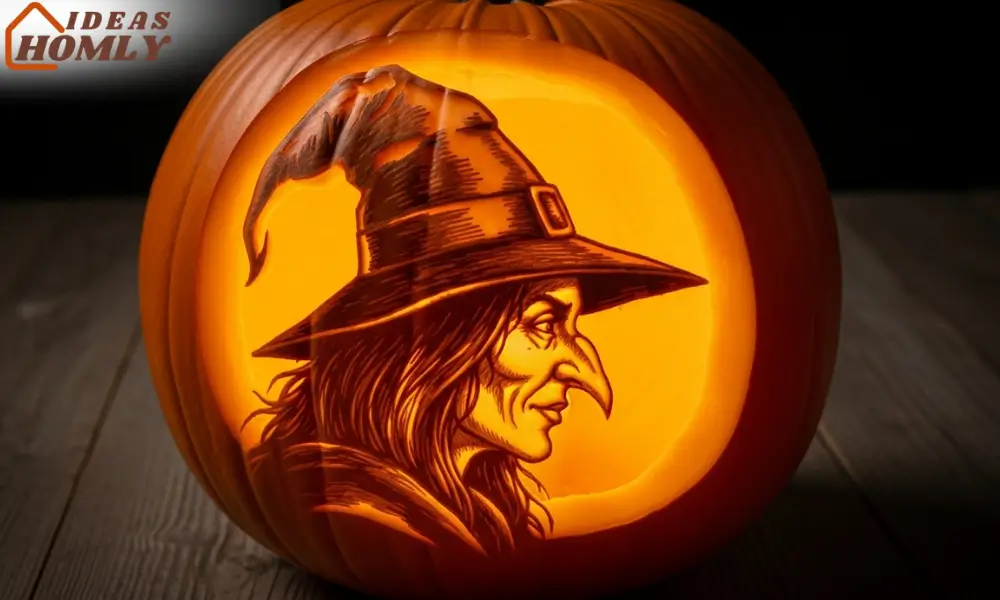
This method works perfectly for portraits or recognizable silhouettes. I once carved a spooky witch profile using this style, and the glowing shadow effect was way more realistic than a standard cutout.
It’s also a smart choice if you want your pumpkin to hold its structure longer because you’re not cutting out big chunks.

Pumpkin Carving Kit Tools Halloween, TRAALL Professional Heavy Duty Carving Set, Stainless Steel Sculpting Tool Carving Knife for Halloween Decoration Jack-O-Lanterns, Gift for Halloween(9PCS)
Pumpkin Carving Kit Tools Halloween, TRAALL Professional Heavy Duty Carving Set, Stainless Steel Sculpting Tool…
Tip: Tape a printed outline to your pumpkin and trace it with a poking tool before shaving off layers. A sharp linoleum cutter or craft knife is ideal here.
2. Etched Lace Veil
For a more delicate look, I like experimenting with lace-inspired patterns. I call it the etched lace veil technique because the design looks like fabric draped over the pumpkin when it lights up.
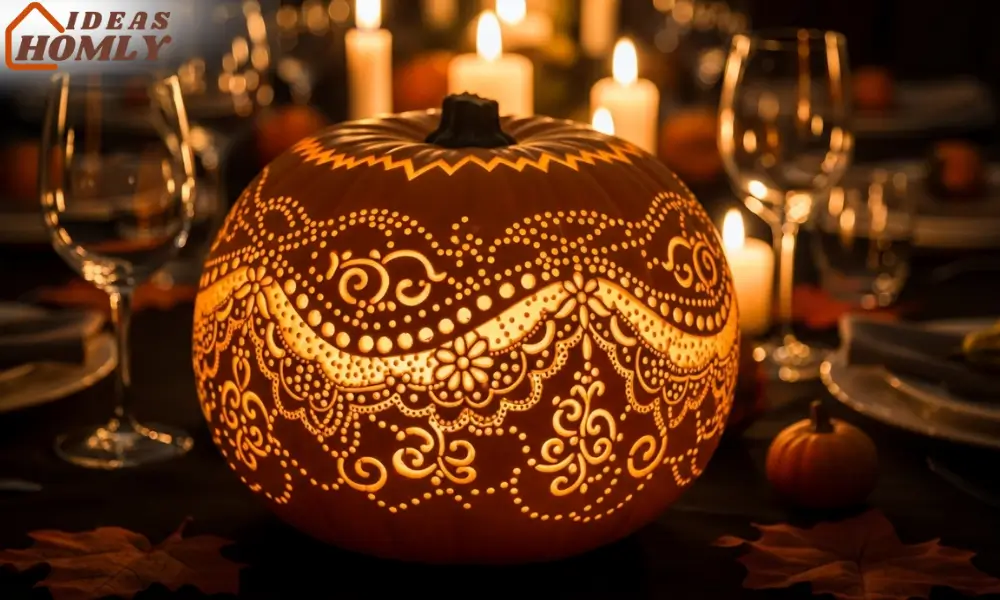
The trick is to carve shallow grooves in looping patterns instead of cutting all the way through. Think floral swirls, tiny arcs, and dotted lines. A Dremel or clay-sculpting tool works wonders for this kind of fine detail.
I once made a lace-pattern pumpkin for a Halloween dinner table, and it turned into the centerpiece of the night. Everyone kept asking if I’d bought it ready-made, which was a pretty good confidence boost.
3. Cookie-Cutter Stamping
Sometimes I want a quick win, and cookie-cutter stamping is my go-to trick. Instead of freehand carving, I use metal cookie cutters and a rubber mallet to punch shapes directly into the pumpkin.
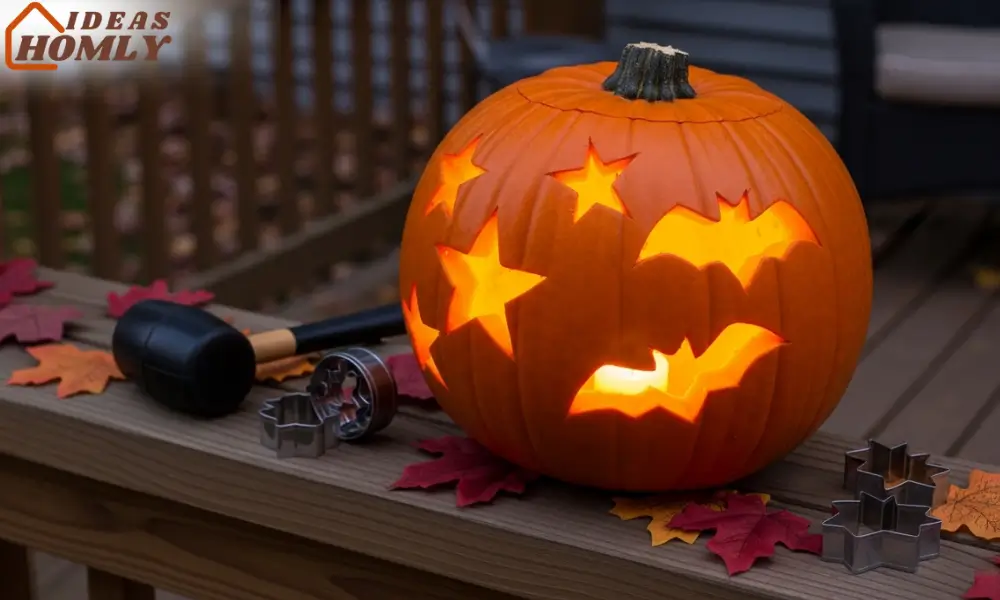
Stars, bats, and cats look great with this method. The best part is that the shapes are uniform, so even if you’re carving a few pumpkins for a display, they’ll look neat and consistent.
I’ve even mixed in different sizes of the same shape to create patterns that looked intentional.
One important note: make sure your pumpkin is sturdy enough. Softer pumpkins can crack under pressure, so I usually pick a medium-sized one with a thick wall.
4. Seed-Tooth Inlays
If you’ve ever scooped out pumpkin seeds, you know how slippery they are. But I’ve found a way to make them part of the design. With seed-tooth inlays, I carve a wide mouth and then glue or toothpick the seeds along the edge like teeth.

KEMINO Pumpkin Carving Kit 10 PCS Halloween Professional Pumpkin Carving Tools with Carrying Bag Stainless Steel Pumpkin Carving Set for Halloween
KEMINO Pumpkin Carving Kit 10 PCS Halloween Professional Pumpkin Carving Tools with Carrying Bag Stainless…
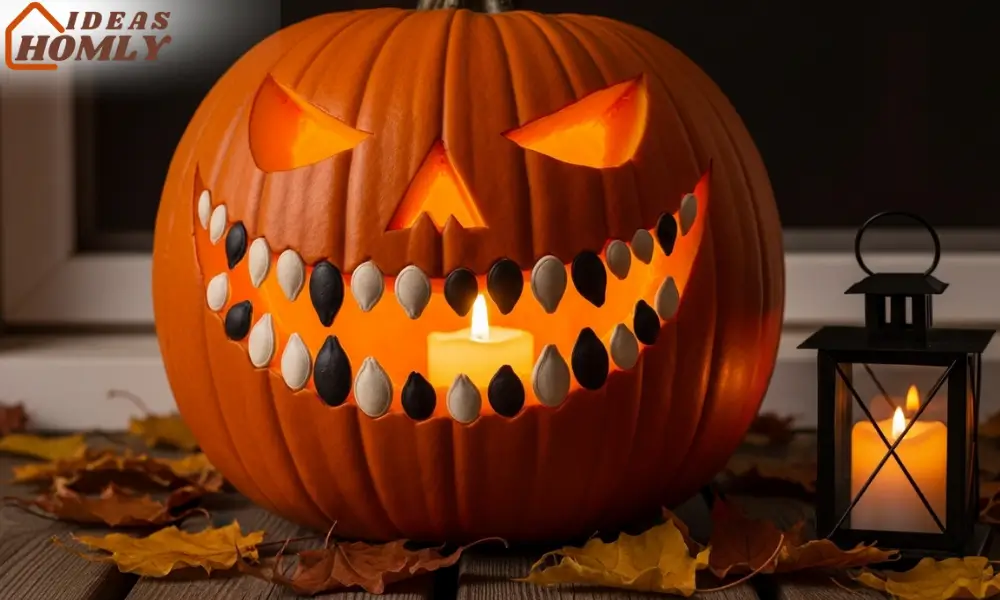
It’s a clever way to reuse what would normally get tossed. Plus, it creates a creepy grin without needing much artistic skill.
I once lined a pumpkin’s mouth with black-painted seeds, and it looked like a monster straight out of a comic book.
To make the look last, I dry the seeds for a few hours before sticking them on. A dab of clear craft glue holds them in place for the night.
5. Layered Panels Pumpkin
Sometimes one carving surface isn’t enough. With the layered panels technique, I cut out sections on different sides of the pumpkin, creating multiple “windows” that each tell part of a story.
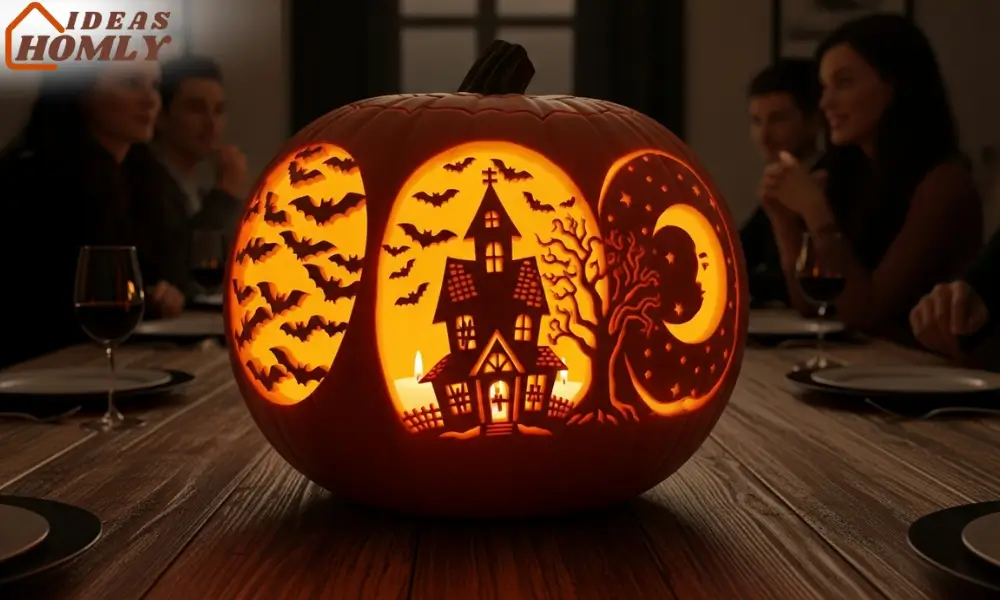
For example, I once carved bats on one panel, a haunted house on the second, and a rising moon on the third. When lit, the whole thing felt like a rotating scene.
This method works especially well if you want to set the pumpkin in the center of a table, where guests can walk around and see something different from every angle. It does take a little more patience, but the payoff is worth it.
To keep it sturdy, I avoid cutting out large sections all at once. Instead, I start small and expand the openings gradually. That way, the pumpkin doesn’t collapse under its own weight.
6. Two-Tone Gourds
If you’ve ever picked up a pumpkin that has a streak of green or a lighter patch, don’t ignore it. Two-tone carving lets you use the natural color differences to create contrast without paint.
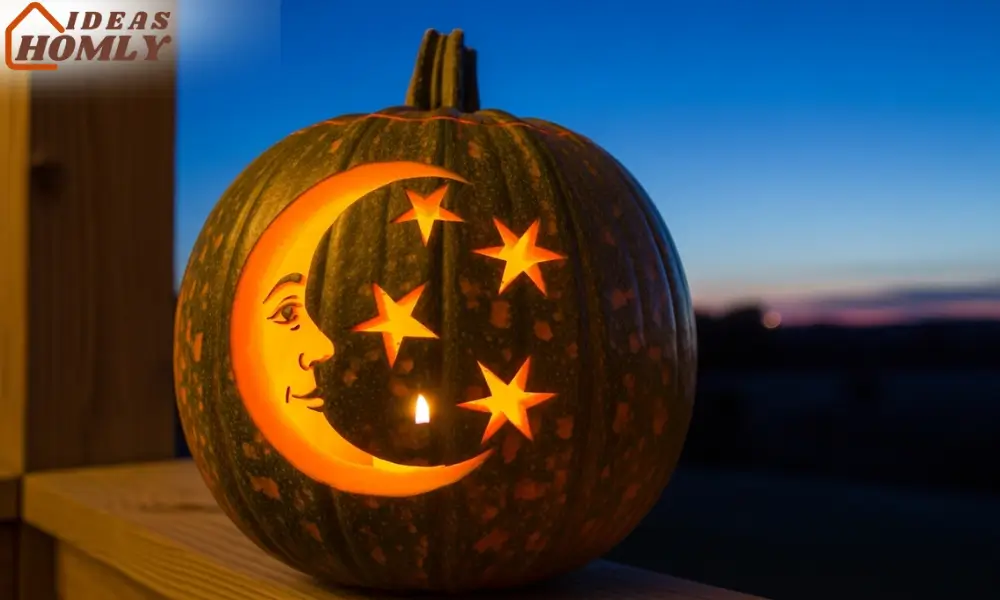
I once carved a crescent moon where the darker skin stayed intact, while the lighter part glowed through beautifully.

CHRYZTAL Pumpkin Carving Kit Tools Halloween, 13PCS Professional Heavy Duty Carving Set, Stainless Steel Double-side Sculpting Tool Carving Kit for Halloween Decoration Jack-O-Lanterns
CHRYZTAL Pumpkin Carving Kit Tools Halloween, 13PCS Professional Heavy Duty Carving Set, Stainless Steel Double-side…
For this trick, I scrape gently at the lighter areas, letting them shine brighter when a candle is inside. The darker skin frames the design, giving it a natural shadow effect. It almost feels like working with built-in highlights.
This style is perfect if you’re aiming for something subtle yet striking. It’s also great for outdoor displays where daylight can show off the natural color contrast even before sunset.
7. Drill-Bit Mosaic Pumpkin
The first time I tried a drill on a pumpkin, I felt like I was cheating, but honestly, it’s genius. A drill-bit mosaic pumpkin lets you create perfect, round holes in seconds. You can arrange them in starburst patterns, constellations, or even geometric grids.
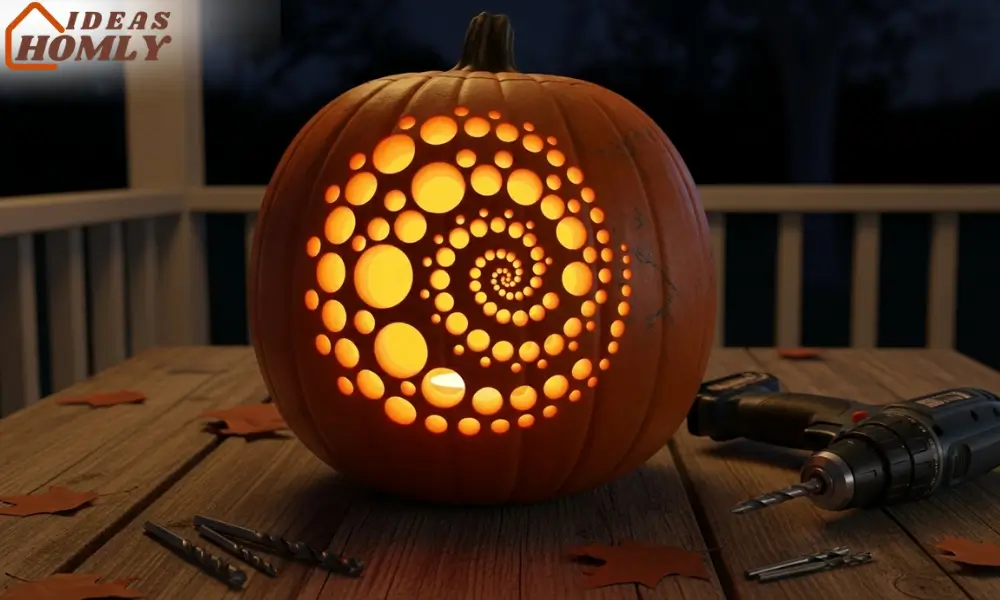
One year, I made a pumpkin patterned with a spiral of holes that looked like glowing polka dots. Neighbors thought it was a store-bought lantern. The best part? It took less than 15 minutes.
You can experiment with different drill-bit sizes to make the pattern more dynamic. Just remember to keep the spacing even so the design looks intentional.
8. Tin-Foil Stencils
Sometimes freehand carving is intimidating, so I rely on tin-foil stencils. The shiny surface molds easily against a pumpkin’s curves, making it much easier to trace.
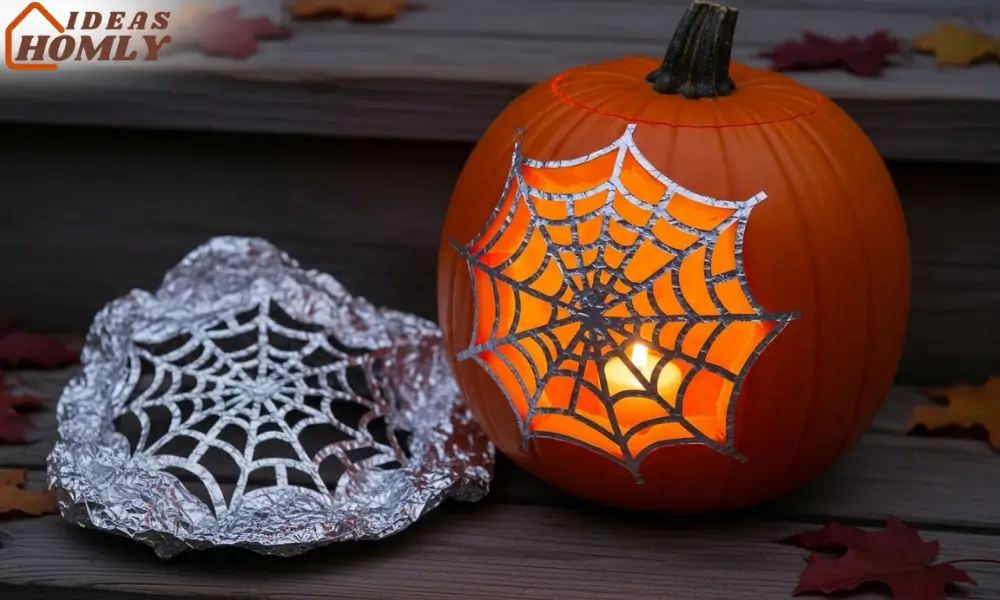
I’ll draw my design on the foil, tape it on, and then poke tiny guide holes through it into the skin.
This method works better than paper stencils because foil doesn’t tear or wrinkle as much. I’ve used it for detailed shapes like skulls and spider webs, where accuracy mattered.
Once the holes are traced, I just connect the dots with a carving knife. It feels a bit like following a puzzle, and the results are far cleaner than if I had tried to freehand everything.
9. Vellum Color Gel Windows
I love playing with light, and one of my favorite tricks is adding vellum or color gel inserts behind carved shapes. Instead of the usual orange glow, the pumpkin lights up in red, green, or even purple. It instantly looks like stained glass.
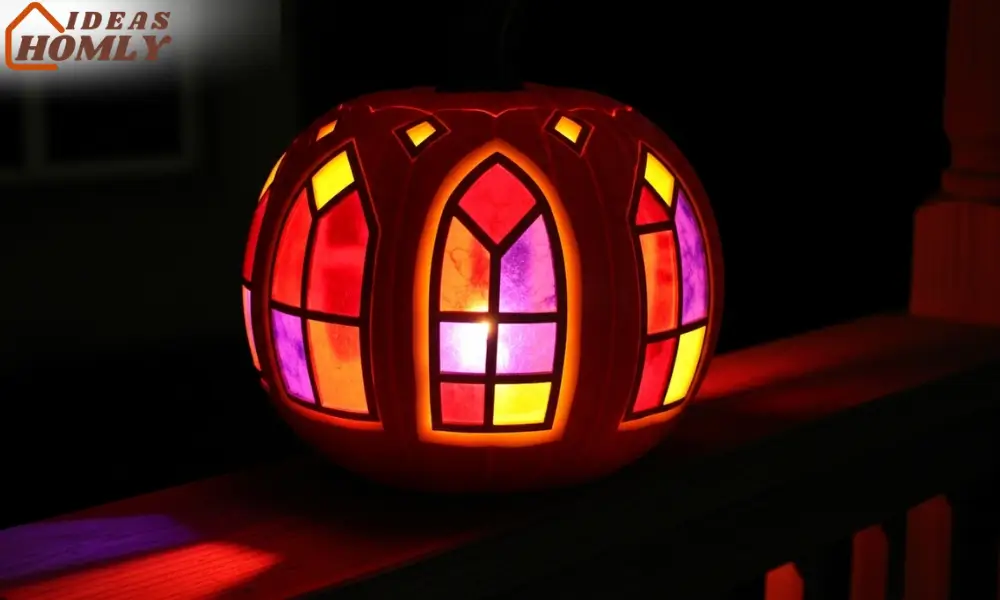
To pull this off, I carve out large openings like windows or shapes and then tape pieces of vellum or thin craft gels inside.

Mikim Halloween Pumpkin Carving Kit with Storage Box, 7 Pieces
Mikim Halloween Pumpkin Carving Kit with Storage Box, 7 Pieces
The material diffuses the candlelight, giving it a soft, colorful glow. I once made a jack-o’-lantern with fiery red eyes, and kids swore it was alive.
This idea works especially well for porch pumpkins, since the colored light carries across the yard. If you want to get creative, you can even layer two colors for gradient effects.
10. Carve-Then-Paint Shadows
Sometimes, carving alone doesn’t create enough depth. That’s when I reach for paint. With the carve-then-paint technique, I cut the usual shapes but also paint the inside edges or surrounding skin. Black paint makes eyes look hollow, while metallics give a spooky shimmer.
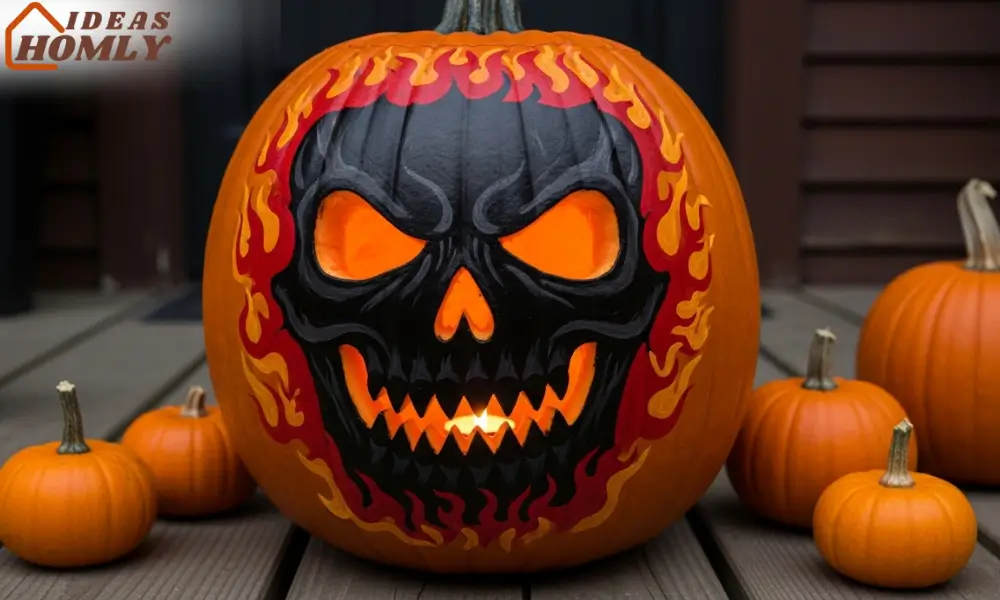
One year, I painted flames around a carved skull, and it turned into the boldest pumpkin on the block. The paint helps the design stand out during the day, while the candle brings it to life at night.
Acrylic paint works best because it dries fast and doesn’t peel easily. Just make sure the surface is clean and dry before painting, or the colors might slide off.
11. Floating Features Pumpkin
For something truly eerie, I like trying the floating features trick. Instead of carving eyes and a mouth directly into the pumpkin, I cut them out separately and then reattach them using toothpicks or skewers. The gaps between the features glow, making it look like the face is floating.
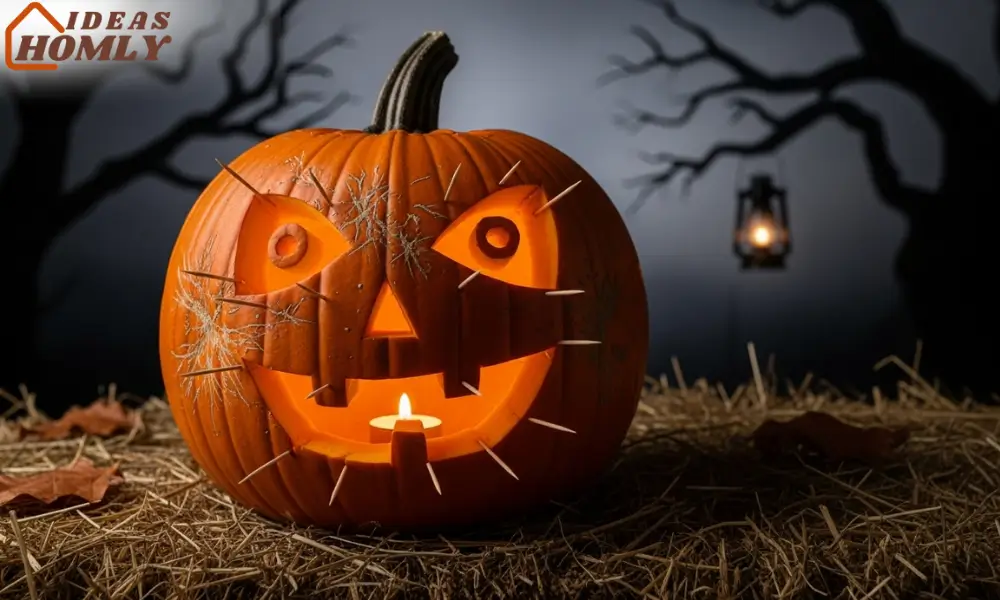
This method gives you freedom to move the pieces around, almost like a puppet. I once shifted the eyes far apart, and it gave the pumpkin a goofy expression that had everyone laughing.
The key is balance, too many floating parts and the structure weakens. But with just a few, you can create an effect that stands out from every other pumpkin on the block.
Tools Needed for DIY Pumpkin Carving
Having the right tools makes the carving process smoother. Here are some I keep in my kit:
| Tool | Why I Use It |
|---|---|
| Serrated carving knife | Best for clean, controlled cuts |
| Linoleum cutter / X-Acto knife | Perfect for etching fine details |
| Drill with assorted bits | Quick and easy hole patterns |
| Cookie cutters + mallet | Uniform stamped shapes |
| Clay-sculpting tools | Useful for scraping layers |
| Tape, foil, or stencils | Helps with precise outlines |
| Acrylic paint & brushes | Adds color and shadows |
I also keep extra candles and battery-powered LED lights handy. They last longer than real tea lights, and I don’t have to worry about relighting them all night.

CHRYZTAL Pumpkin Carving Kit Tools Halloween, Professional Heavy Duty Carving Set, Stainless Steel Double-side Sculpting Tool Carving Kit for Halloween Decoration Jack-O-Lanterns, Gift for Halloween
CHRYZTAL Pumpkin Carving Kit Tools Halloween, Professional Heavy Duty Carving Set, Stainless Steel Double-side Sculpting…
Conclusion
Carving pumpkins doesn’t have to be stressful or repetitive. With these DIY pumpkin carving ideas, you can create everything from glowing portraits to floating faces without needing professional skills.
What I enjoy most is how each design feels personal, like a little piece of art sitting on the porch.
Whether you go for negative-space portraits or simple cookie-cutter shapes, the important part is having fun and trying something new. Halloween only comes once a year, and these pumpkins make the night feel extra special.
FAQs
A carved pumpkin usually lasts three to five days before it starts to shrivel. Warmer weather can shorten that time. I often coat the cut edges with petroleum jelly or a light spray of diluted bleach to slow down the process.
Yes, I’ve carved pumpkins using only a kitchen knife and spoon. But dedicated tools like serrated saws, linoleum cutters, or drills make the process faster and safer. If you’re planning multiple designs, investing in a carving kit is worth it.
Absolutely. Battery-operated LED tea lights are my favorite because they’re safe and long-lasting. I’ve also tried glow sticks and fairy lights for different effects. They’re especially useful if kids or pets are around.
Bugs love sweet, damp surfaces, so I keep my pumpkins on elevated stands and use battery lights instead of real candles. A light mist of vinegar on the inside can also help keep insects away without harming the design.
Yes, and it’s surprisingly fun. I’ve carved butternut squash, melons, and even turnips. Each one has a different texture and glow, which adds variety to a display. Turnips, for example, were actually the original jack-o’-lanterns in Ireland.

Greatever Halloween Pumpkin Carving Kit,Professional and Heavy Duty Stainless Steel Tools,Pumpkin Carving Set with12 Pumpkin Stencils Carrying Case(7pcs)
Greatever Halloween Pumpkin Carving Kit,Professional and Heavy Duty Stainless Steel Tools,Pumpkin Carving Set with12 Pumpkin…
Cookie-cutter stamping is the easiest by far. It’s safe, fast, and creates clean shapes. I usually let kids pick their own cutters, and they love seeing the patterns light up without needing advanced carving skills.
Recommended for You

Luditek Pumpkin Carving Kit, 11 Pieces Halloween Jack-O-Lanterns Professional Stainless Steel Pumpkin Carving Tools, Pumpkin Cutting Supplies Tool Kit Halloween Gifts for Adults Kids
Luditek Pumpkin Carving Kit, 11 Pieces Halloween Jack-O-Lanterns Professional Stainless Steel Pumpkin Carving Tools, Pumpkin…

Elmchee Halloween Pumpkin Carving Tools,Jack-O-Lanterns 13 Piece Professional pumpkin cutting carving supplies tools Kit stainless steel lengthening and thickening with Handbag
Elmchee Halloween Pumpkin Carving Tools,Jack-O-Lanterns 13 Piece Professional pumpkin cutting carving supplies tools Kit stainless…

Yixiang Halloween Pumpkin Carving Kit, 5Pcs Heavy Duty Stainless Steel Pumpkin Carving Tools Set
Yixiang Halloween Pumpkin Carving Kit, 5Pcs Heavy Duty Stainless Steel Pumpkin Carving Tools Set
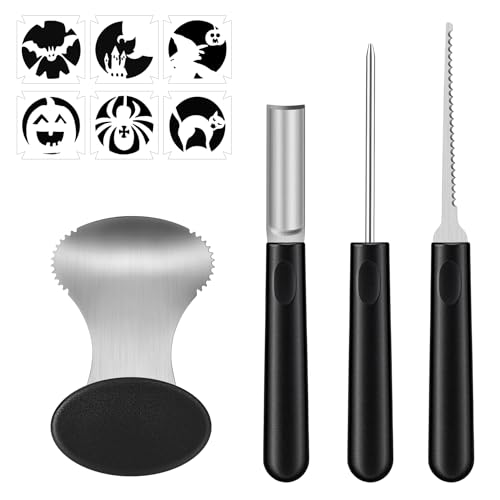
Antner Professional Pumpkin Carving Kit 4PCS Heavy-Duty Stainless Steel Pumpkin Carving Tools Set with 6PCS Self-Adhesive Stencils for Easy Creating Halloween Jack-O-Lantern Decorations
Antner Professional Pumpkin Carving Kit 4PCS Heavy-Duty Stainless Steel Pumpkin Carving Tools Set with 6PCS…

Antner Professional Pumpkin Carving Kit 10 PCS Premium Stainless Steel Pumpkin Carving Tools for Easily Carve Sculpt Halloween Jack-O-Lanterns Decorations
Antner Professional Pumpkin Carving Kit 10 PCS Premium Stainless Steel Pumpkin Carving Tools for Easily…
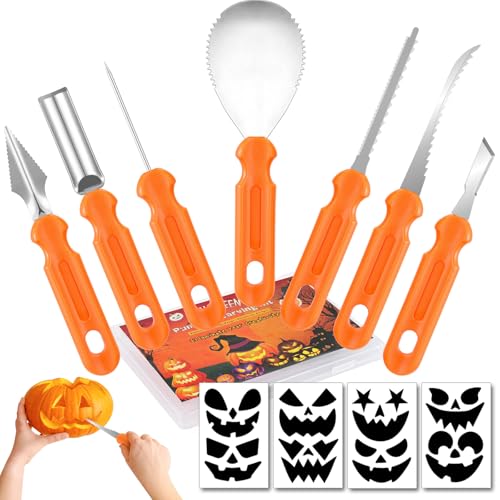
Pumpkin Carving Kit - 7 Piece Professional Stainless Steel Carving Tools with 8 Stencils and Storage Case, Heavy Duty Halloween Jack-O-Lantern Decorations Sculpting Knife Set for Adults and Kids
Pumpkin Carving Kit - 7 Piece Professional Stainless Steel Carving Tools with 8 Stencils and…

BQLZR Carving Clay for Clay Detailing Pumpkin Carving/Detailing Tools,Solid Lightweight Aluminum Handle Mini Ribbon Sculpting Tool Set Pack of 6
BQLZR Carving Clay for Clay Detailing Pumpkin Carving/Detailing Tools,Solid Lightweight Aluminum Handle Mini Ribbon Sculpting…
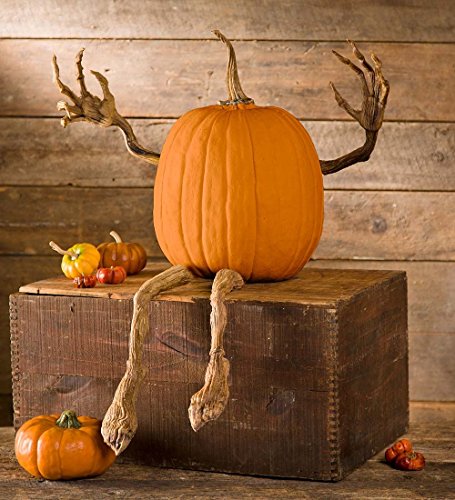
Plow & Hearth Set of 4 Bendable Pumpkin Arms and Legs | Twisting Vines for Halloween Pumpkin Carving DIY Crafts for Kids | Includes 2 arms and 2 Legs | Outdoor & Indoor Halloween Decorations
Plow & Hearth Set of 4 Bendable Pumpkin Arms and Legs | Twisting Vines for…

Pumpkin Masters America's Favorite Halloween Pumpkin Carving Kits Contest Winners 8 Award- Winning Patterns Booklet
Pumpkin Masters America's Favorite Halloween Pumpkin Carving Kits Contest Winners 8 Award- Winning Patterns Booklet

JOYIN 12 Pcs Halloween Pumpkin Carving Kit, Professional Carving Set with Handbag,12 Stencils, 4 LED Lights for DIY Jack O Lantern, Stainless Steel Double-Sided Sculpting Tools Decoration Supplies
JOYIN 12 Pcs Halloween Pumpkin Carving Kit, Professional Carving Set with Handbag,12 Stencils, 4 LED…

QHZHANG 3 PCS Halloween Pumpkin Carving Kit Stainless Steel Tools
QHZHANG 3 PCS Halloween Pumpkin Carving Kit Stainless Steel Tools

Pumpkin Masters Pumpkin Carving Kit, Halloween Carving Kit, Includes 3 Saws, 1 Scoop, 1 Poker, 1 Pattern book with 10 Patterns
Pumpkin Masters Pumpkin Carving Kit, Halloween Carving Kit, Includes 3 Saws, 1 Scoop, 1 Poker,…

Pumpkin Masters, Master Collection Pumpkin Carving Kit, 13 Piece, Stainless Steel Tools, 8 Pumpkin Carving Patterns Included
Pumpkin Masters, Master Collection Pumpkin Carving Kit, 13 Piece, Stainless Steel Tools, 8 Pumpkin Carving…

AUGSUN 21pcs Halloween Pumpkin Carving Kit with Stencils for Adults
AUGSUN 21pcs Halloween Pumpkin Carving Kit with Stencils for Adults