
You can easily refresh an outdated hearth without spending a fortune on a total demolition. I find that most old fireplaces just need a bit of creative love and some fresh paint to look brand new.
Most homeowners ignore their hearth because they think a remodel requires professional masonry skills or a massive budget. I noticed that simple changes like a new mantel or painted brick can completely change the vibe of your home.
I suggest looking at your current setup as a blank canvas rather than a permanent eyesore that you have to live with. You can spend a single weekend working on these projects and see a huge difference in your interior design.
The following suggestions focus on practical methods that real people use to fix up their homes every day. I picked these because they are easy to execute and provide a high level of visual impact for minimal effort.
High Impact Hearth Renovations For Every Budget
I believe that a successful Fireplace makeover starts with a clear plan and a solid understanding of your current materials. You need to decide if you want a subtle refresh or a bold statement piece before you start buying supplies.
Painting your old brick is often the fastest way to brighten up a dark room that feels stuck in the past. I always recommend using high quality heat resistant paint to ensure your hard work lasts for many years to come.
Changing the hardware or the screen can also provide a sophisticated look without requiring any heavy lifting or messy construction. It is these small details that make a professional difference in how your fireplace feels to your guests.
I think you will find that most of these ideas are very approachable even if you are not a seasoned builder. You just need a little patience and a few basic tools to get the professional results you are looking for.
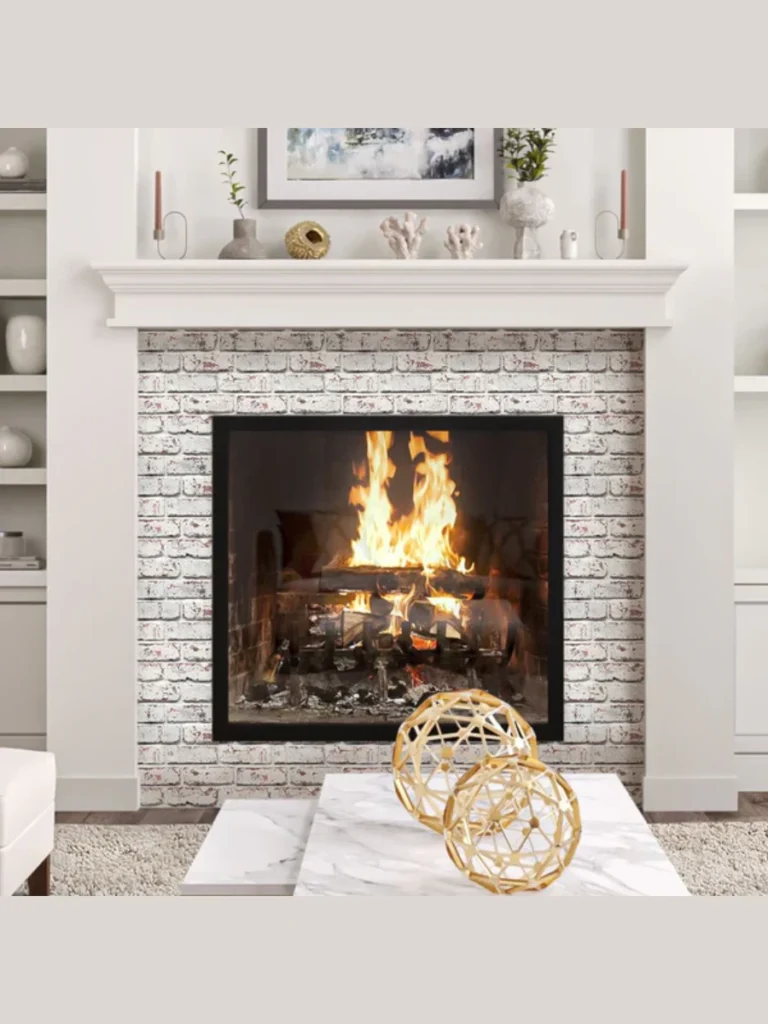
1. Professional Painted Brick Refresh
Painting your red or brown brick a solid white or charcoal gray is a classic move for a reason. I find that this simple change makes the entire room feel larger and much more aligned with modern style trends.
You must clean the brick thoroughly with a wire brush and vacuum before you even think about opening a paint can. Dirt and soot will prevent the primer from sticking which leads to peeling and a very messy looking finish later.
I recommend using a thick nap roller to get the paint into all the deep grooves and pores of the masonry. It might take two or three coats to get full coverage but the clean and uniform look is worth the extra time.
Choose a flat or eggshell finish to avoid a plastic look that can sometimes happen with high gloss paints on brick. This creates a sophisticated backdrop for your seasonal decor and makes your favorite art pieces pop against the wall.
2. German Smear Brick Technique
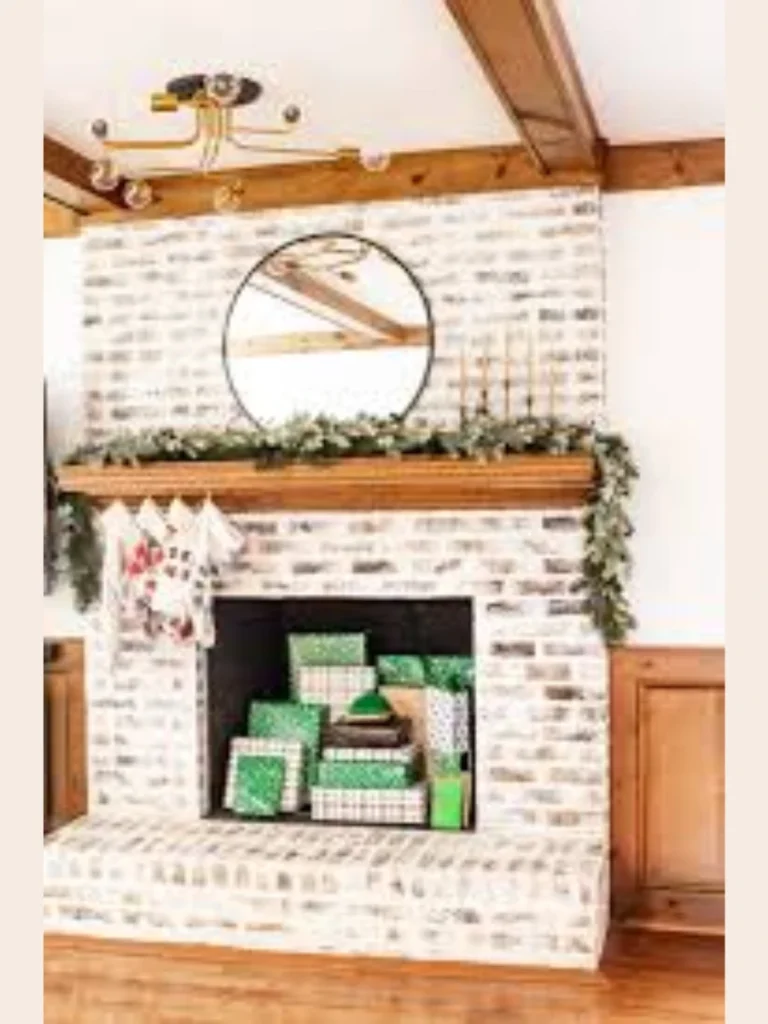
The German smear technique involves applying wet mortar over the brick to create a rustic and weathered European look. I love how this method allows some of the natural brick color to peek through for added depth.
You can control how much brick stays visible by adjusting the thickness of the mortar as you spread it across the surface. It is a messy process but the result looks like an expensive antique wall found in a historic cottage.
I suggest practicing on a small hidden area or a spare brick before you tackle the main focal point of your room. Once the mortar dries it is very permanent so you want to be sure you like the texture and coverage.
This makeover is perfect for hiding mismatched bricks or repairs that were done poorly by previous owners of the house. It provides a heavy and sturdy feel that adds a lot of architectural character to a boring living room.
3. Natural Wood Beam Mantel Swap
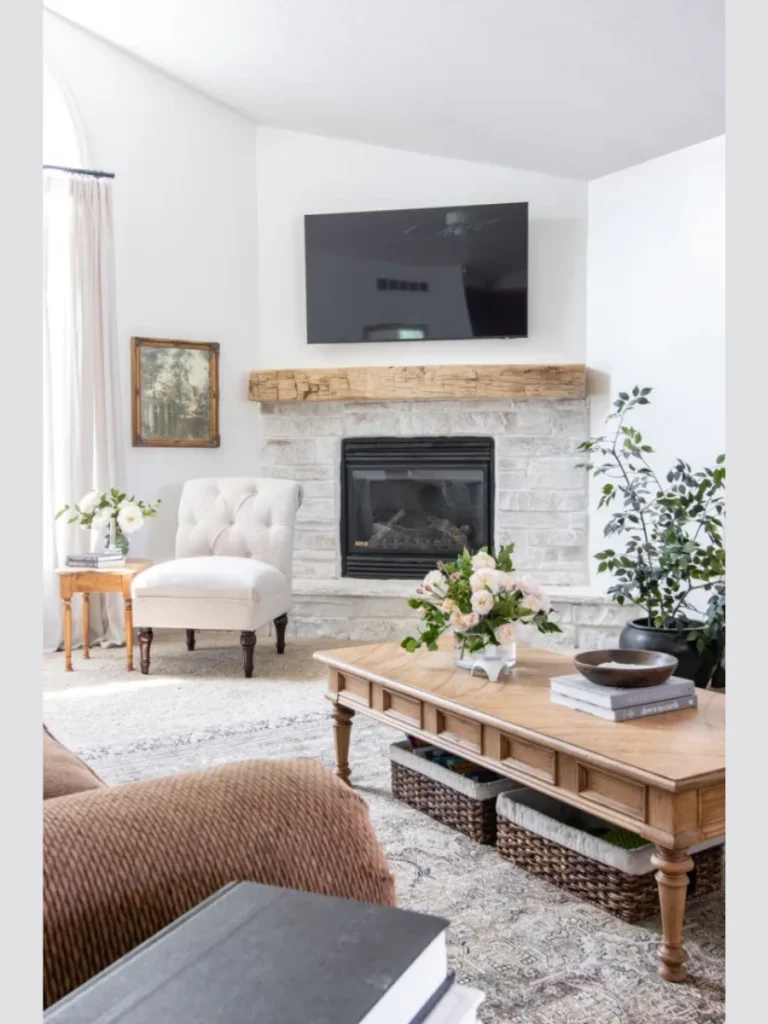
Swapping out a thin or dated mantel for a thick reclaimed wood beam adds instant warmth and a sense of history. I find that a chunky piece of timber provides a sturdy shelf for your heavy mirrors or large framed photos.
You can find beautiful old beams at local architectural salvage yards or even buy pre-finished faux wood beams that are much lighter. I prefer the real thing because the cracks and knots tell a story that mass produced items can’t replicate.
Installation usually requires long lag bolts and a bit of heavy lifting to ensure the mantel stays level and secure. I recommend having a friend help you hold it in place while you drive the screws into the wall studs.
Staining the wood a dark walnut or keeping it light and natural allows you to coordinate with your existing hardwood floors. It bridges the gap between the hard stone fireplace and the soft furniture in the rest of your room.
4. Modern Peel And Stick Tile Overlay
Peel and stick tiles are a great way to cover up an ugly or cracked tile hearth without using any messy thin-set. I noticed that modern versions of these tiles look incredibly realistic and can handle the light heat near a fire.
You simply peel off the backing and press them firmly over your existing ceramic or stone tiles for an instant upgrade. This is a perfect solution for renters or anyone who wants a fresh look without a permanent commitment.
I suggest picking a bold pattern like a blue Moroccan design or a classic black and white marble look to add interest. It takes less than an hour to complete and you don’t have to wait for any grout to dry.
Make sure the old surface is completely degreased and dry so the adhesive can bond properly to the old tile. It is a cheap and effective way to hide years of wear and tear on a busy fireplace floor area.
5. Shiplap Wall Surround Transformation

Adding shiplap planks from the mantel to the ceiling creates a clean and farmhouse inspired look that is very popular. I think this vertical element helps to draw the eye upward and makes your ceiling feel much higher than it is.
You can install the boards horizontally for a classic look or vertically if you want a more modern and edgy vibe. Painting the wood the same color as your walls keeps the look subtle and very professional.
I recommend using a nickel gap spacing between the boards to give the wall that authentic layered wood appearance. It is an easy DIY project that only requires a miter saw and a simple brad nailer to finish.
This makeover hides ugly drywall or old wallpaper and provides a beautiful texture that looks great in any lighting. It is a durable solution that stands up well to the heat and adds a bit of insulation to your wall.
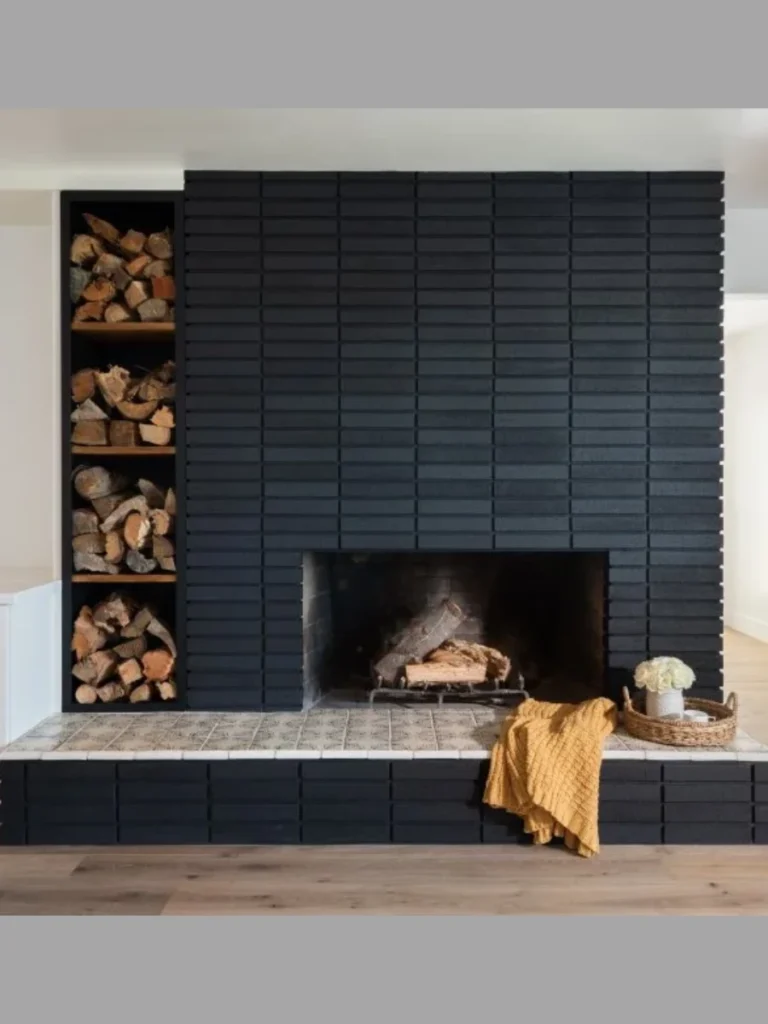
6. Black Matte Firebox Spray Paint
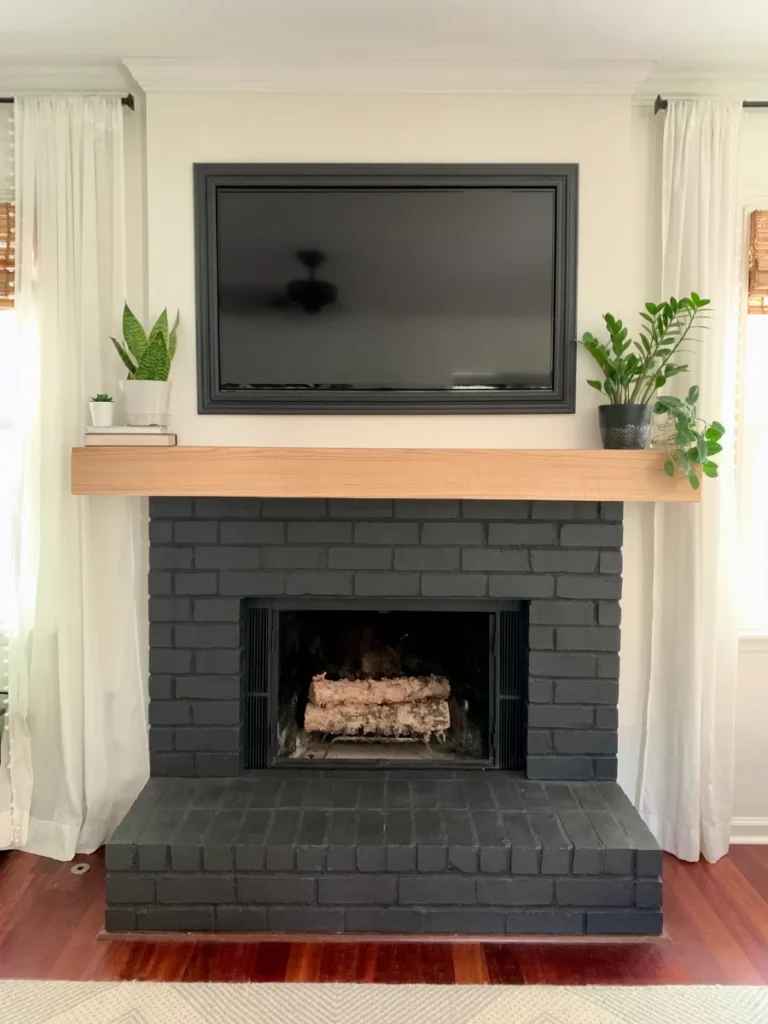
Painting the inside of your firebox with high heat black spray paint makes the whole unit look brand new and clean. I find that this covers up years of ugly soot stains and yellowing that regular cleaning can’t ever fix.
You must use paint specifically rated for high temperatures or it will peel and release dangerous fumes when you light a fire. I suggest taping off the surrounding area carefully to prevent any black overspray from landing on your carpet.
The dark background makes the orange flames of your fire stand out much more vividly during a cozy winter night. It creates a deep and clean look that makes even an old gas log set look like a high end installation.
It is one of the cheapest makeovers you can do but it provides one of the biggest changes in overall cleanliness. I always do this first before I move on to the more decorative parts of a fireplace renovation.
7. Concrete Overlay For A Modern Look
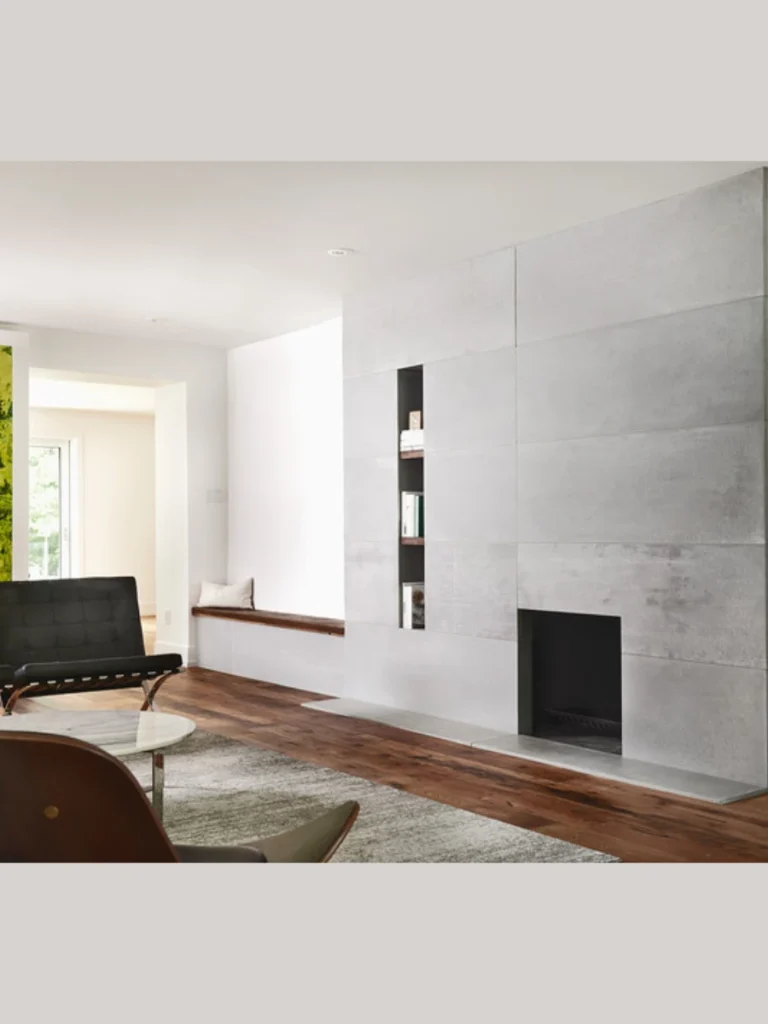
Applying a thin layer of concrete overlay over your old stone or brick creates a smooth and industrial finish. I find that this method hides outdated textures and provides a seamless surface that looks like a custom slab.
You can mix the concrete to a spreadable consistency and apply it with a flat trowel to create a handcrafted feel. It is a great way to get the look of expensive architectural concrete without the massive weight of a solid block.
I suggest using a concrete sealer once the material cures to protect it from ash stains and drink spills. This ensures that the light gray color stays uniform and professional even with frequent use during the winter months.
This makeover works exceptionally well in homes with a minimalist or contemporary design style that needs a strong focal point. It provides a neutral and sturdy backdrop that complements almost any color of furniture or wall paint.
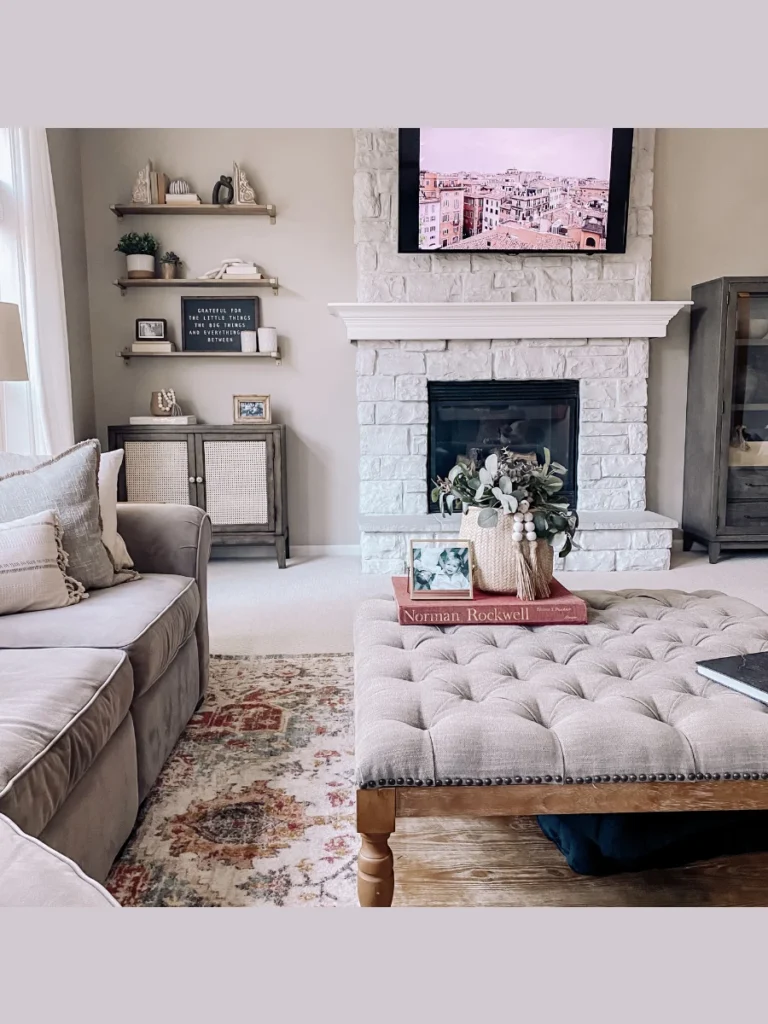
8. Floor To Ceiling Stone Veneer
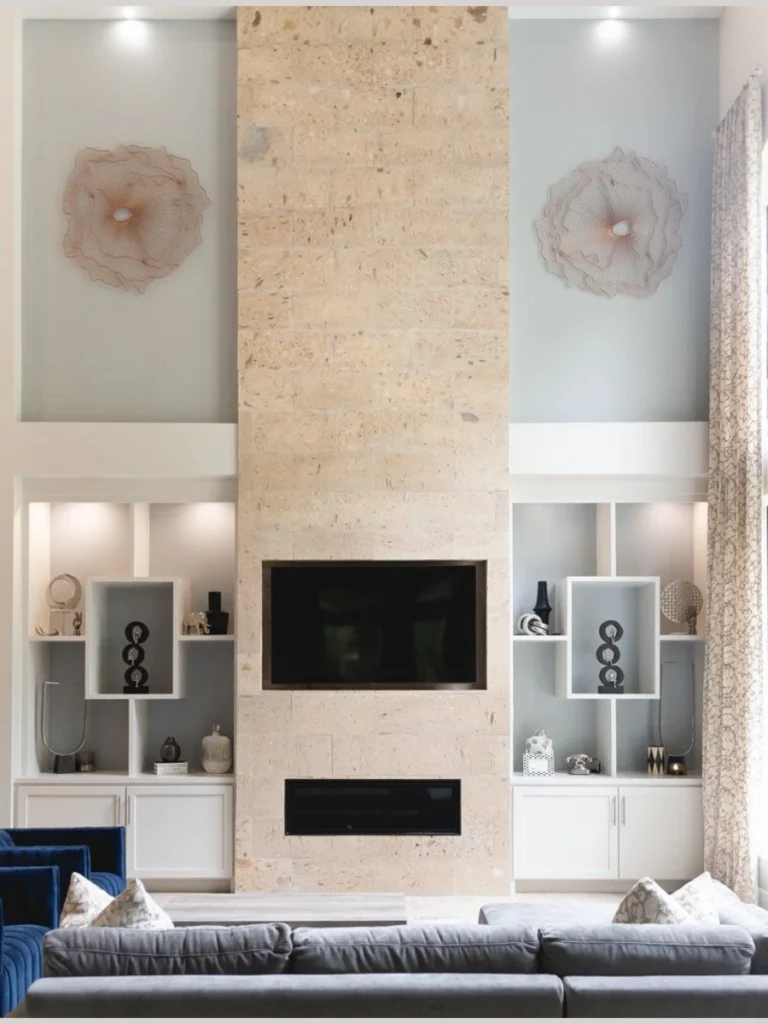
Installing stone veneer panels from the floor to the ceiling gives your fireplace a grand and expensive appearance. I noticed that these lightweight panels are much easier to handle than real heavy stones but look just as authentic.
You can choose from various styles like stacked slate or smooth river rock to match your specific interior design goals. Most of these systems use a simple interlocking design that makes the installation process much faster for a DIYer.
I recommend starting from the bottom and working your way up to ensure the rows stay perfectly level and straight. Using a strong construction adhesive keeps the panels firmly attached to your existing drywall or masonry surface for decades.
This vertical transformation makes the room feel more spacious and adds a touch of natural elegance to a plain living space. It is a permanent upgrade that significantly increases the visual value and perceived quality of your entire home interior.
9. Modern Floating Hearth Extension
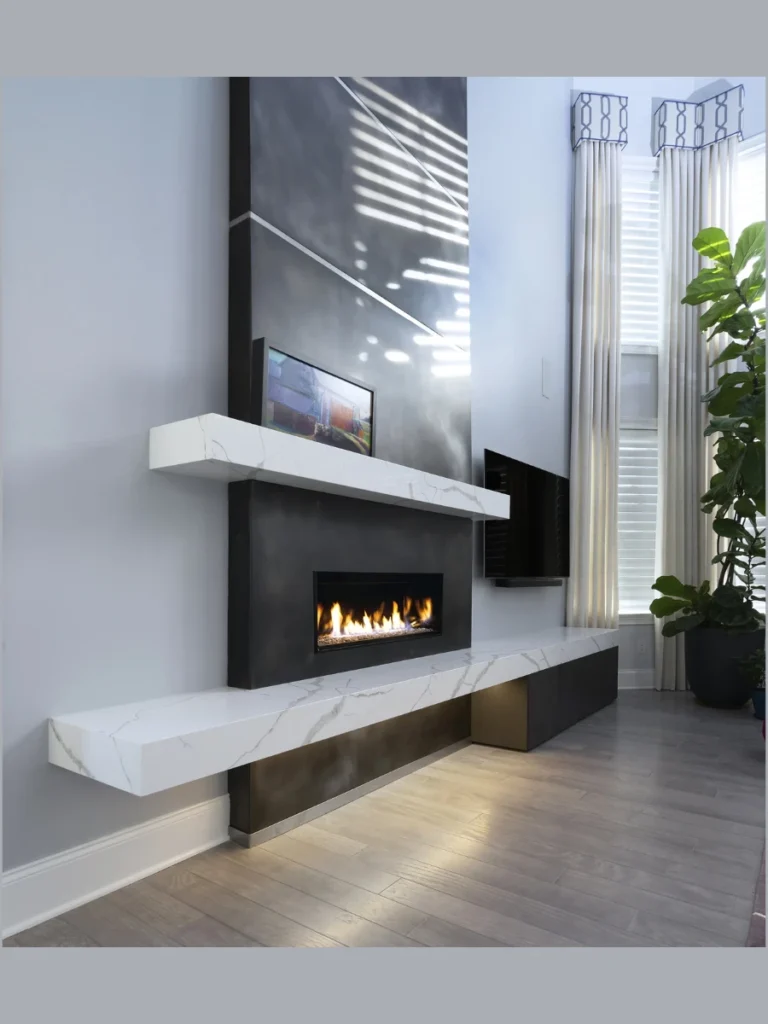
Extending your hearth and lifting it off the floor creates a floating effect that adds a clean architectural line. I love how this design opens up the floor space and makes a crowded living room feel much airier.
You can build a simple wooden frame and wrap it in stone or tile to create a solid and functional ledge. It provides a perfect spot for extra seating or a place to display your favorite decorative baskets and books.
I suggest adding a bit of hidden lighting underneath the floating ledge to create a soft glow during the evening hours. This highlights the texture of your flooring and makes the fireplace look like a piece of hanging art.
Ensure that the frame is bolted securely into the wall studs so it can safely support the weight of a person sitting. It is a smart way to add functionality and a high end designer look to a basic fireplace setup.
10. Patterned Cement Tile Hearth
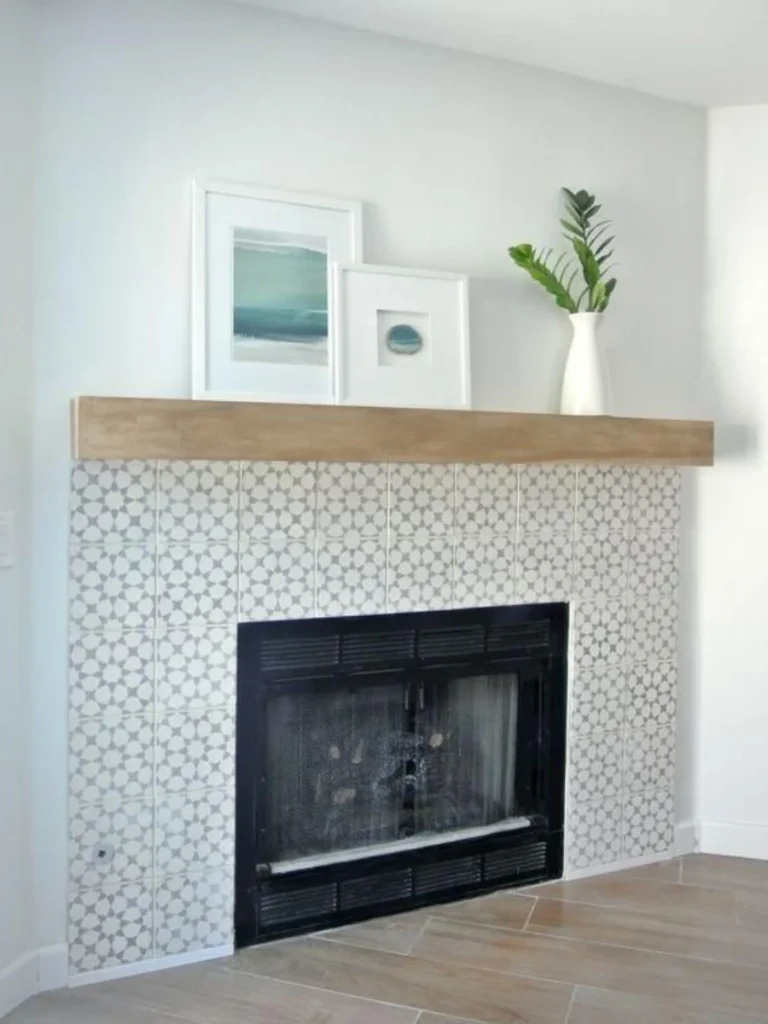
Replacing a boring or cracked hearth floor with patterned cement tiles adds a splash of personality and vintage charm. I find that these bold designs act like a permanent rug that never gets dirty or needs to be vacuumed.
You can pick geometric patterns or floral motifs that coordinate with the colors in your rugs or throw pillows. The thick texture of cement tiles provides a durable surface that can withstand the heat of falling embers.
I recommend using a dark colored grout to help hide the soot and ash that naturally settles on the fireplace floor. This keeps the pattern looking crisp and clean even if you don’t have time to sweep every single day.
This small change provides a big impact because the hearth is often the first thing people see when they look down. It is a relatively inexpensive project that can be completed over a single weekend with basic tiling tools.
11. Custom Built In Shelving Flanks
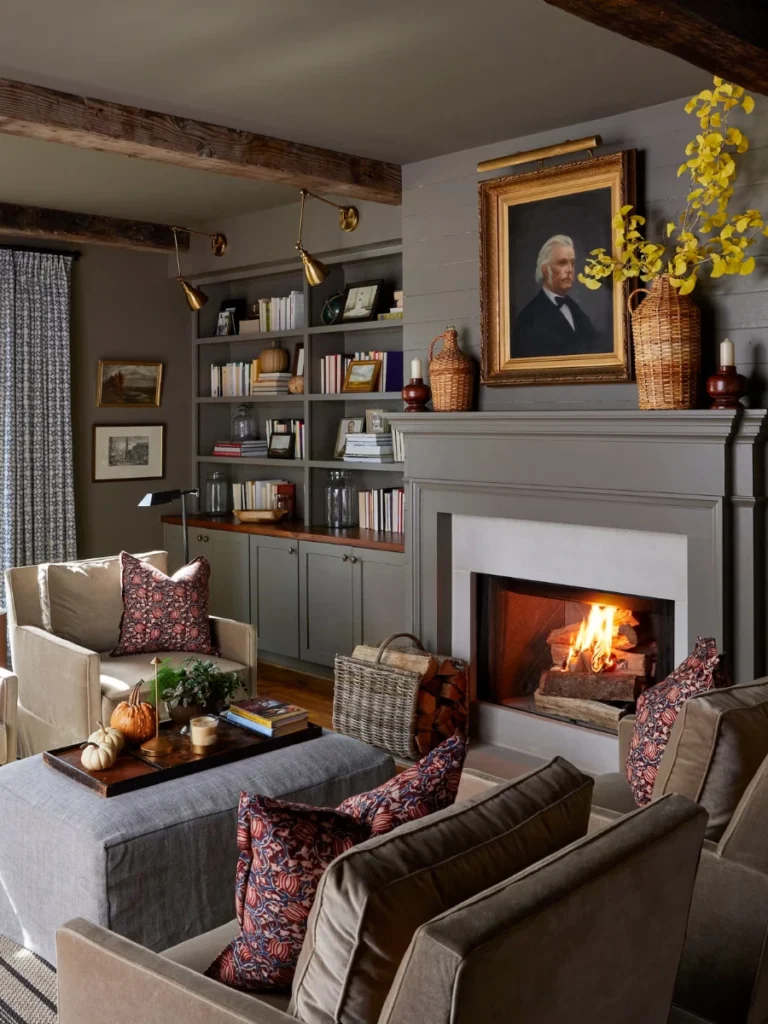
Adding custom bookshelves or cabinets to the sides of your fireplace creates a full wall feature that looks very professional. I think this is the best way to hide ugly wires and organize your growing collection of books and media.
You can paint the shelves the same color as the fireplace surround to create a cohesive and built in architectural look. It provides a balanced frame for the hearth and makes the fireplace feel integrated into the actual room.
I suggest including a few closed cabinets at the bottom to hide your board games or extra blankets out of sight. The open shelves at the top are perfect for displaying family photos and seasonal decor that you want to highlight.
This makeover turns a simple fireplace into a functional storage solution that maximizes every inch of your available wall space. It is a major project but the added storage and style are worth the extra effort and time.
12. Whitewash Masonry Treatment
Whitewashing is a great alternative to solid paint if you want to soften the look of your brick while keeping the texture. I find that this diluted paint mixture allows the natural character of the brick to show through beautifully.
You simply mix white paint with water and wipe it on the brick with a large brush or a clean rag. It is a very forgiving process because you can always add more layers if you want a more opaque finish.
I recommend working in small sections so the paint doesn’t dry too quickly before you have a chance to wipe it. This creates a soft and airy feel that is perfect for a coastal or traditional farmhouse style living room.
It is one of the most affordable ways to update a dark and heavy fireplace without losing the classic feel of the brick. You can finish the entire project in a single afternoon and enjoy a much brighter room by dinner time.
13. Decorative Metal Screen Replacement

Swapping your old gold or brass fireplace screen for a modern black metal version is a quick and effective fix. I noticed that high quality screens with simple geometric patterns can act as a piece of art for the hearth.
You don’t need any tools or skills to make this change because most screens are freestanding and ready to use immediately. It hides the messy firebox when it is not in use and provides a clean look for the room.
I suggest looking for a screen that has a magnetic door system for easy access to the wood logs or gas valves. This makes it much easier to maintain the fire without having to move a heavy metal frame every time.
Choosing a screen with a fine mesh ensures that sparks stay inside the hearth while still providing a great view. It is a small investment that provides a massive improvement in the safety and style of your living area.
14. Mirrored Overmantel Installation
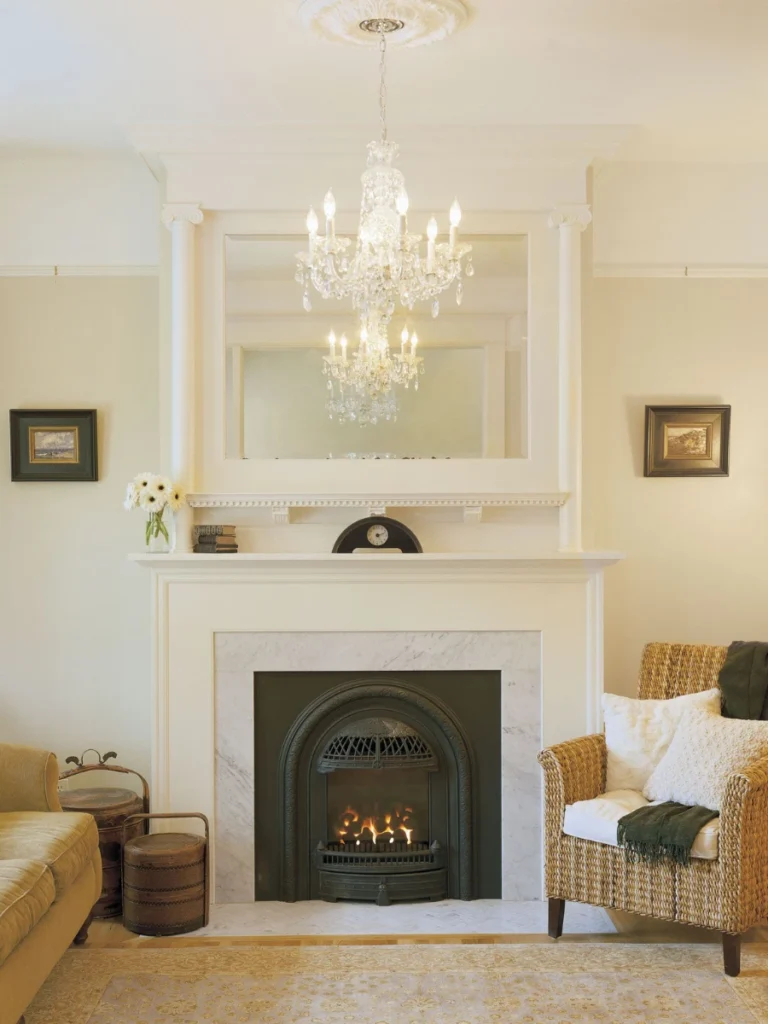
Installing a large mirror or a series of mirrored panels above the mantel helps to bounce light around a dark room. I think this is a clever trick for small spaces that feel cramped or don’t have enough natural window light.
You can choose a mirror with a sleek black frame for a modern look or a frameless version for a minimalist vibe. It creates a sense of depth and makes the fireplace wall look like it continues further back than it does.
I recommend leaning a large floor mirror against the wall above the mantel for a relaxed and casual designer appearance. This allows you to change the look easily without having to drill multiple holes in your masonry or shiplap.
The reflection of the flickering flames in the mirror adds a magical and cozy atmosphere to the room during the night. It is a simple styling tip that makes your fireplace makeover feel more finished and professionally decorated by a pro.
Important Maintenance For Your New Hearth
| Task | Frequency | Why It Matters |
| Paint Touch Ups | As Needed | Heat can sometimes cause minor chips near the opening over several years. |
| Dusting The Mantel | Weekly | Large flat surfaces like wood beams tend to collect dust very quickly. |
| Grout Cleaning | Every 6 Months | Ash can settle into floor grout and make the patterns look dull or dirty. |
| Inspecting Adhesives | Annually | Ensure your tiles or veneers are still firmly attached and not loosening. |
Guide To Successful Fireplace Styling
- Layer Your Items: Place a large piece of art in the back and layer smaller candles and plants in the front.
- Mix Your Metals: Don’t be afraid to mix a black screen with a few brass candlesticks for a modern and curated look.
- Add Some Greenery: A small potted plant or a vase of dried flowers brings life and color to a hard stone surface.
- Keep It Simple: Avoid cluttering the mantel with too many small objects so the fireplace remains the main star of the room.
Conclusion
A fireplace makeover is one of the most rewarding home improvement projects because it completely changes the heart of your home. I believe that anyone can achieve a professional look with a bit of paint and some creative thinking about materials.
Whether you choose a simple whitewash or a full stone veneer transformation, the goal is to reflect your personal style. I find that a well executed refresh makes the entire living room feel more inviting and comfortable for your family.
You don’t need to be an expert contractor to turn an ugly red brick eyesore into a beautiful and modern focal point. I suggest starting with a deep clean and a small project like painting the firebox to build your confidence.
I hope these ideas inspire you to stop ignoring your outdated hearth and start planning your own weekend transformation project today. Your dream fireplace is likely just a few coats of paint or a new mantel away from becoming a reality.
FAQs
Yes, you can paint natural stone but you must use a specialized primer designed for porous surfaces to ensure the paint sticks. I always suggest using a flat or matte paint to keep the stone looking natural and to avoid a shiny plastic finish.
The best way is to build a hollow mantel or use decorative cord covers that you can paint the same color as your wall. If you are doing a shiplap or stone veneer makeover, you can run the wires behind the new material for a clean look.
Peel and stick tiles are safe for the hearth floor area as long as they are not in direct contact with the actual flames. I recommend checking the heat rating of the tiles and ensuring your fire screen is always closed to prevent hot embers from landing.
I find that a mixture of warm water and dish soap with a stiff wire brush works best for removing heavy soot and dirt. For very stubborn stains, you might need to use a specialized masonry cleaner or a bit of vinegar to get the brick clean.
A German smear usually feels dry to the touch within a few hours but it takes about 24 to 48 hours to cure completely. I suggest waiting at least two full days before you hang a heavy mantel or place any decor back onto the brick surface.
Most of these ideas like painting, whitewashing, and installing a new mantel are very DIY friendly and don’t require a professional. However, if you are moving gas lines or doing structural masonry work, I always recommend hiring a licensed contractor for safety.
A clean and modern fireplace is a major selling point for most buyers and can definitely increase the overall appeal of your home. I believe that a small investment in paint and a new mantel provides a very high return on your investment when selling.