
Refreshing your bedroom furniture usually feels like a battle between your dream aesthetic and your actual bank account balance. I spent months staring at an old orange-toned dresser before I realized that a few cans of paint could fix everything.
How To Update Bedroom Furniture Using Simple DIY Techniques
You should always start by cleaning and sanding your pieces to ensure the new finish sticks properly to the old wood. High-quality primers and modern chalk paints allow you to change the look of your furniture without needing a professional workshop.
I find that adding new hardware or decorative legs can make a cheap thrift store find look like a luxury hotel piece. Choosing the right topcoat will protect your hard work from daily scratches and keep your bedroom looking stylish for many years.
1. Painting Dressers With Modern Matte Finishes
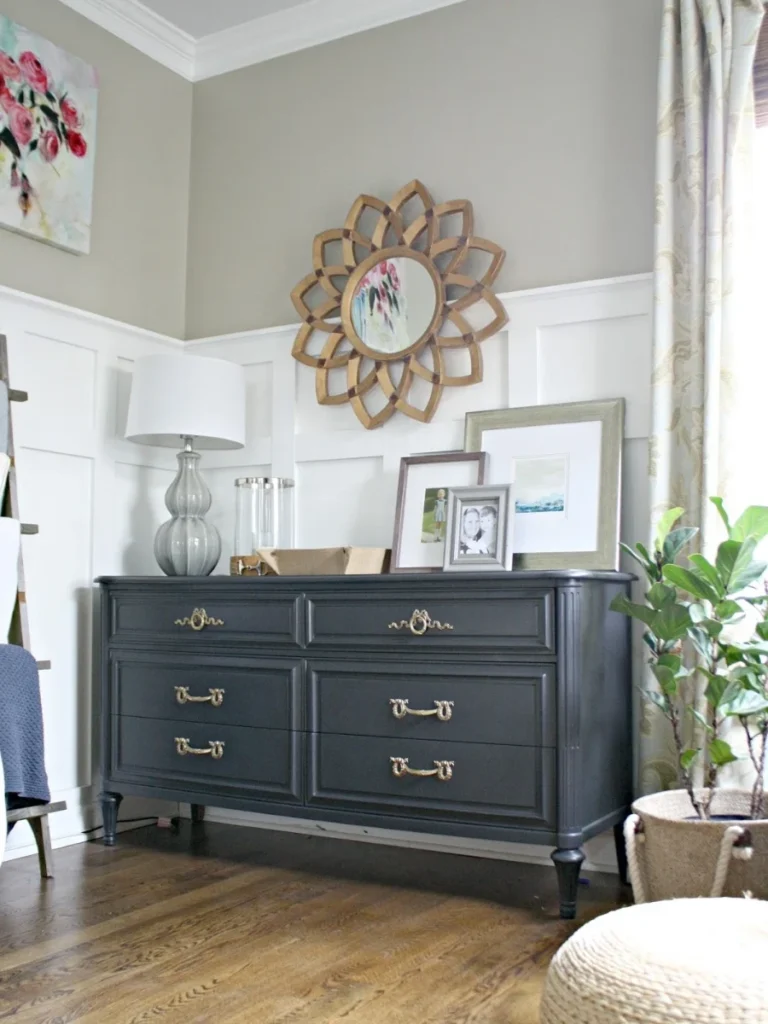
Painting a tired dresser is the fastest way to change the entire energy of your bedroom without buying anything new. I love using matte chalk paint because it hides small imperfections and provides a very sophisticated and soft texture to the wood.
The process is very straightforward and only requires a few basic supplies like a high-quality brush and a small sanding block. You get a completely custom piece of furniture that matches your specific wall color and your personal design taste perfectly.
I personally recommend applying two thin coats of paint rather than one thick layer to avoid any messy drips or streaks. It creates a professional and smooth surface that makes the dresser look like it came from a high-end furniture showroom.
I find that adding a clear wax finish at the end provides a beautiful glow while protecting the paint from daily wear. It is an affordable and very satisfying project that turns an outdated eyesore into a stunning focal point for your room.
2. Replacing Old Knobs With Modern Brass Hardware
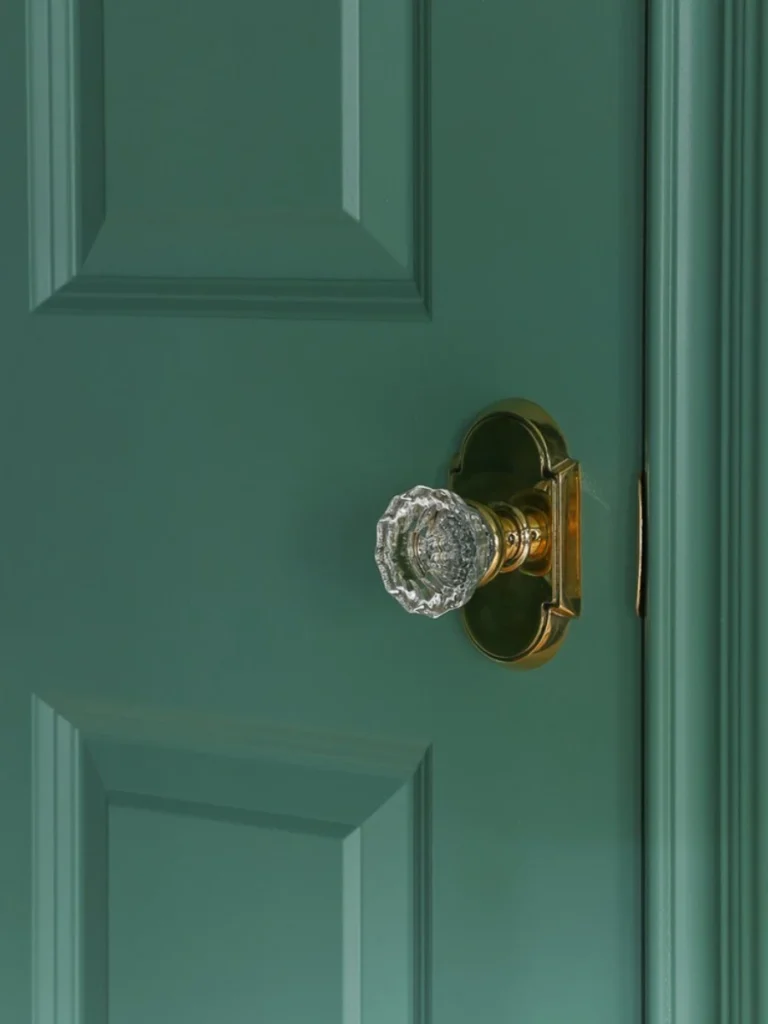
Changing the hardware on your nightstands or wardrobes is a quick win that provides a massive visual impact for very little effort. I enjoy how sleek brass pulls can instantly make a boring white cabinet look modern and incredibly expensive today.
You can find hundreds of unique handle designs online that allow you to express your personality through small and subtle details. It is a simple task that only requires a screwdriver and a few minutes of your time on a lazy Saturday.
I find that matching the hardware across all your bedroom pieces helps the room feel much more unified and professionally designed. You get a cohesive look that tells your guests every single detail was carefully chosen for a very specific reason.
I suggest picking a finish like brushed nickel or matte black if you want a more industrial and moody bedroom vibe. These small changes are a smart way to update your furniture without having to commit to a full paint job.
3. Applying Peel And Stick Wallpaper To Drawer Fronts
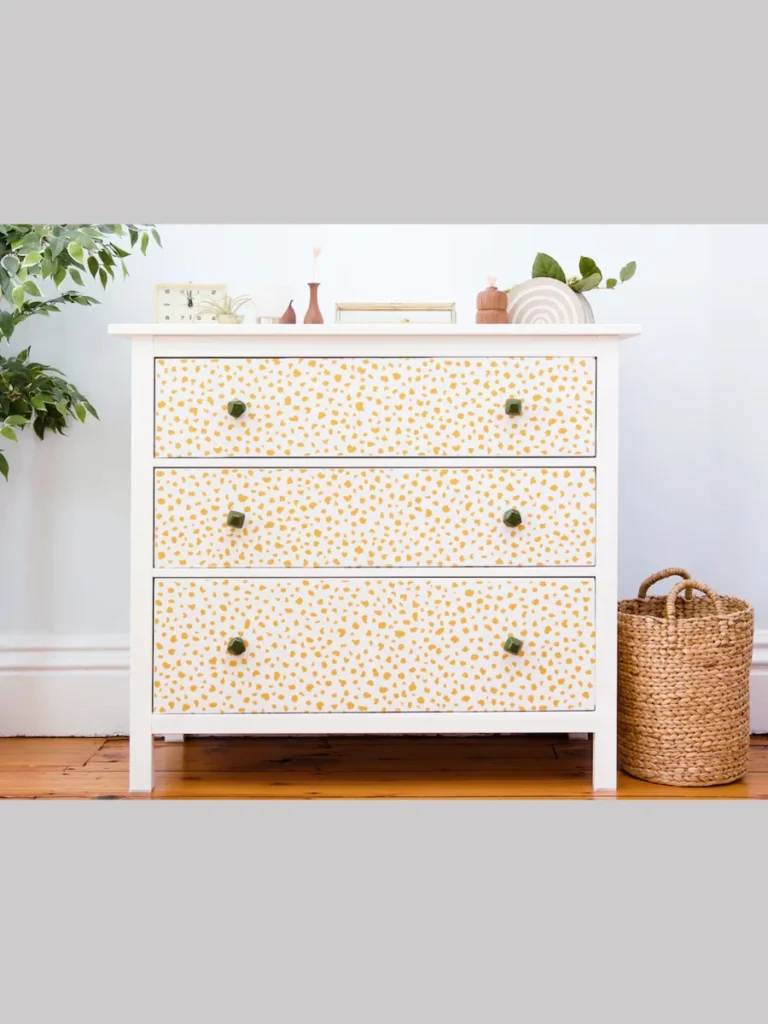
Adding patterns to your drawer fronts with peel and stick wallpaper is a creative way to introduce texture into your bedroom. I love how you can easily remove the paper later if you decide to change your design theme or color palette.
The floral or geometric patterns add a layer of visual interest that makes a plain furniture piece look like a custom art. You only need a sharp utility knife and a steady hand to transform your nightstand into a unique and trendy showpiece.
I think this method works perfectly for renters who want to personalize their space without making any permanent changes to their furniture. It provides a high-end look that hides scratches and dings on old surfaces while keeping everything feeling fresh and new.
I personally recommend using a smoothing tool to get rid of any air bubbles as you apply the paper to the wood. This is an affordable and very clever makeover idea that allows you to experiment with bold patterns without any long-term risk.
4. Staining Wood Surfaces For A Natural Look
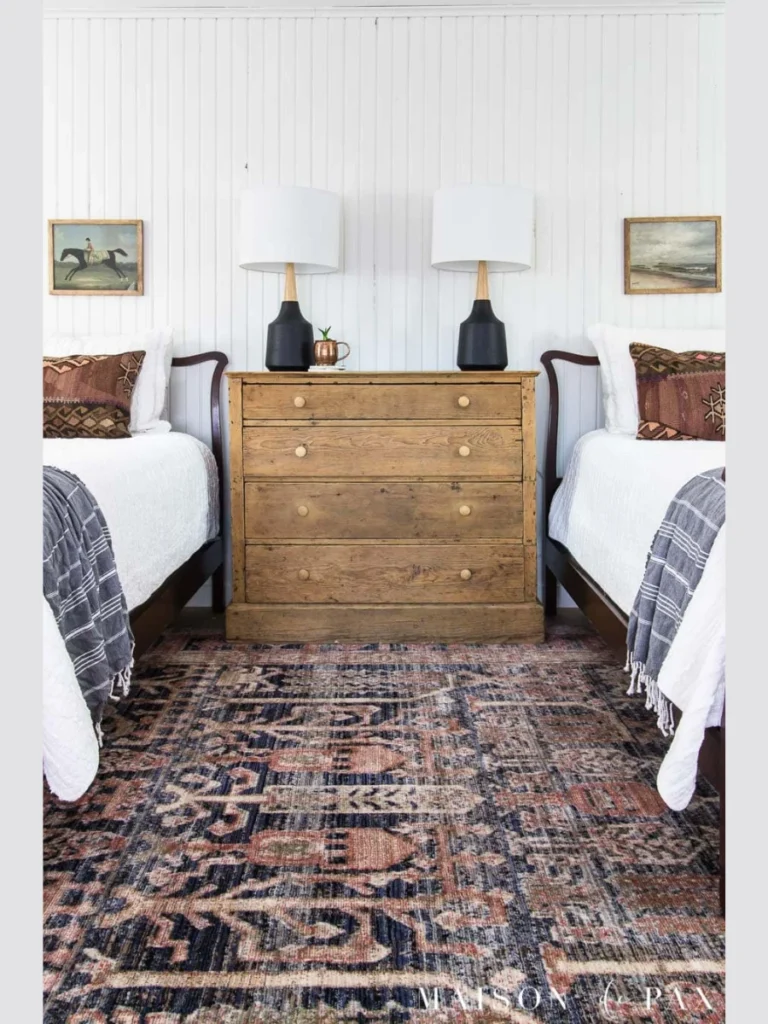
Stripping off old paint to reveal the natural grain of the wood is a beautiful way to add warmth to your bedroom. I enjoy the process of sanding down a piece to its raw state and applying a rich walnut or oak stain.
The natural wood texture provides a sense of history and character that modern plastic or painted furniture simply cannot match at all. You get a piece of furniture that feels grounded and brings a bit of the outdoors into your private sanctuary.
I find that a light wood stain helps a small bedroom feel much airier and brighter than dark and heavy painted pieces. It is a labor-intensive project but the result is a timeless and very elegant piece that will last for several decades.
I suggest using a pre-stain conditioner to ensure the color absorbs evenly across the entire surface of the furniture piece. This is a vital step for anyone who wants a professional and high-quality finish on their next big bedroom makeover.
5. Adding Decorative Molding To Flat Doors
Installing thin wooden trim or molding onto flat cabinet doors can create a beautiful Shaker or traditional look in your bedroom. I love how a few simple strips of wood can add depth and architectural interest to a boring wardrobe front.
The molding creates shadows and lines that make the furniture look much more substantial and custom-built for your specific space. You can easily glue the trim in place and paint over everything for a seamless and very integrated furniture appearance.
I find that this technique is perfect for upgrading cheap flat-pack furniture that feels a bit too plain for a luxury bedroom. It provides a high-end designer look that mimics the expensive custom cabinetry found in the most beautiful modern homes today.
I personally recommend using a miter box to get perfect forty-five degree angles for your corners during the installation process. This is a clever and very affordable way to master the look of your bedroom furniture with minimal power tools.
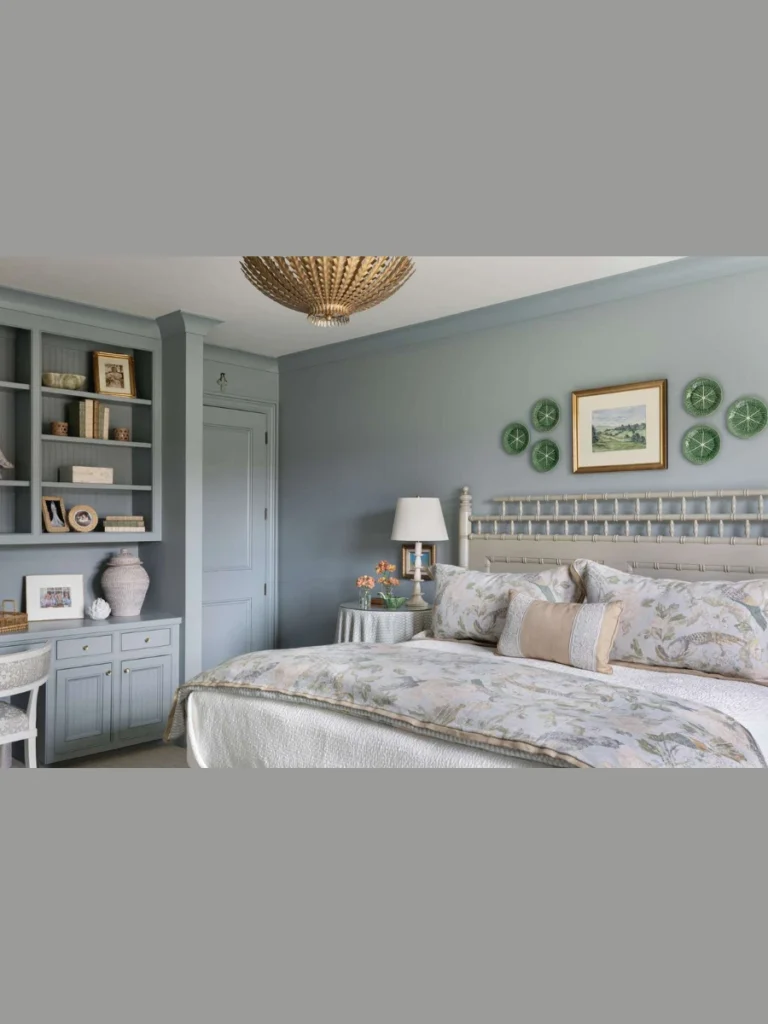
6. Upholstering Headboards With Soft Velvet Fabric
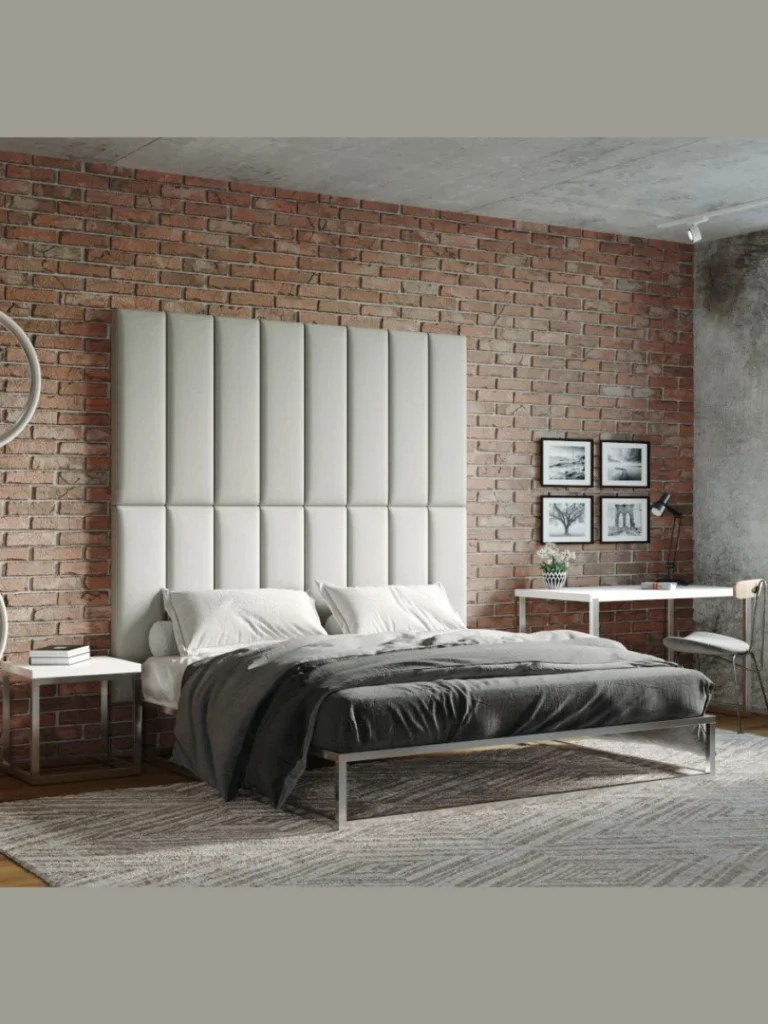
Re-covering an old headboard with new fabric is a fantastic way to add a layer of comfort and luxury to your bed. I enjoy how a soft velvet or linen material can make your entire sleeping area feel like a high-end hotel suite.
The process involves using a staple gun and some batting to create a plush and very inviting surface for sitting up. You get a custom look that allows you to match your bed frame to your bedding and your favorite curtains.
I find that adding a few tufted buttons can provide even more detail and a sense of traditional elegance to the headboard. It is a tactile makeover that makes your bed the most comfortable and stylish part of your entire bedroom layout.
I suggest picking a performance fabric that is easy to clean since your head will be resting against it every night. This is a practical and very satisfying project that turns a hard wooden frame into a soft and cozy retreat.
7. Whitewashing Dark Wood For A Coastal Vibe
Whitewashing is a brilliant way to lighten up heavy and dark bedroom furniture without completely hiding the natural wood grain underneath. I love how a diluted paint mixture creates a soft and weathered look that feels like a breezy beach house.
The technique is very forgiving because you can wipe away excess paint until you reach the exact level of transparency you want. You get a piece of furniture that feels much lighter and helps a small bedroom appear more spacious and open.
I find that this method works best on open-grain woods like oak or pine where the white pigment can settle into the grooves. It provides a relaxed and very approachable aesthetic that pairs perfectly with light blue linens and natural jute rugs.
I personally recommend finishing the piece with a matte water-based sealer to keep the white looking crisp and clean for years. This is an affordable and very fast way to modernize a piece of furniture that feels too dark for your current style.
8. Stenciling Intricate Patterns Onto Tabletops

Adding a stenciled design to the top of a nightstand or desk is a creative way to introduce a touch of custom art. I enjoy using Moroccan or floral stencils to add a layer of detail that makes a simple piece look like a hand-painted antique.
You only need a small amount of acrylic paint and a steady hand to create a repeatable pattern that looks professionally executed. It is a fantastic way to cover up stubborn stains or deep scratches on a tabletop that you cannot easily sand away.
I think that using a metallic gold or silver paint for the stencil adds a subtle hint of luxury and shimmer to the room. It creates a beautiful focal point that draws the eye and makes your bedroom furniture feel like a unique and personal treasure.
I personally suggest using a repositionable spray adhesive on the back of your stencil to prevent the paint from bleeding under the edges. This ensures a sharp and very clean finish that makes your DIY project look like it was done by an expert artist.
9. Decoupage With Vintage Maps Or Botanical Prints

Decoupage involves using a special adhesive to apply paper cutouts to your furniture for a very detailed and layered decorative look. I love using vintage maps or old botanical illustrations to give a dresser a storied and very intellectual personality.
The process allows you to completely customize your piece with images that reflect your hobbies or your favorite travel memories from the past. You get a one-of-a-kind furniture item that starts conversations and adds a massive amount of character to your private space.
I find that applying a few thick layers of varnish over the paper creates a durable surface that feels smooth and very high-quality. It protects the delicate paper from moisture and ensures your artwork stays vibrant and beautiful for many years to come.
I recommend using a brayer or a flat tool to smooth out any wrinkles as you lay the paper onto the wet adhesive. This is a fun and very artistic makeover idea that turns a boring furniture piece into a stunning piece of bedroom decor.
10. Adding Tapered Mid-Century Modern Legs
Swapping out the bulky base of a dresser for sleek tapered legs is a simple trick to give your furniture a modern lift. I enjoy how raising a piece off the floor makes the room feel less crowded and adds a touch of retro sophistication.
You can easily buy pre-made wooden or metal legs online and screw them directly into the base of your existing bedroom furniture. It is a fast way to change the silhouette of a piece and make it look much more expensive and professionally designed.
I find that this works especially well for low nightstands that feel a bit too short next to a modern high-profile mattress. You get a functional height adjustment while giving your furniture a trendy Mid-Century Modern vibe that is very popular right now.
I personally suggest staining the new legs to match your piece exactly or painting them a bold black for a sharp contrast. This is a smart and very effective way to update the structure of your furniture without doing a major reconstruction.
11. Creating A Distressed Shabby Chic Finish
The distressed look involves purposefully wearing away paint on the edges and corners to give furniture an aged and well-loved appearance. I love how this style embraces imperfections and makes the bedroom feel cozy and full of rustic country charm.
You can achieve this look by painting your piece and then using sandpaper to reveal the wood or a different paint color underneath. It is a very low-stress project because any mistakes just add to the character and the overall story of the furniture.
I think this finish is perfect for a guest bedroom where you want a relaxed and unpretentious atmosphere that feels like a home. You get a piece of furniture that looks like it was found in a charming antique shop in the French countryside.
I personally recommend applying a dark wax over the distressed areas to add more depth and a sense of authentic age to the wood. This is a classic makeover technique that turns new and boring pieces into timeless and very beautiful bedroom accents.
Comparison of Popular Paint Types for Furniture
| Paint Type | Finish Quality | Prep Level | Durability |
| Chalk Paint | Matte / Velvet | Very Low | Medium (Needs Wax) |
| Milk Paint | Chipped / Antique | Low | High (Needs Oil) |
| Mineral Paint | Smooth / Matte | Medium | Very High |
| Spray Paint | Glossy / Even | High | Medium |
Common Mistakes To Avoid During Your Bedroom Furniture Makeover
Many DIY enthusiasts make the mistake of rushing the drying process which leads to sticky surfaces and ruined finishes. You should always allow each coat of paint to dry completely before applying the next layer to ensure a very smooth result.
I find that skipping the cleaning phase is a frequent error that causes paint to peel off in large chunks later. You must use a degreaser to remove all the oils and dust from the wood before you ever pick up your favorite paintbrush.
Choosing the wrong type of topcoat can also turn your beautiful white dresser into a yellowish mess over time. I suggest using a water-based polycrylic to ensure your light colors stay crisp and bright without any unwanted amber tones.
I personally think that ignoring the underside and edges of your furniture makes the entire project look unfinished and unprofessional. You should paint every visible angle to ensure your makeover looks high-quality and consistent from every single corner of the room.
Final Thoughts On Furniture Makeover Bedroom Ideas
A furniture makeover is more than just a weekend project; it is a way to breathe new life into items you already love. You have the power to turn a mismatched set of pieces into a cohesive and very beautiful bedroom sanctuary.
I believe that the best results come from taking your time with the prep work and choosing colors that reflect your true personality. Once you finish your first piece, you will likely find yourself looking for more items around the house to transform.
Don’t be afraid to experiment with bold hardware or unique painting techniques because everything can be changed again if you grow tired of it. Your bedroom should be a place that makes you feel happy and relaxed every time you walk through the door.
I hope these furniture makeover bedroom ideas inspire you to pick up a brush and start your own creative DIY journey today. A little bit of effort and a lot of imagination are all you need to create the bedroom of your dreams.
FAQs
While some paints claim to require no sanding, I find that a light scuff-sanding always helps the new finish stick better to the old wood. It removes the glossy topcoat and ensures your hard work won’t peel or chip away after just a few months of daily use.
Chalk paint and mineral paint are the top choices for beginners because they are easy to use and provide a very professional-looking matte finish. Mineral paint is especially great because it often has a built-in topcoat which saves you an extra step during your busy weekend.
The secret to a professional look is using high-quality brushes and taking the time to remove all dust with a tack cloth before you paint. Applying multiple thin coats rather than one thick layer will also prevent drips and ensure a smooth and very even surface.
Yes, you can paint laminate furniture, but you must use a high-adhesion primer designed specifically for slick surfaces to ensure the paint doesn’t slide off. Once you have a good primer base, you can use almost any furniture paint to give your piece a brand new look.
Most furniture paints feel dry to the touch in a few hours, but you should wait at least twenty-four to forty-eight hours before placing items on it. It takes about thirty days for the paint to fully cure and reach its maximum durability, so be extra careful during the first month.
Related Posts
- Top 12 Furniture For Kids Room Ideas
- 13 Best Furniture Kitchen Cabinet Ideas
- Top 14 Furniture In Kitchen Ideas
- 15 Best Furniture Apartments Ideas
- Top 10 Furniture Set Ideas
- 11 Best Furniture Aesthetic Ideas