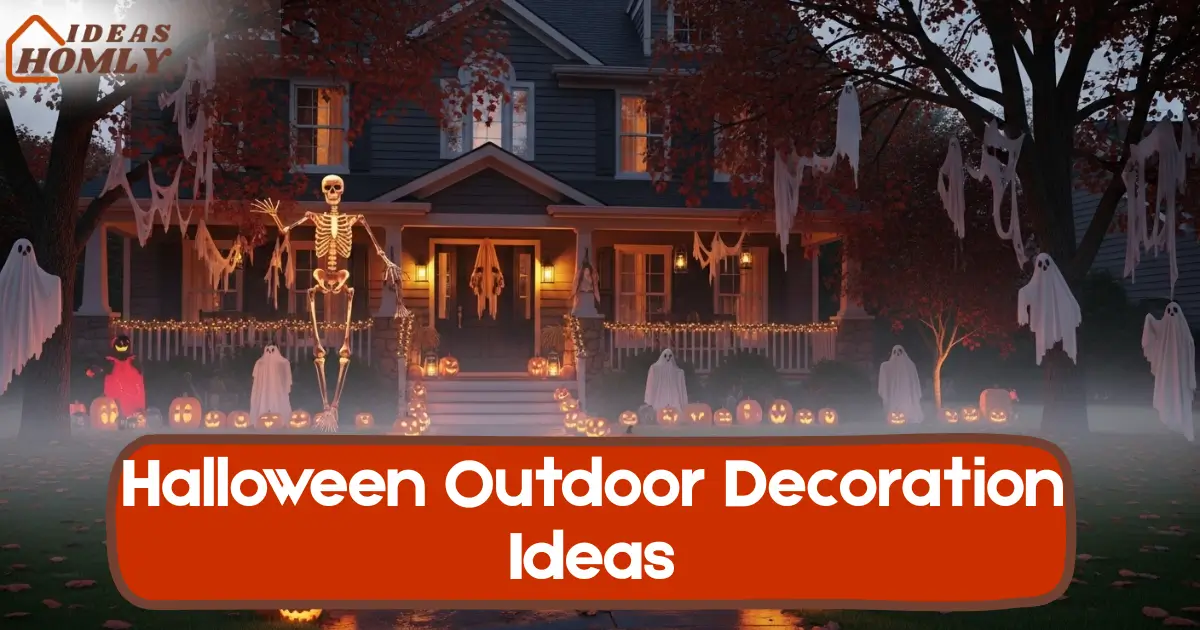
When it comes to Halloween outdoor decorations, I always say that if your yard doesn’t make at least one neighbor slow their car, you’re doing it wrong.
Halloween is my favorite excuse to turn a quiet lawn into something guests can’t stop talking about. From pumpkin arches to glowing graveyards, the right setup can turn any space into a mini attraction.
This guide isn’t about random décor ideas, it’s about outdoor Halloween displays that actually steal the show.
Whether you’re decorating for a neighborhood contest, throwing a party, or just want your house to stand out, these are designs that blend atmosphere, structure, and storytelling.
Before I jump into the main ideas, I always remind myself that planning outdoor décor means more than buying spooky props. Let’s talk about a few key considerations that can make or break the whole setup.
Key Considerations for Outdoor Decor
The first thing I consider is scale. Big decorations like inflatables or skeletons can quickly overpower smaller items, so I group them carefully. Large elements create the “wow” factor; smaller ones add texture.
Lighting comes next. I use warm orange lights to highlight pumpkins and eerie green spotlights near trees or fog setups. Lighting can make even a small yard look cinematic.
Then comes theme consistency. Mixing a skeleton wedding with UFO props might sound fun (and trust me, I tried once), but it often looks chaotic.
Sticking to one strong theme like haunted house, alien crash site, enchanted graveyard always works better.
And finally, I never forget safety and weatherproofing. Cords must stay dry, props should withstand wind, and pathways must remain walkable for guests and trick-or-treaters.
Here’s a quick reference table I’ve made over the years to plan outdoor displays smoothly:
| Element | Why It Matters | Quick Tip |
|---|---|---|
| Scale | Keeps layout balanced | Use one large centerpiece, then smaller accents |
| Lighting | Defines mood and focus | Avoid over-lighting; leave some areas in shadow |
| Theme | Creates storytelling | Pick one mood: spooky, funny, fantasy |
| Safety | Keeps guests and kids safe | Tape cords and use outdoor-rated bulbs |
| Weatherproofing | Ensures durability | Choose plastic/resin props, not paper or cloth |
Now that the groundwork’s clear, let’s get into the real showstoppers.
1. Pumpkin-Packed Porch Arch
This one’s a classic, but when done right, it’s absolutely jaw-dropping. I’ve seen arches packed with carved and faux pumpkins that practically glow like an orange tunnel.
The idea is to use different pumpkin sizes and shapes to form a layered effect around your porch entrance.
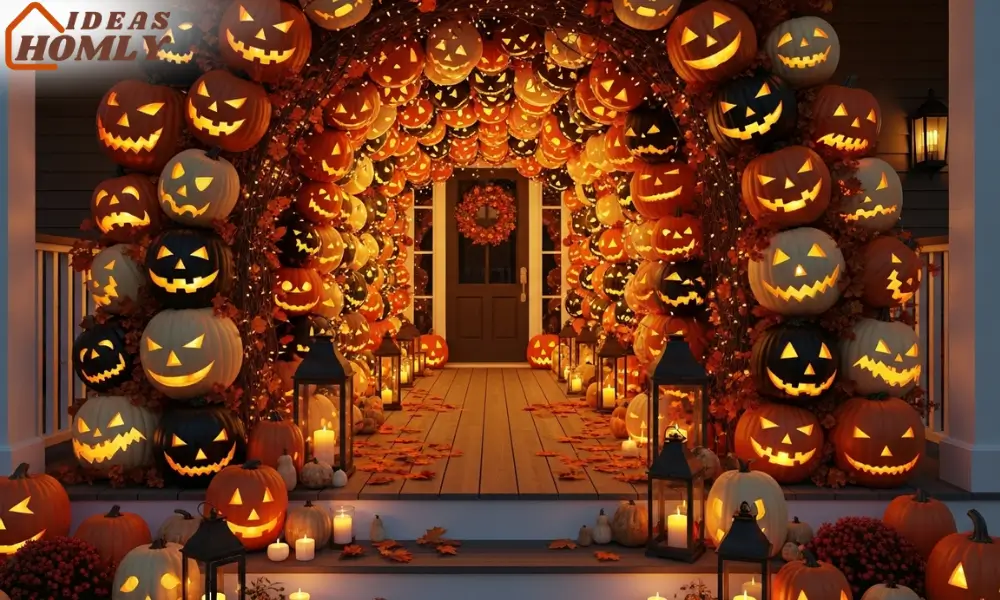
To make it manageable, I start with a metal or PVC frame and zip-tie lightweight pumpkins all around it. You can mix real pumpkins, foam versions, and even LED-lit ones to save time and mess.
The key is to balance symmetry without making it too uniform; the charm is in the slightly uneven layout.
For lighting, I prefer warm white fairy lights woven through the pumpkins, or LED tealights inside each. It gives that cozy yet eerie Halloween glow.
If you want to level it up, add creeping vines or faux autumn leaves between the pumpkins to give it a more natural, rustic vibe.
One trick I learned last year: spray a few pumpkins with matte black paint and mix them into the orange ones. The contrast looks modern and instantly photo-worthy.
If you plan to post on Pinterest or Instagram, this is the one that’ll rake in likes and shares.
2. Haunted Mansion Set Piece
There’s something magical about transforming a front yard into a haunted mansion scene. It doesn’t take an actual mansion, just the right elements placed strategically.
I start by picking a backdrop. A simple fabric wall or faux wooden panels against the porch create the illusion of an old house. I hang aged curtains in the windows, flickering LED candles, and use fog or mist for that chilling Victorian feel.
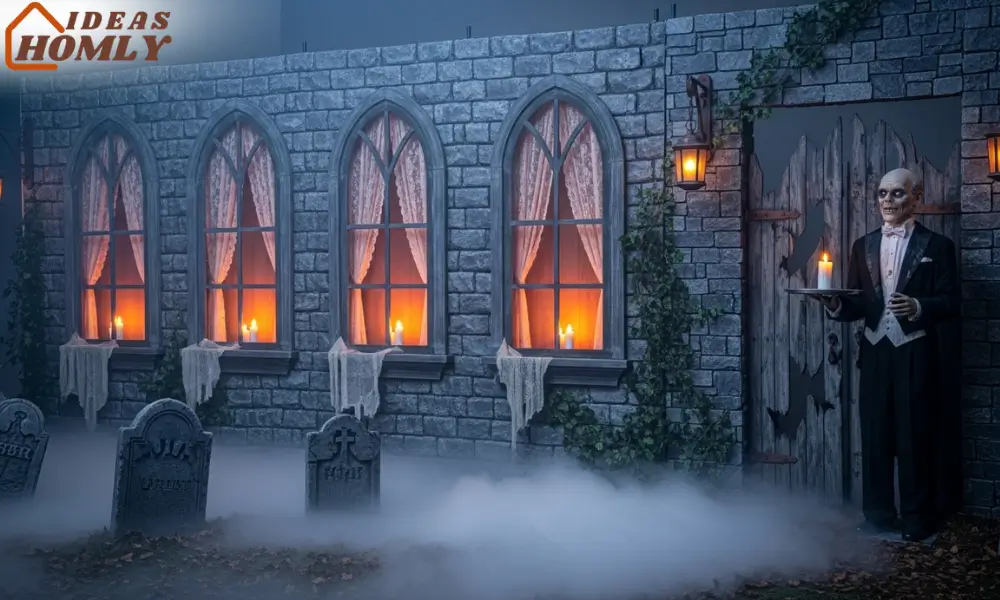
Props matter here. I use fake tombstones, broken gates, and hanging lanterns to fill the space. A single animatronic butler or glowing portrait frame can anchor the scene. It’s all about storytelling, guests should feel like they’re stepping into a ghostly manor’s courtyard.
One of my favorite touches is the sound design. Adding a subtle background track of distant thunder or faint whispers makes it immersive without being overbearing. I keep the volume low enough that people lean in, which makes the scare more personal.
Here’s a small setup tip I learned after a few storms: always secure fabric with weighted clips or bricks hidden under the material. Otherwise, your “haunted curtains” might take flight mid-evening and spook the neighbors for real.
3. The 12-Foot Skeleton Remix
I’ll admit it that the 12-foot skeleton has become the rock star of Halloween lawns. But the trick now isn’t just having one, it’s about making yours stand out from the crowd. I call it the Skeleton Remix because it’s all about giving this viral icon a fresh twist.
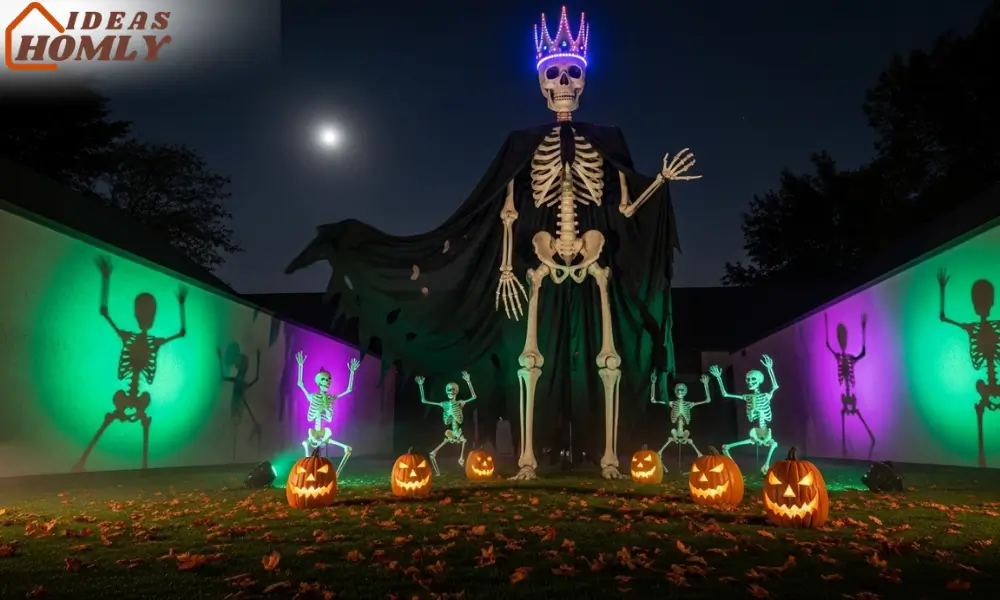
Instead of leaving it bare, I like to dress it up. Think giant costumes like a vampire cape, pirate hat, or LED crown. I’ve even seen people wrap it in glowing vines or surround it with tiny skeleton “fans” to make it look like a concert scene.
The contrast between the massive figure and smaller props creates a fun scale effect.
If you want to go for eerie instead of funny, use up-lighting with green or purple floodlights from below. It gives the bones a chilling shadow play on nearby walls.
For an added punch, install a motion-activated roar or laugh track that triggers when people pass by. Trust me, you’ll hear both screams and laughter all night.
Maintenance is key here. Strong winds love to mess with this giant. I always anchor it with sandbags or metal stakes. It’s not glamorous, but neither is chasing a runaway skeleton down the street in costume.
4. Projection-Mapped Windows
If you’ve got a blank wall or large windows, this one’s for you. Projection mapping turns your house into an animated display without needing a single nail or hook. All you need is a short-throw projector, a white surface, and themed videos.
I project ghosts floating in the windows, or silhouettes pacing behind curtains. It’s spooky, silent, and oddly elegant. Some of my friends use digital pumpkins that “talk” or sing perfect for family-friendly vibes.
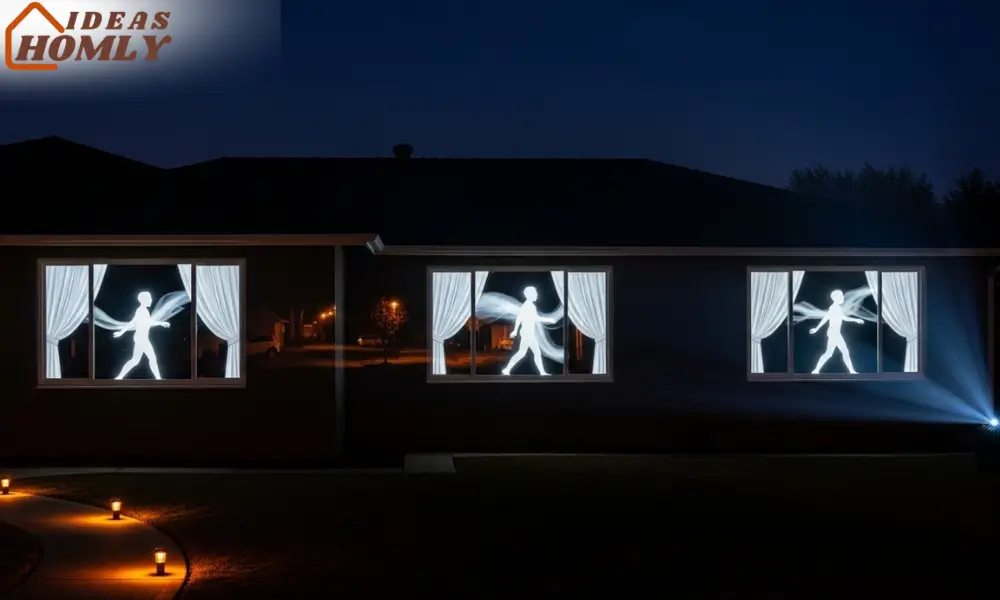
To make it look professional, I make sure the projector is aligned perfectly and shielded from rain. A simple plastic storage bin with a front cut-out can protect it without ruining the look.
Also, dark surroundings help the projection pop so turn off porch lights in that area and keep the spotlight elsewhere.
Projection-mapped displays are surprisingly energy-efficient and crowd-pleasing. They’re ideal for people who want a big impact without cluttering their lawn.
Plus, you can change the video every year for a totally new scene without buying new décor.
Here’s a quick info box for setup essentials:
| Item | Purpose | My Recommendation |
|---|---|---|
| Short-throw Projector | Displays clear image up close | 3000+ lumens for brightness |
| Video Files | Scene animation | Get looping Halloween sets |
| Tripod / Box Mount | Stable base | Keeps projection aligned |
| Plastic Cover | Weatherproofing | DIY or use projector enclosure |
| Soundbar / Speaker | Adds atmosphere | Sync with thunder or whispers |
5. Low-Fog Graveyard Scene
This setup never fails to draw a crowd, especially when the fog creeps low and slow across the grass. A low-fog graveyard combines lighting, props, and smoke machines to mimic that classic cemetery vibe.
I start by laying out foam tombstones at different angles, with names like “I. B. Gonen” or “Anita Rest” (the dad jokes practically write themselves). Then I tuck LED candles or spotlights behind each stone so they glow subtly through the mist.
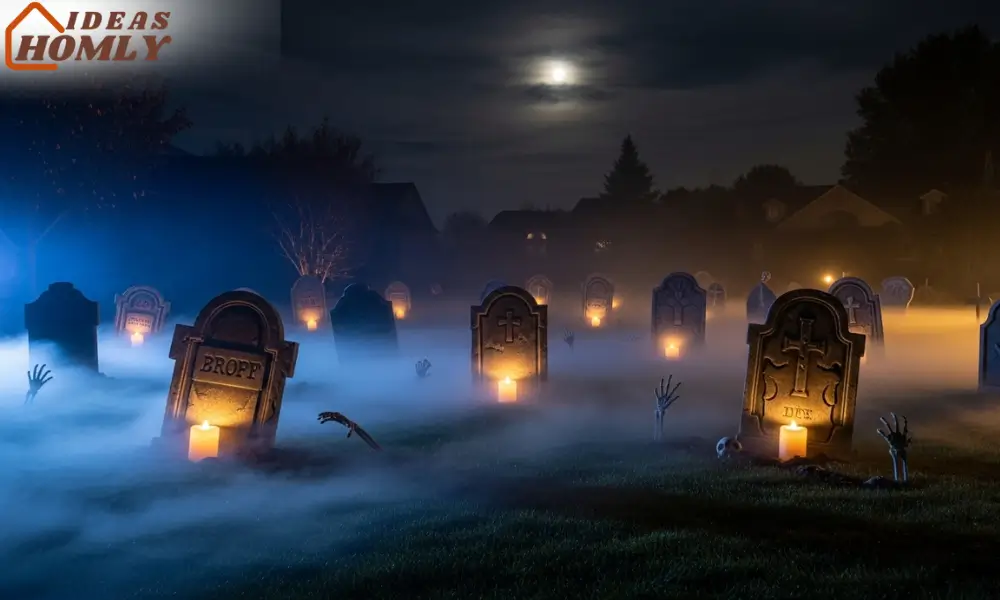
The secret ingredient is ice-chilled fog. I use a fog machine connected to a cooler box filled with ice. The cold air keeps the fog hugging the ground instead of floating away. You can also buy low-fog machines made for outdoor use if you want the easy route.
Adding a few skeletal arms “emerging” from the soil sells the illusion even better. For depth, I sometimes add a moonlight spotlight behind a tree to silhouette the scene. Just keep an eye on the fog direction; wind can ruin your spooky masterpiece faster than you think.
If you’re using real candles, please don’t. LED versions look just as good and won’t set your lawn on fire (yes, that happened once, lesson learned).
6. Alien Landing Lawn Scene
This one’s for those who like a little humor with their horror. Picture a UFO crash site right on your front lawn. I set up a circular area of fake smoke, glowing green lights, and metallic debris to simulate an alien landing.
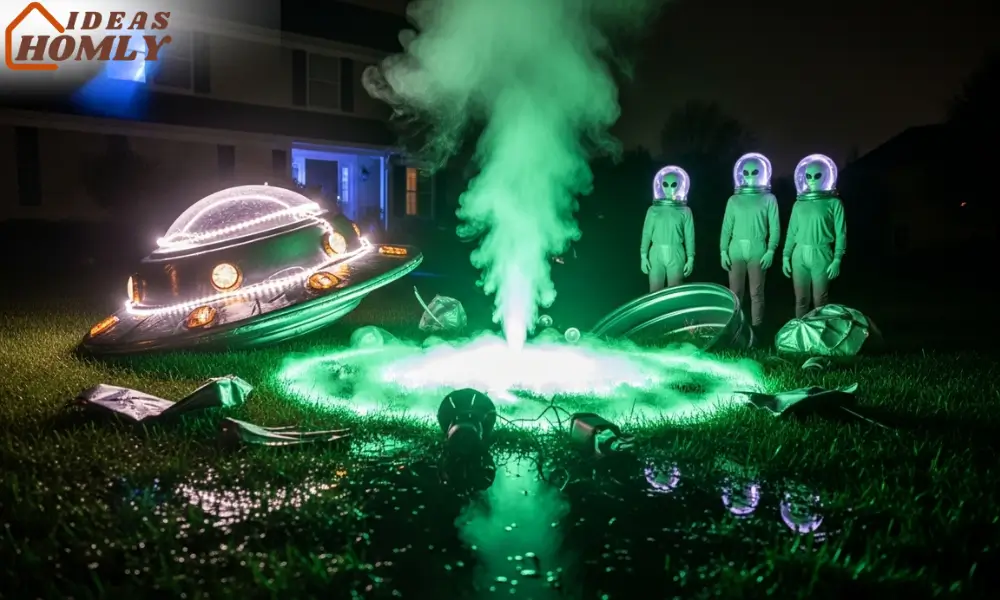
The key prop here is a DIY UFO, a plastic kiddie pool flipped upside down, wrapped in silver foil, and fitted with LED rope lights around the rim. Then I scatter pieces of “wreckage” made from old electronics and cardboard spray-painted silver.
For aliens, I use mannequins with glow sticks inside clear masks, or inflatable green guys from party stores. The trick is lighting, the whole thing should glow as if radioactive. Place a hidden fog machine to make it feel like the ship just crash-landed.
Adding sound effects makes it unforgettable. A looping hum, static, or even alien chatter completes the atmosphere. I once had trick-or-treaters stand around taking photos for ten minutes straight, mission accomplished.
Here’s a small comparison table that might help decide if this idea suits your setup:
| Feature | Alien Scene | Graveyard Scene |
|---|---|---|
| Mood | Futuristic, playful | Classic spooky |
| Lighting | Green, white, metallic | Warm, eerie |
| Setup Time | Moderate | Easy |
| Ideal Space | Open lawn | Smaller yards |
| Family-Friendly | Yes | Yes (less scary for kids) |
Wiring, Power & Weatherproofing
Now, here’s where things get practical and where most people mess up. All the creativity in the world won’t save your Halloween setup if the wiring fails mid-evening. I always plan my power layout before I start decorating.
The golden rule is to use outdoor-rated extension cords and GFCI outlets. I run cords along the edges of paths and secure them with black duct tape or garden staples so no one trips. It’s not glamorous, but safety first, I like my guests alive and unshocked.
Weatherproofing is equally important. I tuck all connections inside waterproof cord covers or plastic bags sealed with tape.
If there’s even a chance of rain, I elevate plugs on bricks or small stands so they don’t sit in puddles. And please, avoid cheap indoor LED strips outside; they’ll flicker, fail, and ruin your hard work.
For lights and animatronics, I use smart plugs with timers. They not only save energy but also let me control everything from my phone.
It’s perfect for those nights when I forget to turn the fog machine off and end up with a haunted backyard until sunrise.
Layering & Depth Tricks
If you’ve ever looked at someone’s yard and thought, “Wow, it actually looks like a movie scene,” you’ve noticed depth. Flat layouts feel dull; layered setups feel alive.
I always build scenes in three layers:
- Foreground: props close to viewers — pumpkins, fog, lanterns.
- Midground: main set pieces — skeletons, tombstones, or the UFO.
- Background: lighting, trees, or projected elements to frame it all.
Even in small yards, spacing makes a difference. For example, I place small LED spotlights behind midground props to cast shadows toward the viewer,it adds instant drama.
I also mix textures: glossy pumpkins next to rough hay bales, soft moss under metallic props, bright lights near darker corners. That balance tricks the eye and makes every photo look richer.
Here’s a simple visual planning chart I use:
| Layer | Key Elements | Pro Tip |
|---|---|---|
| Foreground | Pumpkins, fog, lanterns | Keep movement low (fog, flicker) |
| Midground | Props, skeletons, tombstones | Use varying heights |
| Background | Lights, projections, trees | Add contrasting colors |
And remember, never crowd everything in one spot. Negative space is your friend — it helps the eye rest before the next big moment.
Timing & Automation
Timing can make your décor feel alive. I set my smart plugs and timers so different effects trigger in waves. For example, fog starts first, lights fade in after 10 seconds, then a motion sensor cue activates the sound. It’s a mini performance, and the crowd loves it.
For simplicity, I use Wi-Fi-enabled smart outlets that sync with my phone. They let me turn things on gradually, no frantic plug-ins when guests arrive. If you’re tech-savvy, linking them through an app like Alexa or Google Home makes it even smoother.
Here’s a small tip: schedule your lights to flicker slightly or change color every few minutes. That subtle variation keeps the display dynamic without being distracting.
And if you want the show to stop at midnight, automation makes sure your house doesn’t keep glowing like a carnival till dawn.
Conclusion
Halloween decorating, at its heart, is about creating an experience. Whether it’s a glowing pumpkin arch, a bone-chilling graveyard, or a UFO crash, each display tells a story.
I’ve learned that the best outdoor setups aren’t the ones with the most props, they’re the ones with smart planning, good lighting, and just the right amount of chaos.
By focusing on safety, depth, and timing, you can turn any outdoor space into something unforgettable. And the best part? Every year, you can tweak, layer, or remix what you already have to keep things fresh.
So grab your fog machine, untangle those cords, and let your yard steal the show this Halloween. Because if you’re going to decorate, you might as well go all in.
FAQs
I usually start two weeks before Halloween. It gives me time to fix wiring, test lighting, and adjust spacing without rushing.
Yes, as long as you use water-based fog and keep the machines elevated or out of reach. Avoid chemical-based options.
I secure props with sandbags, garden stakes, or zip ties. For lighter décor, using weighted bases helps maintain balance.
LED floodlights and solar spotlights work great. I use warm orange, green, or purple tones for mood and depth.
Absolutely. Store them in plastic bins away from sunlight or moisture. I label each box by theme, and it saves so much time the following year.

