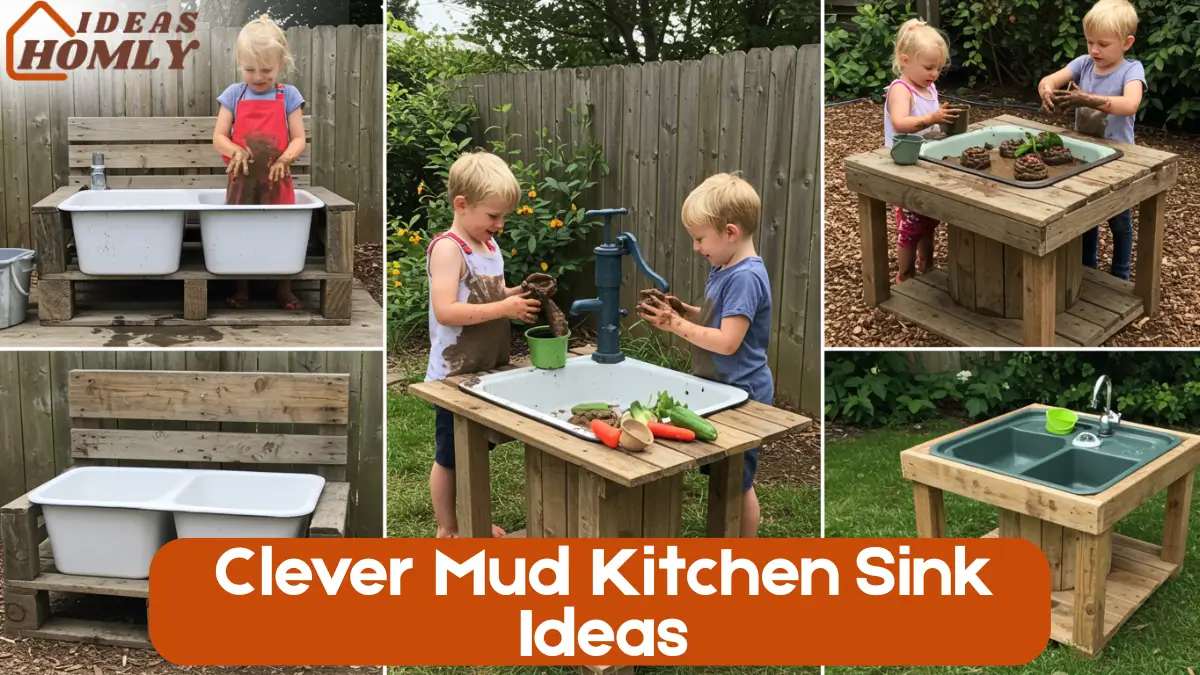
Setting up a mud kitchen in the backyard has become one of my favorite DIY projects as a home decor and creative play enthusiast. And if you’re wondering whether adding a sink is necessary, my answer is yes, absolutely.
A well-thought-out mud kitchen sink doesn’t just mimic a real kitchen; it turns outdoor play into something magical and imaginative. With years of hands-on experience building outdoor setups and crafting affordable home play areas, I’ve found that the sink is the centerpiece kids adore most.
Let me walk you through why it’s important and share some practical, budget-friendly mud kitchen sink ideas that I’ve personally found to be functional, safe, and exciting for kids.
Why Include a Sink in Your Mud Kitchen?
A mud kitchen without a sink feels incomplete. Whether it’s just a bucket of water or a built-in faucet, that small addition brings the whole kitchen to life. Kids love the idea of rinsing vegetables, washing their “dishes,” or even just splashing around.
Here’s why I always add a sink in my outdoor play kitchen builds:
- It encourages realistic pretend play, which keeps kids engaged longer.
- It introduces basic hygiene habits in a fun and natural way.
- A water feature increases sensory exploration, essential for early childhood development.
- It makes cleanup easier by containing mess in one zone.
1. Pallet-Framed Double Sink
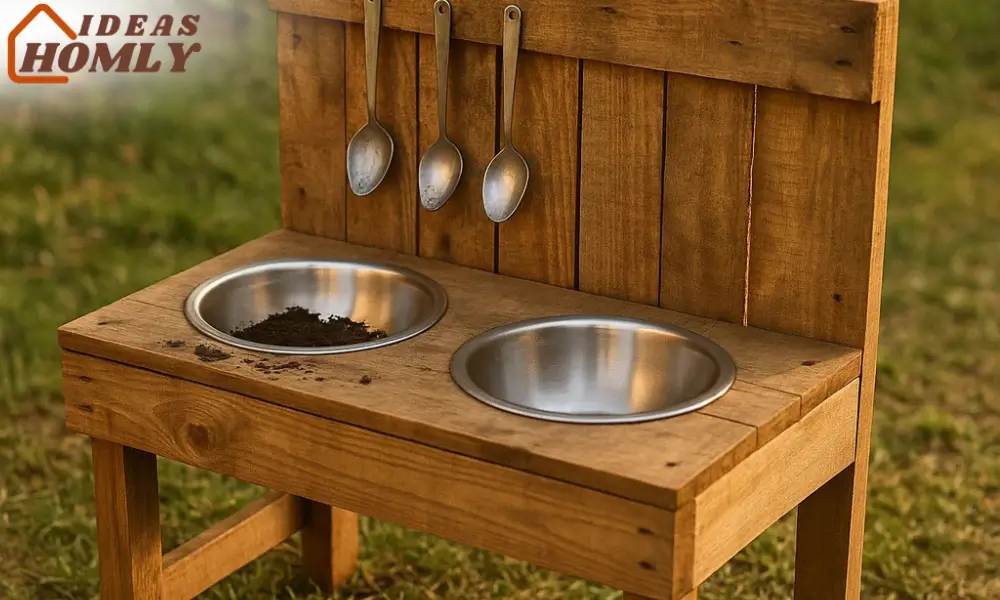
This idea is one of my personal go-tos for larger families or siblings who love to play side-by-side. The double sink setup gives each child their own space, reducing fights and doubling the fun.
What You Need:
- A reclaimed wooden pallet
- Two metal or plastic bowls (mixing or pet bowls work well)
- A hand drill and jigsaw
- Screws, wood sealant, and sandpaper
How I Built It:
I started by laying the pallet flat, then marked out two circular holes—just big enough to snugly fit each bowl. After cutting and sanding the openings, I dropped in the bowls, securing them with a bead of silicone around the edge.
To elevate the whole setup, I attached four wooden legs underneath the pallet. If you want to take it up a notch, add a second pallet vertically at the back to mimic a backsplash or shelf.
Seal the wood well with an outdoor-safe varnish to make it weather-resistant.
Why It Works
This setup looks rustic and blends naturally into a garden. It’s spacious, affordable, and easy to maintain. Plus, it gives children the freedom to play independently or collaboratively.
Here’s a quick comparison to understand the features better:
| Feature | Pallet-Framed Double Sink |
|---|---|
| Materials | Pallet wood, bowls |
| Skill Level | Beginner |
| Water Flow Option | Manual pour or bucket refill |
| Cost Estimate | Low (under $30 with repurposed items) |
| Play Value | High |
This is one of those setups that grows with your child. You can always upgrade it by adding hooks for utensils, a towel rail, or even paint it with your kids to make it more personal.
2. Cable-Spool Pedestal Sink
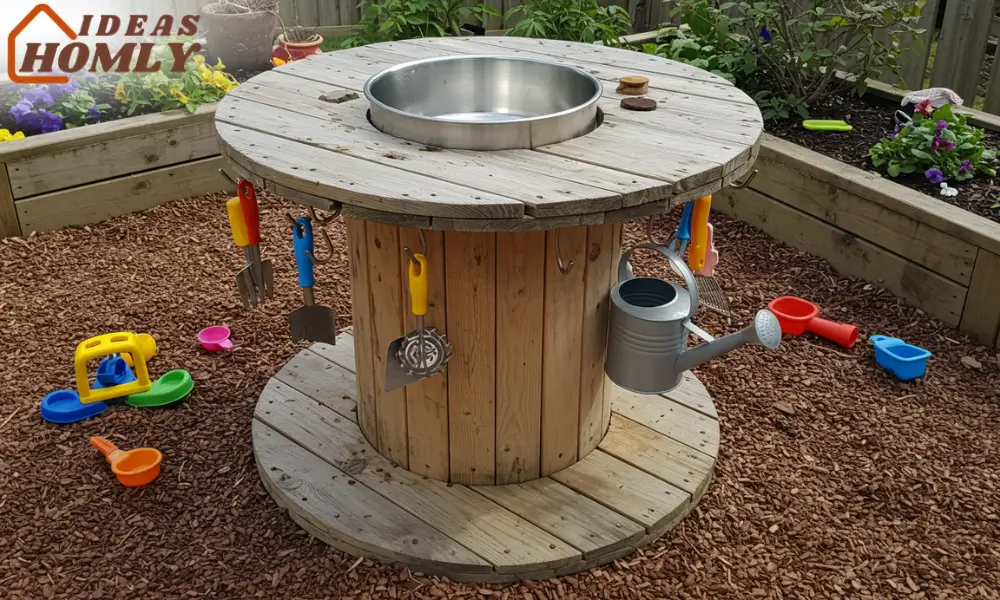
If you’ve ever come across one of those giant wooden cable spools, don’t let it go to waste. I turned one into a stunning pedestal-style mud kitchen sink, and it’s become a favorite in my backyard setup.
How I Made It:
I started by sanding the top surface to make it smooth and safe for little hands. Then, I cut a circular hole into the center, just big enough to nest a large stainless steel bowl I picked up second-hand. This acts as the sink basin.
For the water source, I kept things simple. I placed a small jug or watering can nearby for kids to pour water in as needed. You can also attach a mini tap or garden hose attachment if you’re up for a little plumbing work.
Around the base, I screwed in a few hooks for hanging ladles, spoons, and old kitchen tools. On the top, there’s still space for bowls, mud pies, and imaginary cooking stations.
Why I Love It:
- It takes up very little ground space, making it great for small backyards.
- The height is perfect for preschoolers and toddlers.
- It’s incredibly sturdy and doesn’t tip easily.
This one is especially appealing because of its circular shape, it breaks away from the usual boxy layout and gives a more playful feel. It also holds up well to weather after a good coat of outdoor varnish.
3. Vintage Enamel Basin + Hand-Pump
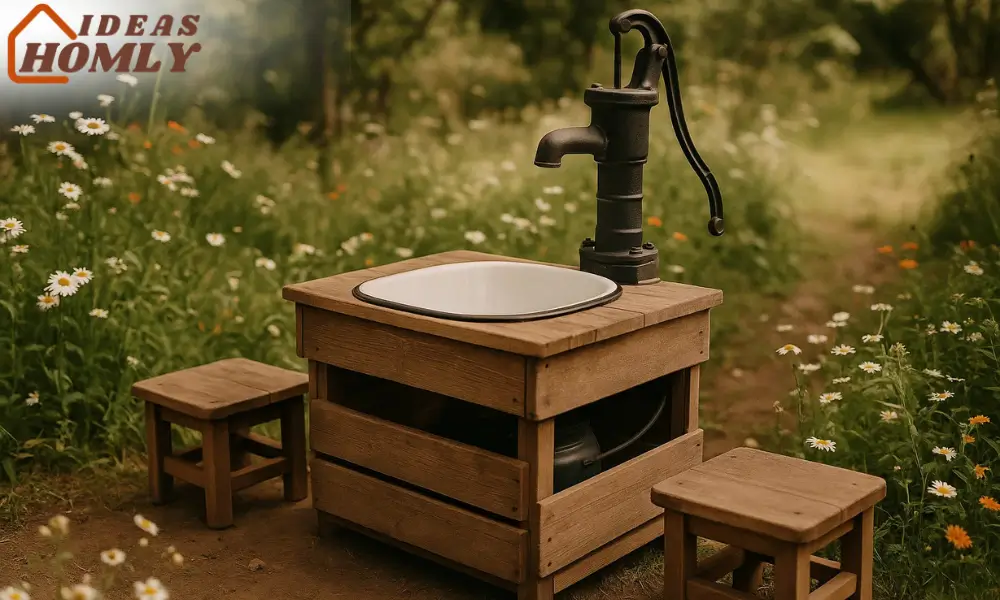
This is a setup that brings an old-fashioned charm to your backyard. I actually found an enamel wash basin at a flea market and paired it with a manual hand pump and it became the most talked-about feature of my mud kitchen.
Building the Setup:
The enamel basin sits neatly inside a wooden crate or table that I modified with a jigsaw. It’s both beautiful and functional. You can use any sturdy tabletop surface old cabinets, workbenches, or plant stands all work.
The star of the setup is the hand pump. I ordered a child-safe manual pump online and connected it to a hidden water container underneath the table. When kids pump it, the water comes out just like in an old-fashioned sink. The excitement on their faces is priceless.
Here’s a little setup chart for clarity:
| Item | Description |
|---|---|
| Sink Basin | Vintage enamel bowl (12–14 inches) |
| Water Source | Manual hand pump with hidden tank |
| Table/Base | Wooden crate or upcycled table |
| Maintenance | Wipe enamel after play, refill tank |
What Makes This One Special:
The interactive pump adds a new layer of engagement. Kids feel like they’re really controlling the water, which encourages them to return again and again.
Also, the enamel has a nostalgic look that fits beautifully into natural gardens or rustic backyards. It’s great for anyone who values design just as much as function.
If you’re like me and love blending old-world charm with play-based learning, this one’s a winner. And you don’t need to buy new, look around second-hand stores or local markets to score great deals.
4. Drop-In Utility Tub + Grey Water Bucket
When I needed something strong, easy to clean, and super low maintenance, I turned to the drop-in utility tub method. These plastic utility sinks are affordable and can handle serious muddy action.
How I Set It Up:
I picked up a large plastic utility tub from a home improvement store. Then I built a sturdy wooden frame using leftover 2x4s. I cut out a snug-fitting hole in the tabletop to drop the tub in just like a real sink.
Underneath the tub, I added a 5-gallon grey water bucket to catch runoff. I drilled a small hole at the bottom of the tub and connected it to a short PVC pipe that drains into the bucket. This keeps things clean and gives kids a sense of how real plumbing works.
You can pour in water from a jug, or use a detachable spray nozzle connected to a garden hose.
Why It’s a Practical Choice:
- Utility tubs are deep, sturdy, and weather-resistant.
- You can easily remove the tub for deep cleaning.
- The grey water system avoids puddles in the yard.
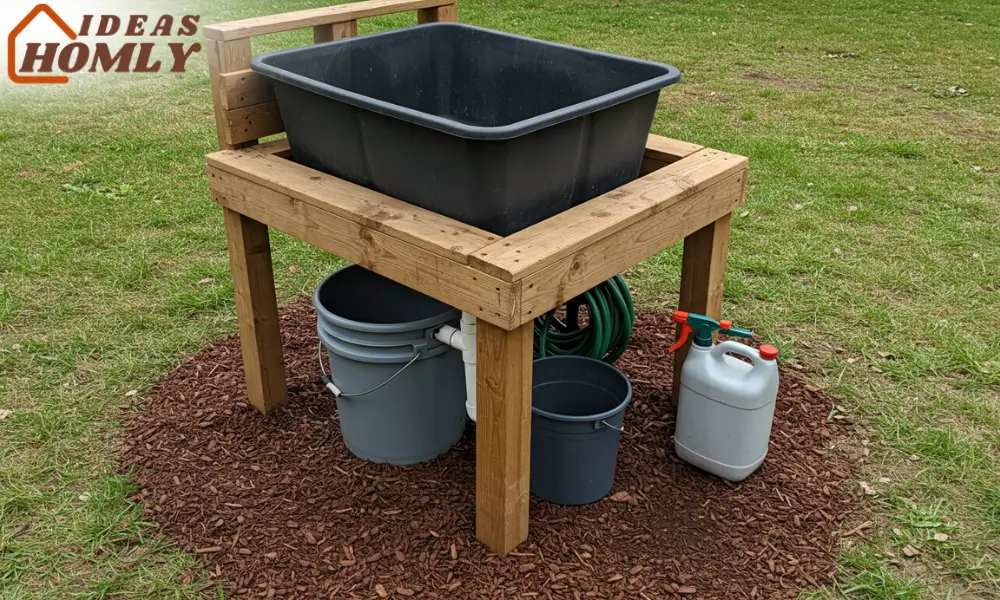
Here’s a quick breakdown:
| Feature | Details |
|---|---|
| Basin Material | Heavy-duty plastic utility tub |
| Drainage | PVC pipe to 5-gallon bucket |
| Water Source | Hose, jug, or spray nozzle |
| Ideal For | Messy, water-heavy mud kitchen play |
If you’re working with older kids or want a more realistic sink, this one delivers functionality while keeping the backyard tidy.
5. Collapsible Camping Sink
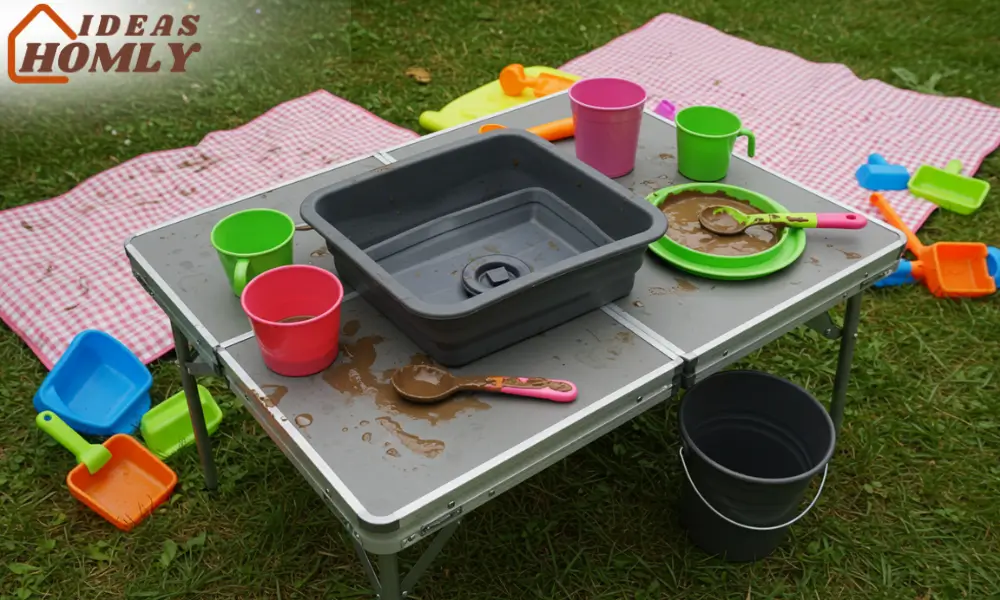
If you’re tight on space or want a portable option, a collapsible camping sink is the answer. I’ve used this on camping trips and in my backyard for a temporary mud kitchen setup and it’s amazing how flexible it is.
What I Like About It:
These sinks are lightweight and fold flat when not in use. I simply place them on a low table, fill with water, and let the kids go wild. Some come with built-in drain plugs, which I direct into a watering can or bucket below.
I love using this for seasonal setups, especially during summer garden play or on family trips. If you’re not looking to build a permanent mud kitchen, this is a fantastic choice.
| Feature | Collapsible Sink |
|---|---|
| Portability | High – folds flat for storage |
| Setup Time | Under 5 minutes |
| Water Handling | Manual pour, drain plug optional |
| Best For | Small spaces, temporary setups |
It’s low-effort, low-cost, and big on fun. That’s a win in my book.
How to Keep Mud Kitchen Sinks Clean
Over the years, I’ve learned a few tricks to keep our mud kitchen sinks clean without turning it into a chore.
Here’s what works best for me:
- Empty daily: Remove standing water at the end of the day to prevent smells and bacteria.
- Wipe after use: A quick wipe with a cloth keeps bowls and basins in good condition.
- Scrub weekly: Use a mild soap and soft scrub brush to clean all surfaces every weekend.
- Keep a drainage system: A small bucket under the sink to collect used water makes cleanup easier.
- Rotate tools: Clean kitchen utensils every few days to prevent mold or grime buildup.
This maintenance routine takes just a few minutes but helps extend the life of your mud kitchen setup—and keeps it safe for the kids.
Conclusion
Adding a sink to your mud kitchen takes backyard fun to the next level. Whether it’s a rustic pallet design, a vintage charm basin, or a quick collapsible sink, there’s a perfect setup for every space and budget.
From my experience, the sink becomes the heart of the play area. Kids are naturally drawn to it; it invites them to pour, mix, clean, and pretend. And as a parent and DIY lover, it’s satisfying to see something so simple spark so much joy.
Choose the design that suits your space and start building. Your kids will thank you with hours of muddy laughter and pretend cooking adventures.
FAQs
Mud kitchens are best for kids between 2 to 8 years old, but even older children enjoy them with more complex setups. I’ve seen toddlers enjoy simple water play, while school-age kids get into imaginative cooking and gardening roleplay. Just make sure the sink height fits your child’s comfort level.
Yes, but I usually recommend keeping it simple. You can connect a hose with a spray nozzle or use a small water tank with a pump. Real plumbing is possible, but it involves permits and winterizing. For most DIY setups, manual water fill options work great and keep things flexible.
Costs vary depending on your materials. I’ve made budget setups under $20 using recycled materials, and others cost around $60–$100 with new parts. Pallets, used bowls, and utility tubs can cut costs significantly. The key is creativity, not a big budget.
In my experience, plastic utility tubs, stainless steel bowls, and enamel basins work best. They’re easy to clean, weather-resistant, and deep enough for messy play. Avoid anything fragile or shallow. Depth is key to avoid splashing and overflowing.
When winter rolls in, I cover mine with a weatherproof tarp or move portable parts indoors. For permanent setups, I drain all water, dry everything out, and apply a coat of wood sealant before storing. It helps keep the wood strong and the basin rust-free for the next season.

