
Winter window painting always grabs attention because it turns plain glass into a seasonal scene. I love how it creates instant warmth without needing expensive decor.
When I paint my windows, I see the whole room feel brighter and more inviting. The best part is that these designs work for homes, shops and classrooms because they feel playful and seasonal.
I also like how window painting lets me change the mood without committing to anything long term. If I feel bold one week and minimal the next, I can wipe the design with warm water and restart.
This flexibility makes winter painting one of my favorite seasonal projects. It gives me a simple way to refresh my space and enjoy the season without buying too much stuff.
Before starting any design, I always gather the right supplies. I learned the hard way that the wrong pens or paints can stain or streak.
Winter window art looks best when you use beginner-friendly tools that clean up easily. The right products help me paint with confidence, especially when I try more detailed scenes.
Supplies You Need (Beginner Friendly)
Chalk Pens
Chalk pens give clean lines with a soft matte finish. I reach for them when I want snowflakes, borders or lettering. They work on most windows and wipe off with warm water. I always shake them well to get consistent color because they can get watery if I skip that step.
Tempera Paint
Tempera paint gives rich, vibrant color. I like it because it dries fast and sits on the glass smoothly.
It also cleans up easily with water which makes it perfect for beginners. When I need a bold winter village or a large snowy scene, tempera becomes my go-to option.
Stencils
Stencils save time when I want neat shapes. Snowflakes, trees and stars always look sharp when I use them. I tape the stencil lightly so it doesn’t move while I paint. It helps me skip the pressure of drawing perfect shapes freehand.
Other Helpful Tools
Soft round brushes help create smooth curves. Flat brushes work well for filling areas. Cotton pads make cleaning small mistakes easier. I also keep a microfiber cloth nearby to polish the glass before painting. Clean glass helps the paint stick better which prevents streaking later.
Cleaning Tips
I always clean the window with warm water mixed with a little dish soap before painting. Any dust or fingerprints can make the paint slide. After I remove the design, I give the glass a quick wipe with vinegar water. This leaves the surface clear and ready for the next idea.
1. Snowflake Border Across the Top of the Window
A snowflake border instantly makes a room feel more seasonal. I like placing it across the top because it frames the view without blocking light.
The border looks great in living rooms, kitchens and even entryways. It gives a soft winter feel without overwhelming the window.
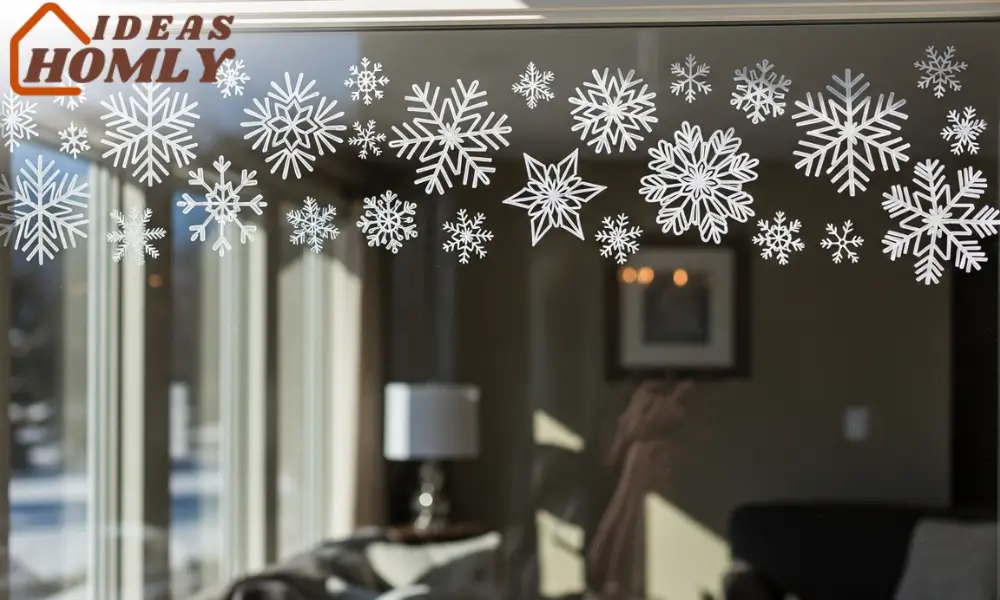
I start with chalk pens or white tempera because both give crisp lines. I usually mix large and small flakes to keep the border interesting.
Sometimes I add tiny dots between the flakes for a snowfall effect. When I tried it the first time, I noticed how the border made the whole window look more polished.
Small Table of Snowflake Styles
| Snowflake Type | Best Tool | Look |
|---|---|---|
| Simple Six-Point | Chalk pen | Clean and modern |
| Detailed Lace | Stencil | Decorative and classic |
| Chunky Snowburst | Tempera | Bold and playful |
I often adjust the style depending on the room. If the rest of my decor feels minimal, I keep the flakes simple. If I want a cottage feel, I go with more decorative patterns.
2. Stacked Snowmen and Evergreen Tree Scene
A snowman painting always brings charm to winter decor. I like stacking the snowmen because it adds a cheerful twist.
When I paint them next to evergreen trees, the whole window looks like a playful winter card. Kids love this one and honestly, I enjoy it just as much.

I start with basic circles for the snowmen and keep the features simple. I use tempera for the bodies because it looks soft and snowy. For the trees, I layer short brushstrokes to create texture. This small detail makes the evergreens feel natural and cheerful.
When I paint this scene on a large window, I add a small path or snow mounds underneath. It gives the design depth without making it complicated.
I also noticed that warm colors for scarves and hats make the snowmen feel lively. This small pop of color balances the cool winter look.
3. Chalk Pen Winter Village Along the Window Sill
A winter village always brings a cozy feel. Drawing it along the window sill keeps the scene grounded and easy to view. I like using chalk pens here because they produce clean lines that work well with small houses. The village looks lovely at night when the room lights shine behind it.
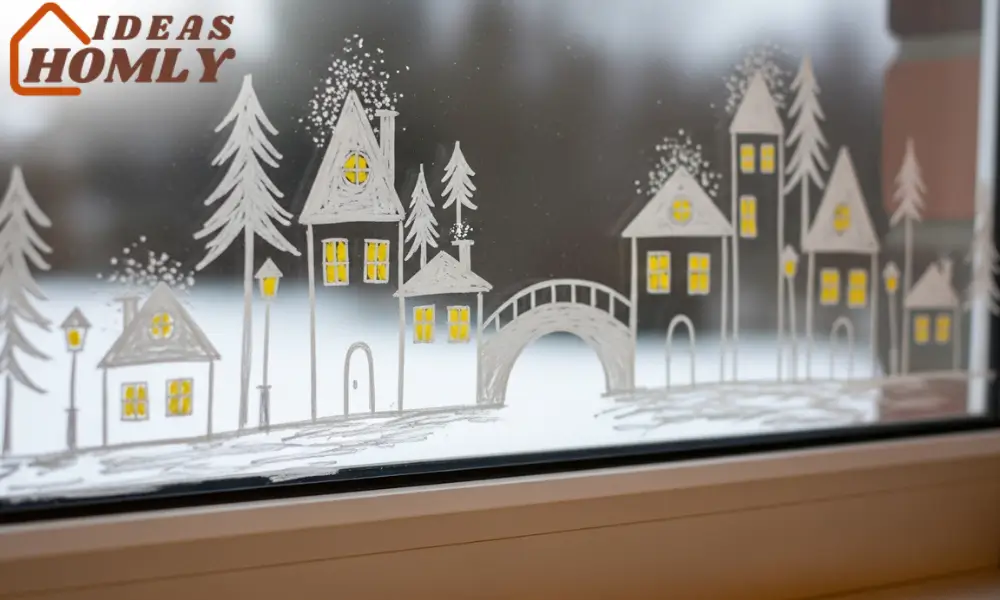
I keep the houses simple with squares, triangles and a few windows. I sometimes add tiny trees or lamp posts between the homes.
When I tried adding a small bridge once, the whole village instantly looked more complete. These small additions bring personality without making the design hard to draw.
I also outline the rooftops with white dots to create a fresh snow look. This detail gives the village a soft winter glow. If I want more depth, I draw the houses at slightly different heights. It creates a layered street view that feels more realistic.
4. Santa Sleigh and Reindeer Silhouette
A silhouette design always brings a bold winter look. I enjoy painting this one because the shapes stay simple while still making a big impact.
When I place Santa near the upper corner of the window, the whole scene feels like he is flying across the glass. This design works well on both small and large windows.

I use black tempera for the sleigh and reindeer because the contrast helps the shapes pop. I keep the lines smooth and avoid too much detail so the silhouette stays clean.
When I add a small moon or a few stars around the scene, it feels more magical. One time I added a faint snowy trail behind the sleigh and the design immediately looked more dynamic.
This scene also works well as a repeating pattern if the window is long. I place Santa on one side and reindeer along the length of the glass. It creates a sense of movement that brings the whole window to life without feeling busy.
5. DIY Snowflake Window Clings for 3D Effect
Window clings add depth without requiring advanced painting skills. I enjoy making these because they feel playful and easy to move around. I create them using thin tempera layers on plastic sheets.
Once dry, they peel off like stickers and cling to the window naturally. This trick makes the whole setup feel more professional without extra effort.

I paint simple snowflakes or tiny winter icons like stars and mini trees. I keep the paint layer even so the clings look smooth on the glass. When I add a little shading around the edges, the shapes appear more dimensional. I also like how these pieces let me rearrange the layout whenever I want a small refresh.
These clings work well when mixed with painted borders. I place a few near the corners or float them near the center for a scattered effect. The 3D look gives the whole window more charm and makes the design stand out even from a distance.
Window Painting Tips from Pros
I picked up a few helpful tips over the years that make the whole process easier. They also help the artwork last longer without smudging.
Prevent Streaking
I always clean the window with warm soapy water and a dry microfiber cloth before painting. Any oil or dust creates streaks. I also let each layer dry before adding details. This small patience trick helps the colors look sharp.
Best Brush Types
Soft round brushes help with curves and outlines. Flat brushes work well for filling wide areas. I avoid stiff brushes because they scrape the paint. The right brush makes painting smoother and easier for beginners.
Layering Techniques
I start with light pencil-like sketches using a faint chalk pen. Then I build color from the background forward. This method keeps the design from looking muddy. I also use thin layers so the paint dries without cracking.
Conclusion
Winter window painting gives me a fun way to refresh my space without spending much. I enjoy how simple supplies can change the feel of a whole room.
These ideas bring character to any home or shop while staying beginner-friendly. Each design creates a seasonal mood that feels bright and welcoming.
I like how this project lets me experiment. Some days I go for a classic snowflake border and other days I paint a full winter village. Even the 3D clings help me switch things up whenever I want a fresh look. This flexibility makes window painting one of my favorite winter traditions.
If you want a seasonal project that feels relaxing and creative, winter window art is worth trying. It gives you a chance to express your style and enjoy the season inside your home.
I always feel a little happier when my windows show a bit of winter charm. It brings warmth to even the coldest days and adds fresh energy to the room.
FAQs
It usually stays bright for a few weeks if applied in thin layers. I clean the glass lightly when any dust builds up. A good primer layer improves how long the paint stays crisp.
Tempera and chalk pens work best because they clean easily and dry fast. I like tempera for bold artwork. Chalk pens give me neat outlines without bleeding.
Kids can paint simple shapes with supervision. I give them stencils so they feel confident. They enjoy drawing snowmen, stars or tiny trees along the edges.
Warm water mixed with dish soap removes most designs quickly. I wipe with a microfiber cloth for a clear finish. Vinegar water helps remove any stubborn bits.