
A plain jack-o’-lantern can sit on your porch and look fine, but a creative face makes people stop and stare. Every Halloween, neighbors compete silently with their pumpkin displays.
Some go for scary, others for funny, but the real magic comes when you try something different. That’s where unique pumpkin face ideas come in handy.
Over the years, I’ve realized that carved pumpkins are more than just seasonal décor. They set the mood for trick-or-treaters, spark conversations, and even make your home feel more festive.
With the right design, your pumpkin can stand out from a row of glowing orange faces and actually get remembered.
In this guide, I’ll share seven pumpkin face carving ideas that are creative, doable, and perfect for anyone looking to add personality to their Halloween decorations. Let’s start with the first two that really push beyond the classic toothy grin.
1. Split-Personality Jack-O’-Lantern (Angel vs Devil)
Nothing gets attention faster than contrast. A pumpkin with half an angel face and half a devil face plays right into that. On one side, carve a soft smile with rounded eyes and maybe even a halo cutout above.
On the other, sharpen the features with angry eyebrows, jagged teeth, and a carved flame effect.
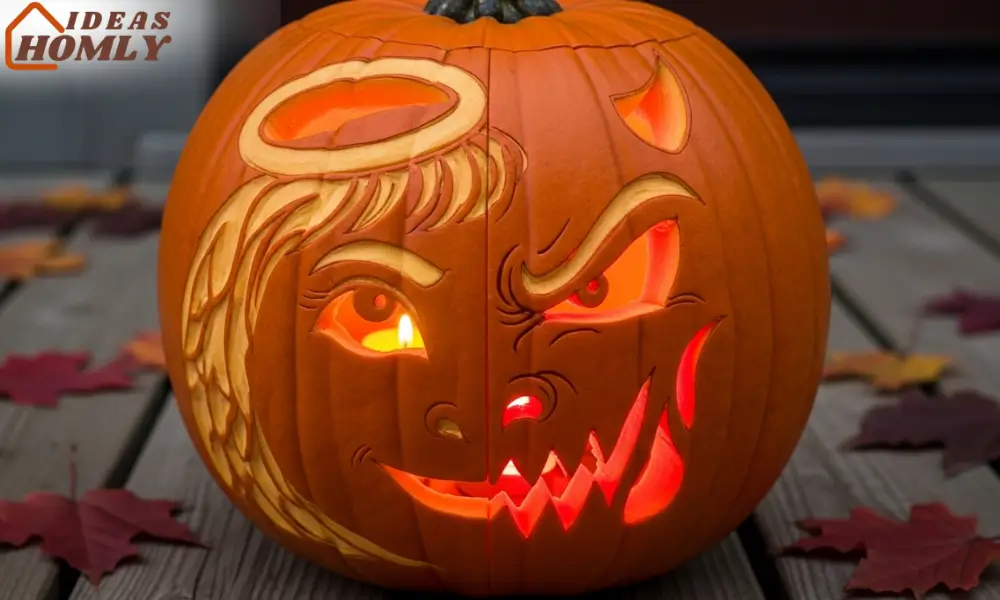
I like this design because it tells a little story. Kids laugh at the split look, adults appreciate the detail, and it glows beautifully at night. The contrast between good and evil in a single pumpkin also makes for a great photo opportunity.
If you want to add more flair, use two candles inside, one with a warm white glow for the angel side, and one with a red or orange LED for the devil side. The different lights make the split more obvious, even from the street.
Quick Tips for the Angel vs Devil Face
- Sketch the design with a marker before carving to balance both sides.
- Keep the angel side smooth with curved lines.
- Make the devil side sharp and edgy for a clear contrast.
2. Zipper Mouth Pumpkin Face
A zipper-mouth pumpkin always gets reactions. It looks like the pumpkin is keeping a secret, or worse, hiding something spooky.
To carve this, start with round eyes and maybe a worried expression. Then, instead of carving a normal mouth, carve a thin slit and attach an actual zipper across it.
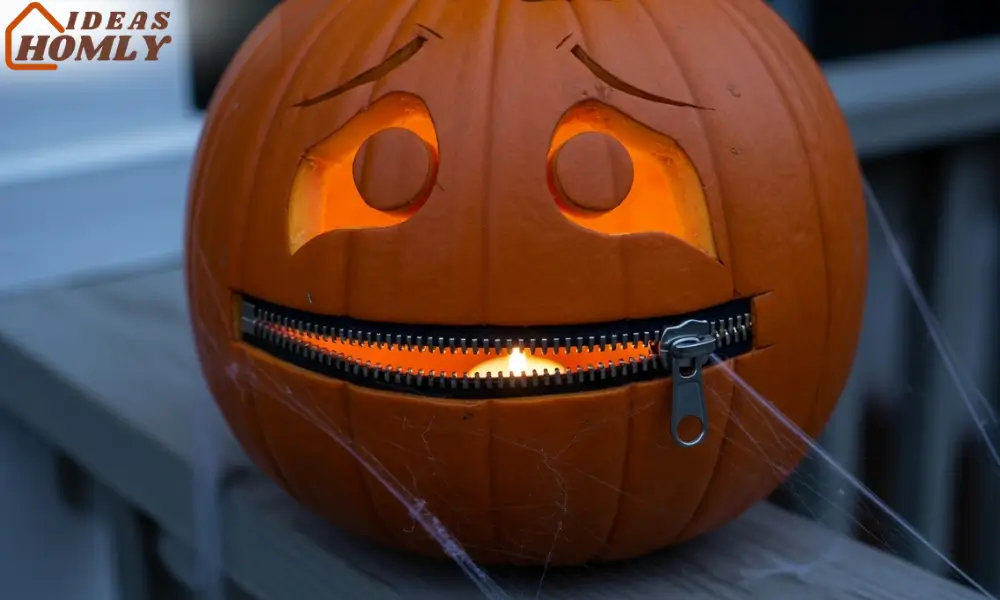
I first saw this design at a Halloween party, and it instantly became my favorite. It’s creepy without being over-the-top, and it adds a real object that makes people do a double-take.
You can buy cheap zippers from a craft store, cut them to size, and glue or pin them in place.
If you prefer a carved-only version, carve zipper teeth along the slit so it looks like a giant stitched mouth. Paint the teeth silver for a metallic effect. Either way, it creates a face that looks straight out of a Halloween horror flick.
Why It Works So Well
- The zipper idea feels unique compared to traditional pumpkin smiles.
- It gives you flexibility, either realistic with an actual zipper or artistic with carved zipper teeth.
- Works well in pairs if you place two zipper mouth pumpkins side by side.
3. Whistling Pumpkin Face with Sound
A pumpkin that looks like it’s whistling feels both funny and a little eerie. The trick is to carve a small round mouth, almost like an “O” shape, and angle it slightly upward. Add curved eyes to give the impression that the pumpkin is whistling a tune.
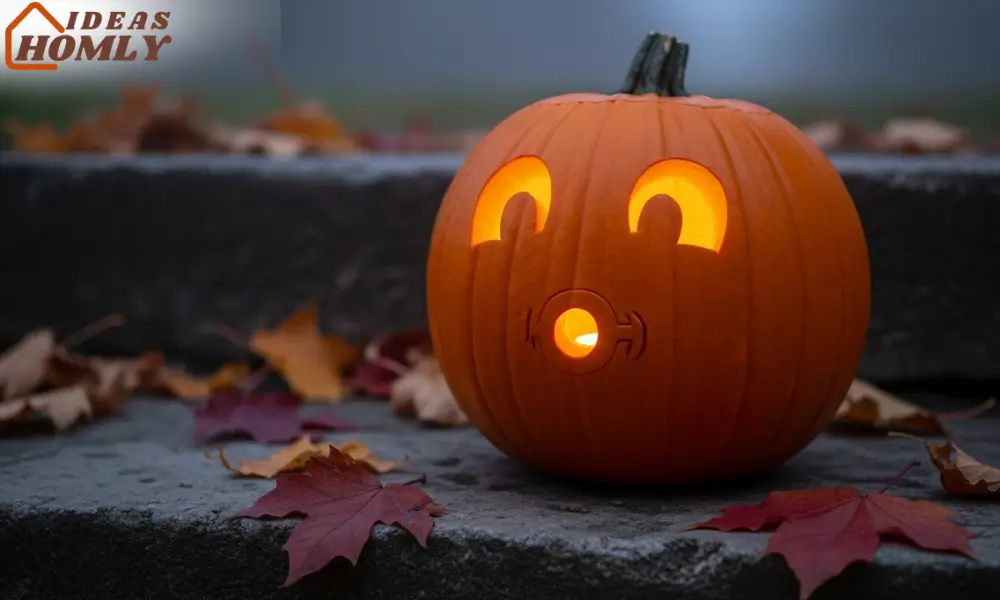
To make this design even better, place a small battery-powered whistle toy or sound module inside. The combination of the carved “whistle face” and an actual faint whistling sound makes it stand out among typical jack-o’-lanterns.
I’ve noticed kids especially love this one because it gives the pumpkin a personality. It’s not scary, it’s playful—like a pumpkin with a secret melody.
Variation idea: Instead of a whistle sound, tuck a mini Bluetooth speaker inside and play spooky wind noises. That way, the carved mouth and the sound align perfectly.
4. Pirate Eyepatch Pumpkin
The pirate pumpkin face is a Halloween classic, but the eyepatch twist makes it fun. Carve one big expressive eye with a cheeky grin, and then cover the other eye with an actual eyepatch.
You can either buy a cheap costume patch or make one from black felt or cardboard.
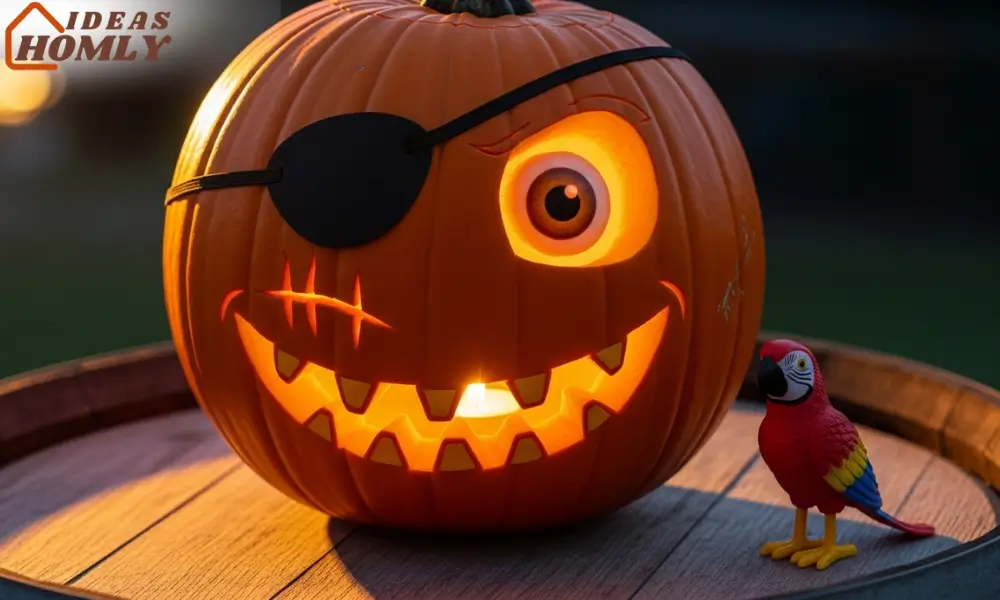
When I made this design, I also carved a scar line running down from the patch, just to give it a rougher pirate look. A few triangle teeth carved in different sizes finish the effect and make the grin look mischievous.
For the lighting, try a flickering LED candle inside. The flicker makes it look like the pirate is laughing under torchlight, which adds to the theme. Place a plastic toy parrot next to it if you want to go all-in.
Why this pumpkin works well:
- It’s kid-friendly, not too creepy.
- Easy to pull off, even if you’re new to carving.
- Adds humor to a front porch filled with scarier pumpkins.
5. Stitched-Smile Ragdoll Pumpkin
This one feels straight out of a Tim Burton film. The stitched-smile design involves carving a wide grin and then etching thin lines across it to make it look sewn shut. Pair that with large, round eyes carved or painted on, for that ragdoll effect.
I love this idea because it blends creepy and cute at the same time. Depending on how wide you make the smile, it can look friendly or unsettling. If you want to go darker, make the teeth sharp and add a stitched scar above the eyebrow.
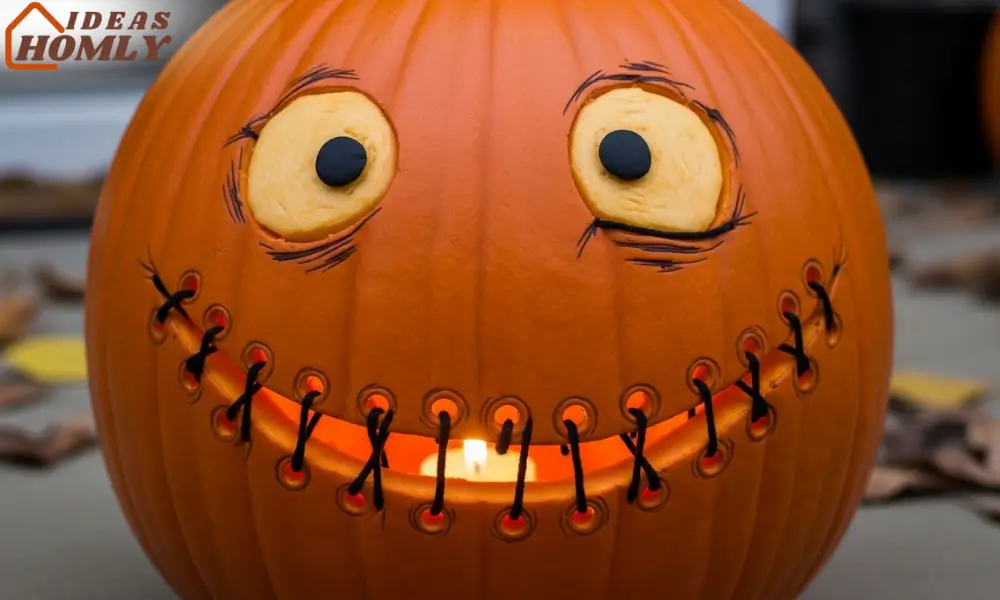
You can even use black yarn or thin rope to create “actual stitches.” Just poke small holes along the carved grin and thread the yarn through. When lit up, the pumpkin gives off a creepy puppet-like charm that’s perfect for Halloween night.
Pro tip: Use a small carving tool or even a woodburning pen to create fine stitch details. The extra effort pays off when people lean in to look closer.
Mini Comparison
| Pumpkin Face Idea | Difficulty Level | Best For |
|---|---|---|
| Whistling Face | Medium | Families who like playful pumpkins |
| Pirate Eyepatch | Easy | Kids and quick porch décor |
| Stitched-Smile Ragdoll | Medium-Hard | Fans of spooky yet stylish designs |
6. Clockwork Cyborg Pumpkin Face
A pumpkin with a cyborg twist instantly grabs attention. To create this, carve one side with a normal jack-o’-lantern eye, and on the other, cut out a round, mechanical-looking socket. Add small circular holes around it to mimic bolts.
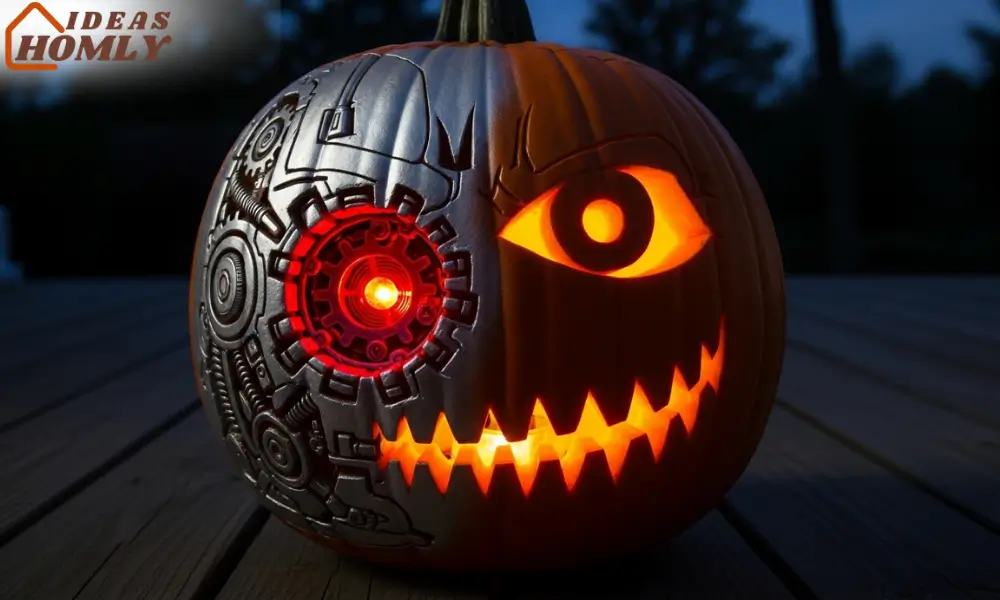
I once used silver spray paint on part of the pumpkin’s surface to give it that metallic “cyborg” vibe. Pair that with a red LED light inside the carved socket, and suddenly your pumpkin looks like it has a robotic eye scanning the crowd.
For the mouth, carve jagged mechanical-looking teeth or leave it open with wires dangling from inside. Even old watch gears or toy parts glued around the carving can boost the effect. It’s a fun blend of sci-fi and Halloween.
Why it stands out: It merges the spooky tradition of pumpkin carving with the techy feel of a robot face. Kids call it the “Terminator pumpkin,” and adults can’t help but take photos.
7. Peek-Inside Hidden Face Pumpkin
This design plays on curiosity. Instead of carving the face fully on the outside, cut a large opening like a cracked wall, and then carve a smaller pumpkin face inside. When lit, it looks like a hidden character is peeking out.
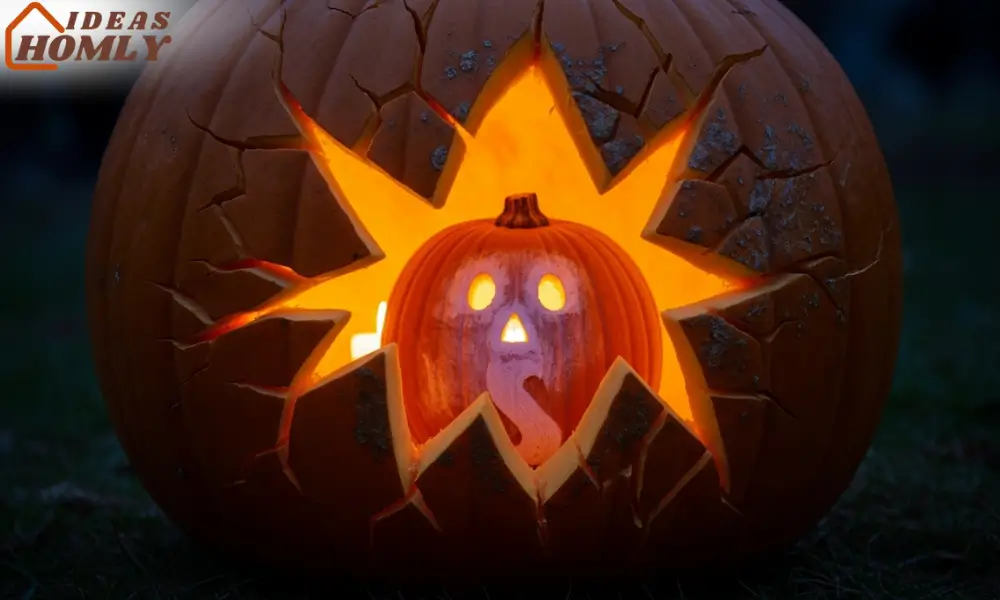
I like this one because it’s not only clever but also feels interactive. Trick-or-treaters lean closer to see what’s inside, and the layered lighting effect adds drama. You can also paint the inner pumpkin white or green to give it a ghostly look.
If you don’t have a smaller pumpkin, use a foam ball or even carve a fake pumpkin and place it inside. This layered setup makes your porch decoration look more like an art project than just another jack-o’-lantern.
Tools Needed for Precision Face Carving
Carving detailed pumpkin faces requires more than a kitchen knife. I’ve learned that the right tools save time and reduce frustration.
Quick Tool Checklist
| Tool | Why It Helps |
|---|---|
| Pumpkin carving saws | Thin blades for clean, controlled cuts |
| Scoop with serrated edge | Removes seeds and pulp quickly |
| Clay sculpting tools | Perfect for etching details like stitches or bolts |
| Pushpins & thumbtacks | Great for marking outlines before cutting |
| LED candles & lights | Safer than real candles and add color effects |
Investing in a small carving kit usually costs less than a Halloween costume, but it makes every design easier to pull off.
Conclusion
Carving pumpkins is more than a Halloween tradition; it’s a chance to show creativity on your doorstep.
From the split-personality design to the hidden-face pumpkin, each idea adds something fresh to the classic jack-o’-lantern. Some are funny, some are creepy, and a few lean into sci-fi vibes.
The best part is that none of these ideas require professional skills. With patience, the right tools, and a little imagination, your pumpkin can turn heads and become the star of your street this Halloween.
So, if you’ve been tired of the same toothy grins, try one of these seven unique faces. They’re guaranteed to spark conversations, and maybe even a little friendly competition with your neighbors.
FAQs
I usually coat the carved edges with petroleum jelly to slow down drying. Storing the pumpkin in a cool, shaded spot during the day also helps it last longer. Some people even mist it with a water-and-lemon solution to keep mold away.
Yes, combining carving and paint works beautifully. For example, I’ve painted eye patches, scars, and even flames instead of carving them. It saves time and adds more color variety.
Medium-sized pumpkins with smooth skin are my go-to. They’re not too heavy to work with and don’t have as many deep ridges that can mess up small details. Smaller pumpkins are better for layering projects like the hidden-face design.
I prefer LEDs because they’re safer and come in different colors. A red LED makes a cyborg pumpkin scarier, while a flickering yellow one gives the pirate pumpkin a torchlit effect. They also last longer than tea candles.
I always sketch the face with a washable marker first. That way, I can adjust proportions and try different expressions without damaging the pumpkin. Templates work too, but freehand sketching gives you more creative freedom.