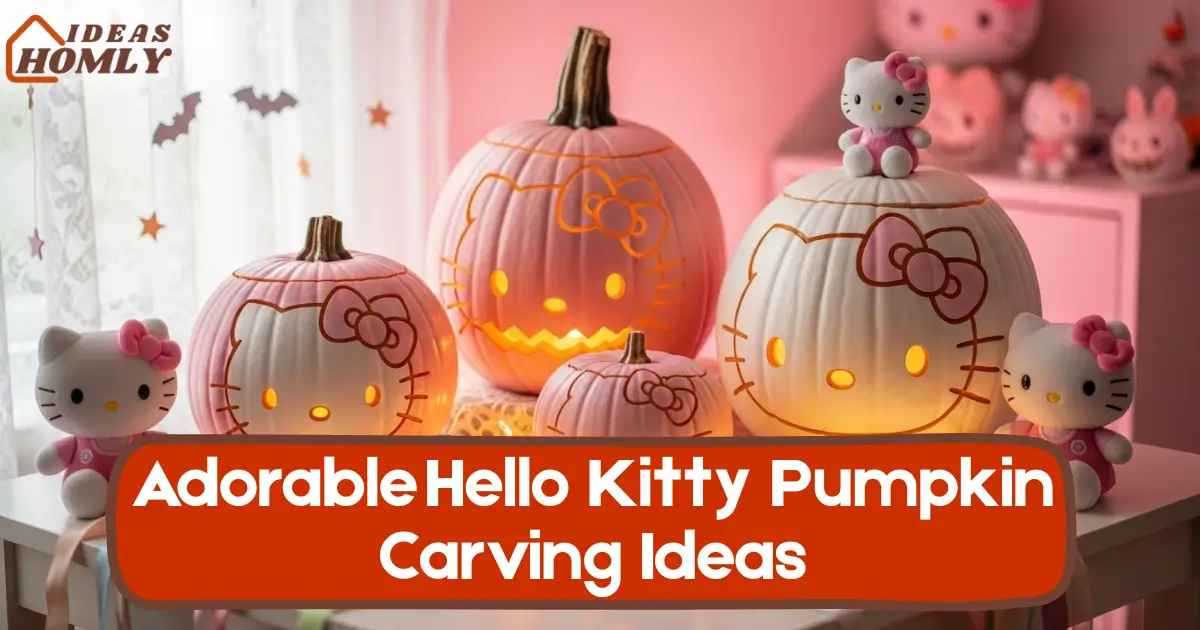
If you’re searching for Hello Kitty pumpkin carving ideas, you’re probably someone who appreciates the mix of cute and creative. I totally get it, carving pumpkins doesn’t always have to be spooky.
Sometimes, it’s just about making something adorable for your porch, kids’ room, or a themed Halloween corner that melts hearts instead of scaring them.
This year, I decided to give my Halloween a soft, pastel twist with Hello Kitty-inspired designs. The best part? These ideas are not just eye-catching but also super doable, even if you’ve never tried detailed pumpkin art before.
Whether you’re crafting with kids, gifting a pumpkin to a Hello Kitty fan, or simply adding charm to your fall décor, these carving ideas are sure to grab compliments.
You’ll find simple steps, practical carving tips, and some finishing suggestions that make your pumpkins look like they came straight from Sanrio’s creative studio.
Choosing the Right Pumpkin & Tools
The base of every successful pumpkin carving project starts with, you guessed it, the right pumpkin. When it comes to Hello Kitty pumpkins, the smoother and paler the surface, the better.
I’ve noticed that white pumpkins (like Lumina or Casper varieties) work perfectly for cute themes because they mimic Hello Kitty’s signature soft tone.
If you can’t find white pumpkins, don’t worry. A light orange or cream-toned pumpkin can still work beautifully. Just make sure it’s symmetrical and has a flat side for carving; that’s where your design will shine.
For tools, skip the bulky kitchen knives. Go for mini carving tools or X-Acto knives that handle delicate cuts. I personally love using:
- Needle tools or fine tip awls for outlining Hello Kitty’s bow and whiskers
- Clay loop tools for shaving thin layers to create depth without cutting through
- Pumpkin saws with serrated edges for precise shapes
It’s also smart to keep a small brush handy to remove pulp from fine details as you work. A clean surface keeps your design neat and helps light shine evenly through.
Here’s a quick tool comparison table to make the selection easier:
| Tool Type | Best For | Pro Tip |
|---|---|---|
| Mini Saw | Cutting main outlines | Works great for Hello Kitty’s face or bow outline |
| Needle Tool | Small features | Ideal for whiskers and eyes |
| Clay Loop | Shallow carving | Perfect for soft shading around features |
| Paint Brush | Cleaning cuts | Keeps visibility clear during carving |
Hello Kitty Carving Concepts
This is where the fun begins, carving ideas that actually make your pumpkin look irresistibly cute. I’ve tested a few variations, and these four Hello Kitty pumpkin carving designs stood out as both practical and adorable.
1. Bow-Only Negative Space
If you want something simple but recognizable, carve only Hello Kitty’s bow using a negative space technique. Instead of cutting it all the way through, carve just deep enough to let light glow softly from underneath.

Start by sketching the bow shape slightly off-center at the top. Shave away the outer areas while leaving the bow shape intact. The glowing halo effect gives a minimalist yet charming look, kind of like Hello Kitty’s essence without her full face.
For extra flair, you can paint the bow with pink acrylic and add a touch of glitter. I once used a metallic rose shade, and it looked beautiful in candlelight.
Lighting Tip: Use a warm LED candle instead of real flame to prevent heat from dulling the bow’s edges.
2. Witch-Hat Kitty
This one’s a Halloween favorite in my house. Picture Hello Kitty wearing a little witch hat, cute with just the right hint of spooky.
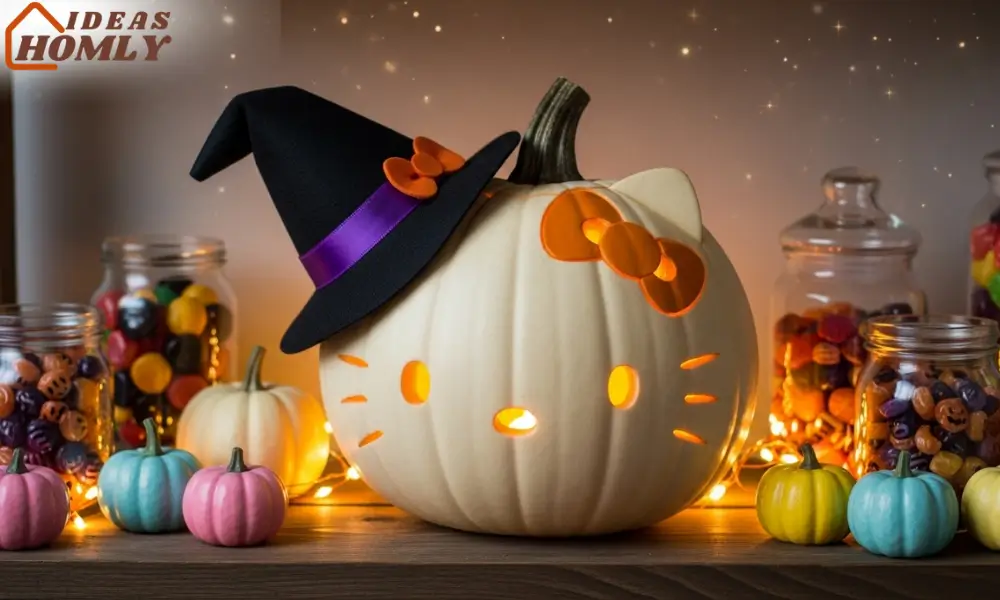
Begin with a stencil of her classic head shape (you can find many outlines online or trace from a printout). Carve her face first, keeping the eyes and whiskers minimal, then add a small tilted witch hat above the ear.
Paint the hat black or purple, and glue a mini orange ribbon around it. It gives such a sweet seasonal vibe, especially when placed on a side table with soft fairy lights.
Pro Tip: If carving the hat seems tricky, paint it instead. The mix of paint and carving adds depth without too much effort.
3. Milk Bottle Silhouette
This idea is pure nostalgia. Remember those tiny Hello Kitty milk bottles from the old merchandise line? You can turn that into a pumpkin design.
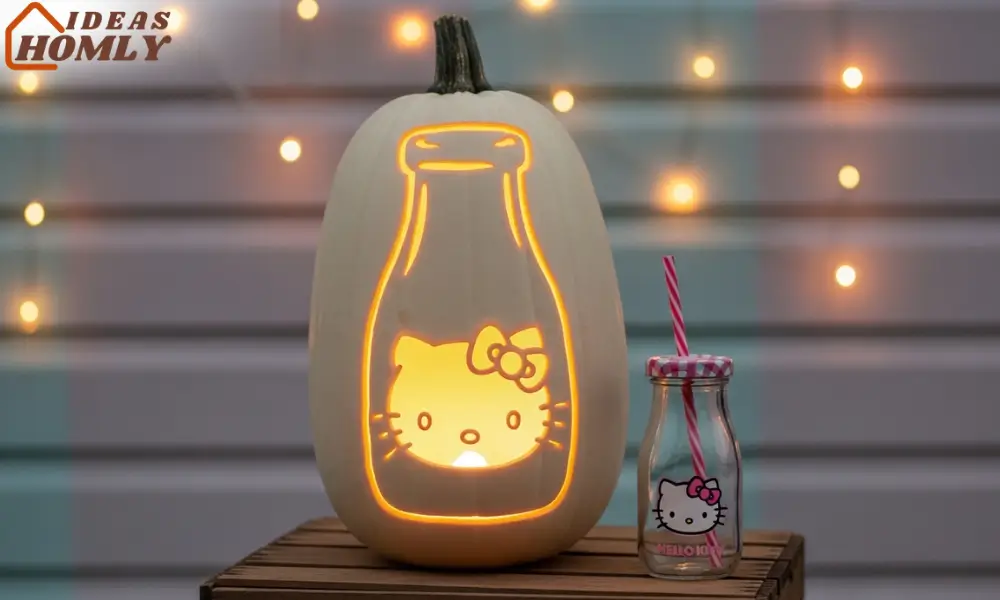
Choose a tall pumpkin and sketch the outline of a milk bottle shape with Hello Kitty’s face inside. Carve the bottle edge lightly and make the face details slightly deeper so that her eyes glow brighter than the bottle frame.
The result looks amazing when backlit, like a glowing vintage bottle with Hello Kitty’s charm inside. It’s one of those designs that looks simple but turns heads instantly.
4. Candy-Corn Cheeks
This design brings a splash of color to the traditional orange pumpkin. Instead of heavy carving, I used shallow engraving and paint layering.
Carve out Hello Kitty’s eyes, nose, and bow, then paint her cheeks using candy corn shades, yellow at the bottom, orange in the middle, and white on top.
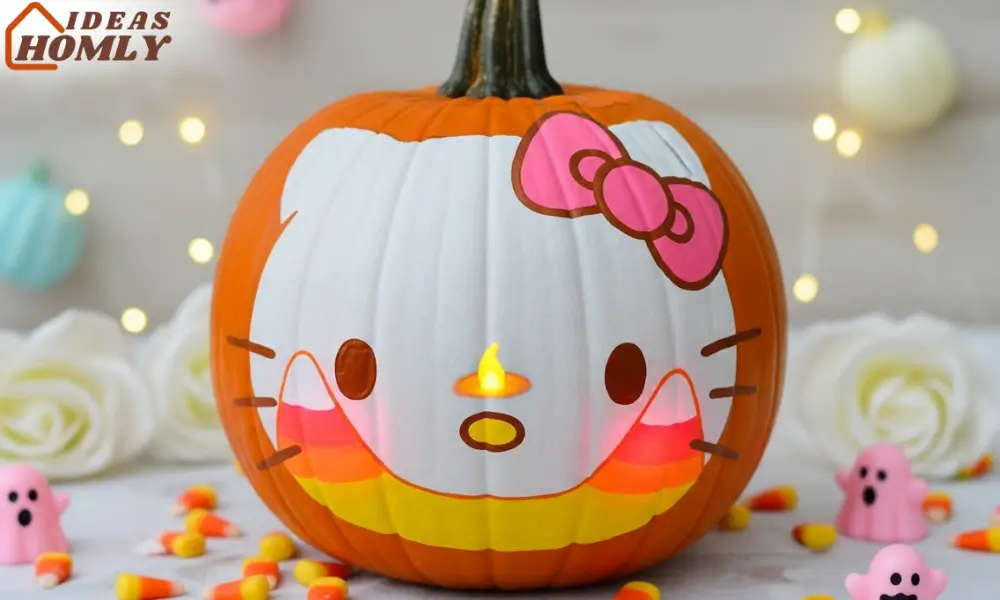
When you light it up, the soft gradients glow beautifully. This one’s especially great if you want a mix of painting and carving, a fun hybrid style that kids can safely help with.
Pro Tip: To keep the paint vibrant, seal it with a clear coat once it dries.
Coloring & Finishing Touches
Once your carving is done, the real charm comes alive with color and texture. I’ve learned that the finishing stage can make or break the look of a Hello Kitty pumpkin.
A few small touches can turn a plain pumpkin into something you’d actually want to keep as a decoration even after Halloween.
Let’s start with painting and coloring. Since Hello Kitty is known for her soft pinks, whites, and pastels, I prefer using acrylic paints because they dry quickly and hold color beautifully on pumpkin skin.
If you carved a white pumpkin, keep most of it natural and paint only her bow or hat. For orange pumpkins, add a thin coat of white paint first before working on the details; it creates a bright, clean surface.
When it comes to markers, go for oil-based ones for outlining. I use them to define the whiskers, eyes, and the bow’s edges.
The lines stay crisp even if the pumpkin sweats a little, which can happen in warm weather. Avoid water-based markers because they tend to smudge.
A little trick I picked up: dip a cotton swab in baby oil and gently rub it across the carved areas once dry. It gives a slight sheen and makes the pumpkin look fresh longer.
Whisker Wires and Bow Embellishments
I always feel like Hello Kitty isn’t complete without her whiskers standing out. Instead of carving them fully, I stick thin black wires (like craft or floral wire) into small pre-drilled holes where the whiskers go. It adds dimension and a bit of realism.
For the bow, you can get creative; fabric bows, mini sequins, or even ribbon scraps look adorable. I once glued a small velvet bow on a pumpkin, and it honestly looked like a collectible.
Just make sure the embellishments don’t sit near candlelight if you’re using real candles. For safety, I stick to battery-operated LED candles or fairy lights inside the pumpkin. They last longer, and you don’t have to worry about melted decor.
Light Filtering Tricks
Lighting can make a huge difference. I like experimenting with shallow vs deep cuts to control how much light comes through each part of the design.
- Shallow cuts (scraping just the surface) create a soft, glowing effect great for faces or bow outlines.
- Deep cuts allow bright, defined light to shine through, ideal for the eyes or bottle silhouette.
If you’re placing your pumpkin indoors, soft fairy lights give a magical touch. Outdoors, I’d suggest a small tea light or two LEDs for even brightness.
Here’s a quick light comparison chart you might find handy:
| Lighting Option | Brightness | Safety | Best For |
|---|---|---|---|
| LED Candle | Medium | Very Safe | Indoor setups |
| Tea Light | High | Needs supervision | Outdoor displays |
| Fairy Lights | Soft glow | Safe | Tiered decorations |
Setting Up for Display
Now that your Hello Kitty pumpkins are finished and glowing beautifully, it’s time to show them off.
Setting the right display scene makes a big difference in how your carving is perceived. I like to think of this step as styling a tiny Hello Kitty corner for Halloween.
Tabletop Setups & Tiered Arrangements
For a tabletop display, I usually group my pumpkins by size, one main large Hello Kitty design in the center and two smaller ones on the sides.
It adds balance and looks great in photos. Placing them on a soft pink or white cloth background makes the colors pop instantly.
If you have more than one design, go for a tiered arrangement. Stack pumpkins using small wooden crates or stands.
I’ve even used cake stands to elevate smaller pumpkins. It’s an easy way to make them look like part of a themed centerpiece, especially for parties or kids’ events.
A small bowl of wrapped candies or pastel LED string lights around the base completes the look. It’s cute, festive, and kid-approved.
Backdrop & Props for Photos
A good backdrop transforms your display from simple to stunning. I like using soft pink tones, white lace, or even fabric with polka dots to match Hello Kitty’s classic style.
If you’re into taking pictures for Pinterest or Instagram (and who isn’t these days), position your lighting slightly to the side so it highlights the carved features. Soft side lighting creates beautiful shadows that accentuate the details.
Props also make a big difference. Place a Hello Kitty plushie, a few mini milk bottles, or bow-shaped confetti nearby. For outdoor setups, fairy lights and artificial flowers add warmth and keep the vibe cheerful.
Here’s a quick example setup table:
| Display Type | Best Location | Recommended Props | Lighting Style |
|---|---|---|---|
| Tabletop | Living room or shelf | Plush toy, bow ribbons | Warm white LED |
| Outdoor Porch | Entry area | Fairy lights, small pumpkins | Tea lights |
| Tiered Stand | Party corner | Mini candy jars | Pink fairy string lights |
Extra Tip: Theme Extension
You can even extend your Hello Kitty pumpkin theme into the rest of your décor. Add matching napkins, cups, or coasters if you’re hosting a Halloween get-together.
I’ve also seen people paint tiny pumpkins in pastel pink and scatter them around as fillers. It keeps the theme cohesive without going overboard.
Conclusion
So there you have it, four adorable Hello Kitty pumpkin carving ideas that mix cuteness, creativity, and just the right touch of Halloween charm.
Whether you went for the Bow-Only Negative Space, the Witch-Hat Kitty, the nostalgic Milk Bottle Silhouette, or the cheerful Candy-Corn Cheeks, each design brings its own personality to your fall décor.
What I love most about these projects is that they’re simple enough to make with family yet impressive enough to display proudly. The key is balance; soft colors, gentle lighting, and small details that give your pumpkin a cozy, character-filled glow.
Every year, I notice these friendly, pastel pumpkins stand out among the darker Halloween décor around my neighborhood. They make people smile, and that’s the magic of Hello Kitty.
Whether you’re decorating for a party, a photo backdrop, or a quiet corner at home, these pumpkin designs add a sweet, nostalgic charm that’s hard to miss.
If you’ve never tried themed carving before, this might just be your new seasonal favorite. And once you start, don’t be surprised if you find yourself carving an entire Sanrio pumpkin collection next fall!
FAQs
Smooth-surfaced pumpkins like Casper or Lumina work beautifully. Their pale tone lets pastel colors stand out and gives a clean finish.
If you only have orange pumpkins, painting them with a thin white base coat before carving gives a similar look.
Absolutely! Kids can handle parts like painting, gluing bows, or placing whisker wires. For carving itself, I recommend adults handle the knife work while kids focus on decorating and coloring; it becomes a fun team project.
After carving, coat the edges with petroleum jelly or a pumpkin preservative spray. This keeps it from drying out too quickly. Also, avoid placing it in direct sunlight during the day, and bring it indoors overnight if possible.
Battery-operated LED candles or fairy lights are best. They don’t produce heat, last longer than real candles, and give that warm, cozy glow perfect for Hello Kitty-themed pumpkins.
Yes! They actually blend beautifully with soft pastel or kawaii-style Halloween decorations. Add mini ghost figurines, pink bats, or candy-shaped lights to create a mix of cute and spooky. It makes your décor more unique and photo-friendly.