I know your current furniture looks like it survived a prehistoric era or a very confused yard sale. Giving your old pieces a fresh look saves a massive amount of money compared to buying new.
I have spent years testing these methods to see what actually sticks and what falls apart after a week. You do not need professional skills to make a thrifted dresser look like a high-end designer piece.
My guide focuses on simple techniques that use affordable tools to get professional results without the headache. Let’s stop staring at that peeling laminate and actually do something productive with our weekend for once.
Budget Friendly Strategies for Successful Furniture Restoration
The first thing you need to realize is that most “ruined” furniture is just one good sanding session away from greatness. I always start by checking the structural integrity of a piece before I waste a drop of expensive paint.
Cleaning your furniture with a heavy duty degreaser is the most overlooked step in the entire makeover process. If you skip the cleaning, your beautiful new finish will peel off faster than a cheap sunburn in July.
You should always invest in a decent brush because using a dollar store version will leave bristles stuck in your finish forever. A smooth surface is the difference between a piece looking “homemade” and looking like it came from a gallery.
I recommend seting up a dedicated workspace with plenty of ventilation so you don’t accidentally pass out from the fumes. Trust me, your family will appreciate you not painting the kitchen table while they are trying to eat dinner.
1. Using Chalk Paint for a Matte Vintage Aesthetic
I love using chalk paint because it lets me skip most of the annoying prep work that traditional oils require. You can usually paint directly over old finishes without spending five hours sanding the wood down to its soul.
The finish comes out incredibly matte and velvety, which hides all those little dents your kids or pets left behind. It dries remarkably fast, so you can finish an entire coffee table makeover before your favorite show ends.
I usually apply a clear wax over the dried paint to protect the surface from water rings and general life chaos. Without the wax, the paint feels a bit chalky and picks up every fingerprint like a crime scene investigator.
You can even lightly sand the edges after painting to create a distressed look that makes people think it’s an antique. It is the easiest way to pretend you have a refined taste for history without actually owning anything old.
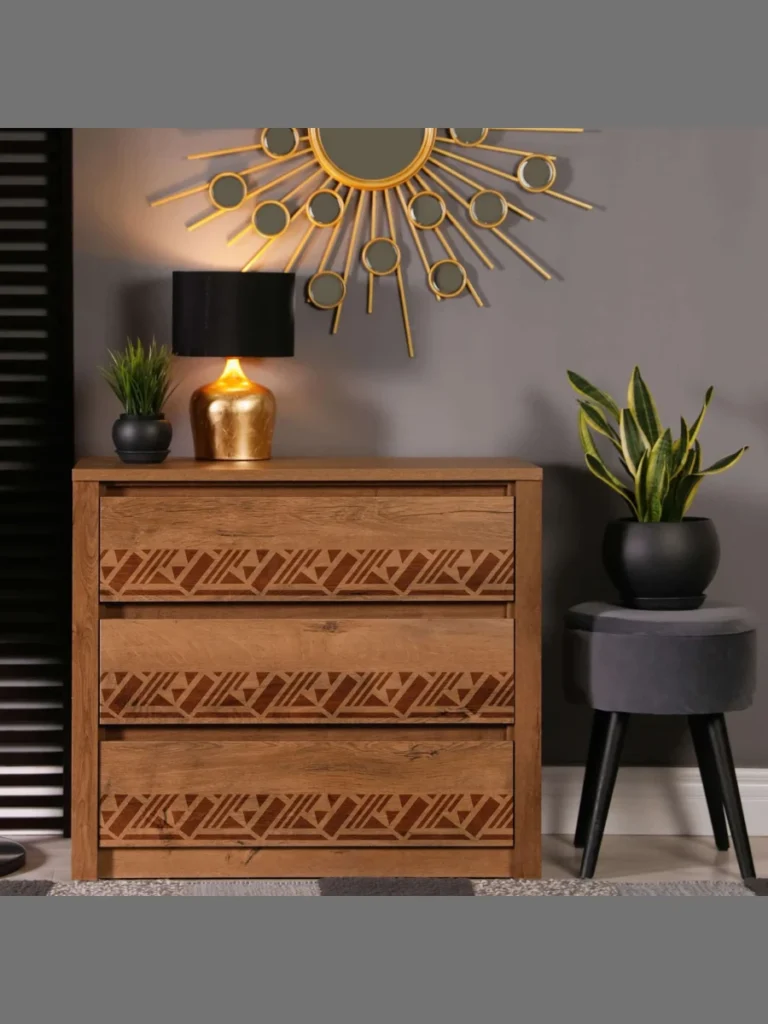
2. Replacing Hardware for a Modern Designer Look
Changing the knobs and pulls on a dresser is the ultimate lazy person’s way to achieve a high-end furniture makeover. Most stock hardware looks like it was chosen by someone who hates joy, so swapping it out is vital.
I usually look for heavy brass or matte black handles to give a basic IKEA piece some much needed weight. You would be surprised how a ten dollar set of handles makes a cheap cabinet look like a luxury item.
If the new hardware doesn’t fit the old holes, just fill the gaps with wood putty and drill fresh spots. It takes about ten minutes of extra effort but allows you to use those trendy long bar pulls everyone loves.
I always keep a small collection of unique vintage knobs I find at thrift stores for these specific weekend projects. It adds a personal touch that ensures your furniture doesn’t look exactly like every other house on the block.
3. Applying Peel and Stick Wallpaper to Drawer Fronts
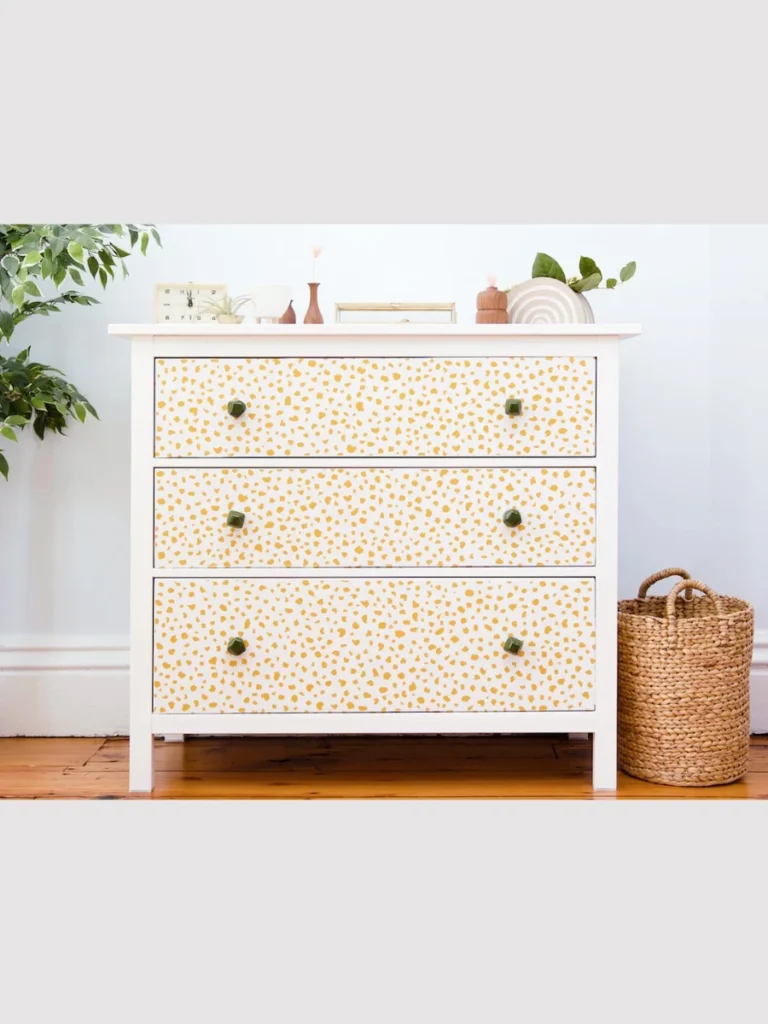
Adding patterns to the front of your drawers is a brilliant way to hide deep scratches or boring wood grain. I prefer using peel and stick wallpaper because it is much less messy than traditional decoupage with liquid glue.
The key is to measure twice and cut once, or you will end up with a crooked floral pattern that hurts. I use a sharp craft knife to trim the edges perfectly flush with the wood for a seamless appearance.
This technique works wonders on the inside of bookshelves to add a pop of color when people look closely. It creates a layered look that makes your styling efforts seem way more professional than they actually are at heart.
If you get tired of the pattern next year, you can just peel it off without damaging the furniture underneath. It is the perfect solution for those of us who have commitment issues when it comes to interior design.
4. Refinishing Table Tops with Natural Wood Stain
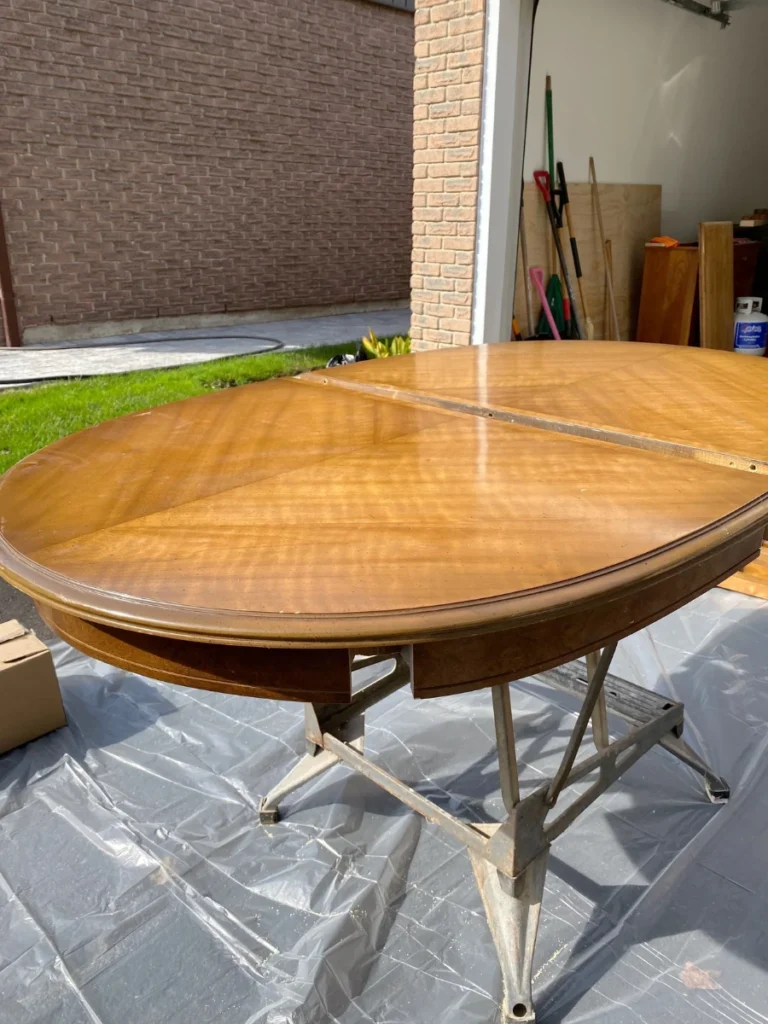
I often find that the base of a table is fine, but the top looks like a used cutting board. Sanding back the top to reveal the natural grain is a classic move that never goes out of style.
You need to work through different grits of sandpaper to get a surface that feels as smooth as polished glass. Applying a fresh stain allows you to match the piece to the other wood tones already in your room.
I prefer water based stains because they don’t smell like a chemical factory and they dry in a reasonable amount of time. Always wipe away the excess stain quickly to avoid dark blotches that look like you spilled coffee on the wood.
Finish the job with a few coats of polyurethane to ensure the wood can handle spills and daily wear and tear. A natural wood top paired with a painted base is a timeless look that fits almost any decor style.
5. Adding Trim and Molding for Architectural Detail
Plain flat doors on cabinets can look a bit sad and unfinished if you don’t give them some character. I like to glue thin strips of wood molding onto the faces to create a sophisticated “shaker” style look.
You can buy pre-cut trim at most hardware stores and attach it with a bit of wood glue and nails. It instantly adds depth to the piece and makes a boring boxy cabinet look like a custom built-in.
Make sure you use a miter box to get those 45-degree angles perfect, or the corners will look quite amateur. Filling the seams with a little bit of caulk before painting makes the trim look like it was always there.
This is my favorite trick for turning basic plywood furniture into something that looks like it cost a month’s rent. It provides that architectural interest that usually only comes with very expensive, heavy furniture pieces found in high-end boutiques.
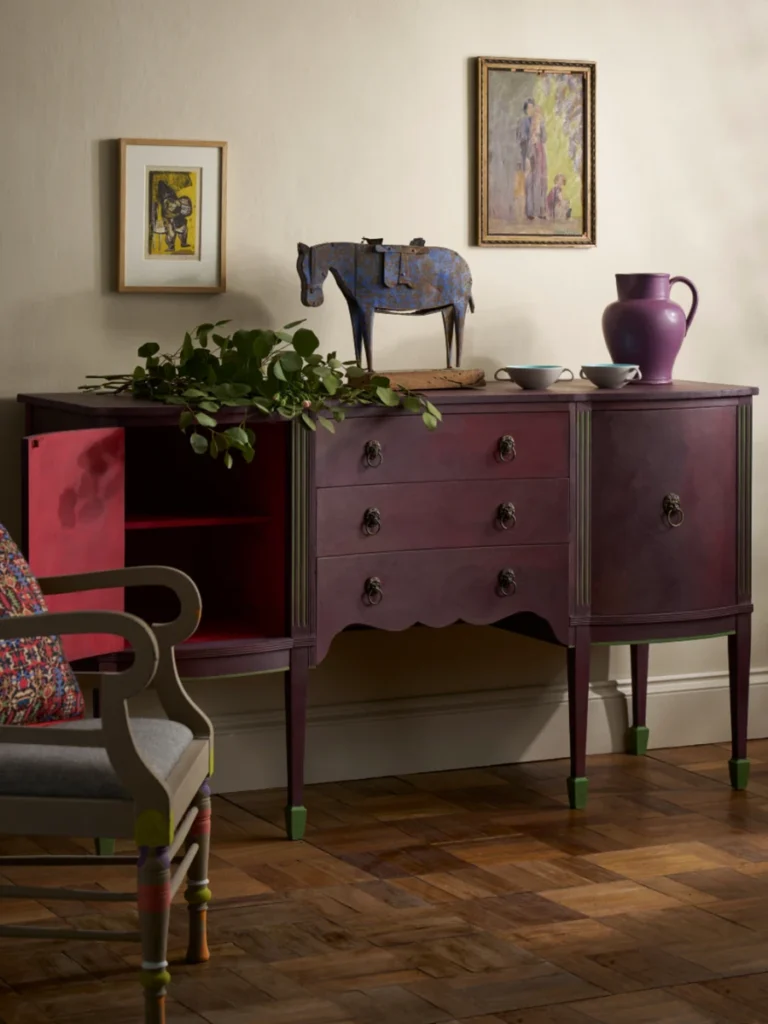
6. Distressing Paint for a Rustic Farmhouse Style
I enjoy distressing furniture because it means I can stop worrying about making the paint look absolutely perfect. You purposely sand away bits of paint on the edges to mimic years of natural wear and tear.
This technique works best on pieces with lots of curves or carved details where the wood can peek through. It creates a cozy vibe that makes a room feel lived in rather than looking like a sterile showroom.
I usually apply two different colors of paint so that the bottom layer shows through when I start sanding. It adds a level of depth that makes the “fake” aging look much more authentic to the casual observer.
You should focus your sanding on areas that would naturally get bumped, like corners, handles, and the bottom legs. Overdoing it can make the piece look like it survived a house fire, so keep your movements light.
7. Geometric Stenciling for a Bold Modern Statement
Stenciling is a fantastic way to add a custom pattern to a plain tabletop without needing any actual artistic talent. I use low-tack painter’s tape to hold the stencil down so the paint doesn’t bleed underneath the edges.
You want to use a very dry brush or a foam roller to apply the paint in thin, even layers. If you load up the brush with too much paint, it will definitely seep under the plastic and ruin.
I find that metallic golds or deep navy blues work wonders for creating a high-end geometric look on dark wood. It turns a boring piece of furniture into a focal point that starts conversations whenever you have guests over.
Once the paint is dry, I peel back the stencil slowly to reveal the crisp lines hiding underneath the mess. It is an incredibly satisfying process that makes you feel like a professional designer for about twenty minutes.
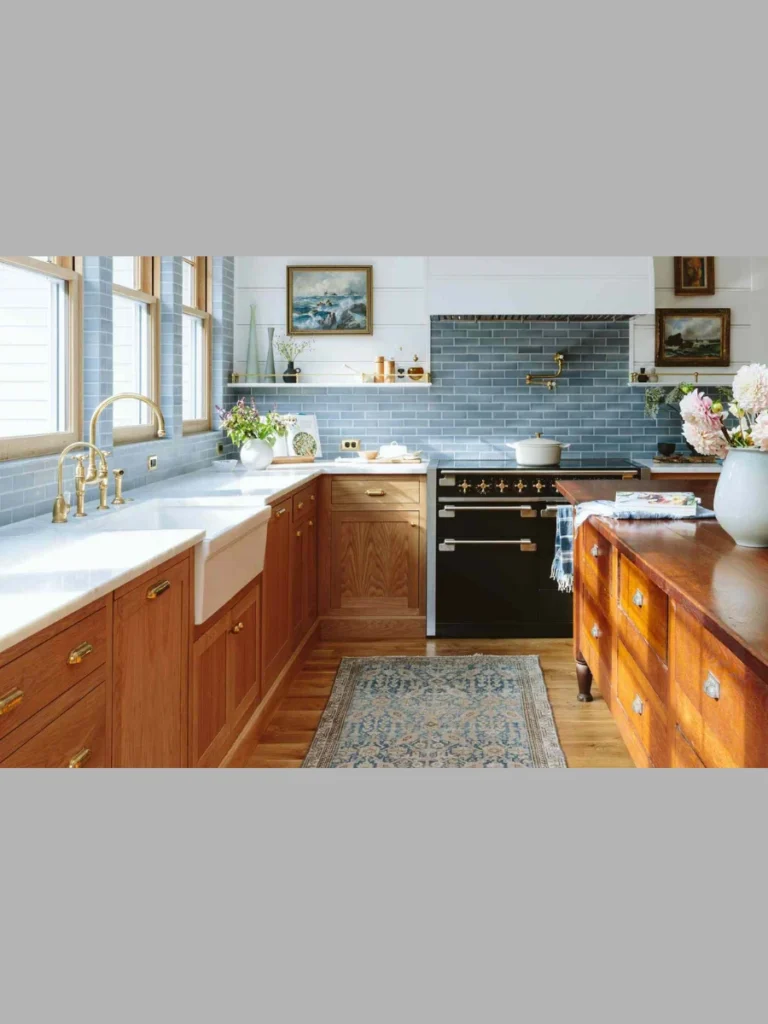
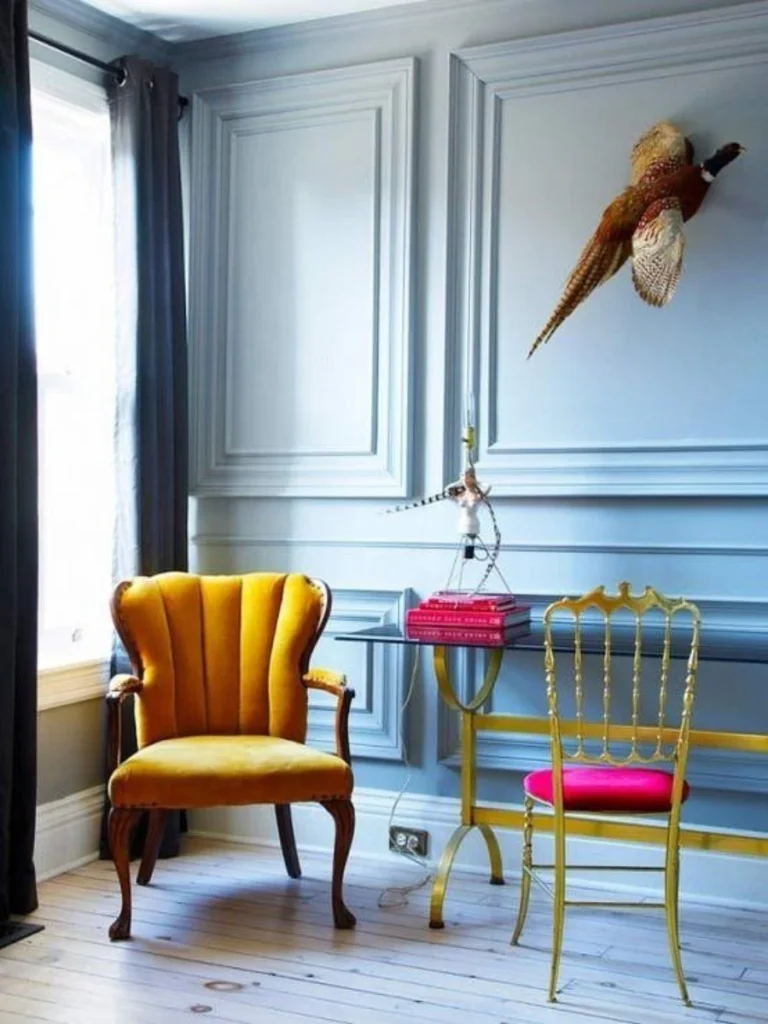
8. Reupholstering Chair Seats with Trendy New Fabric
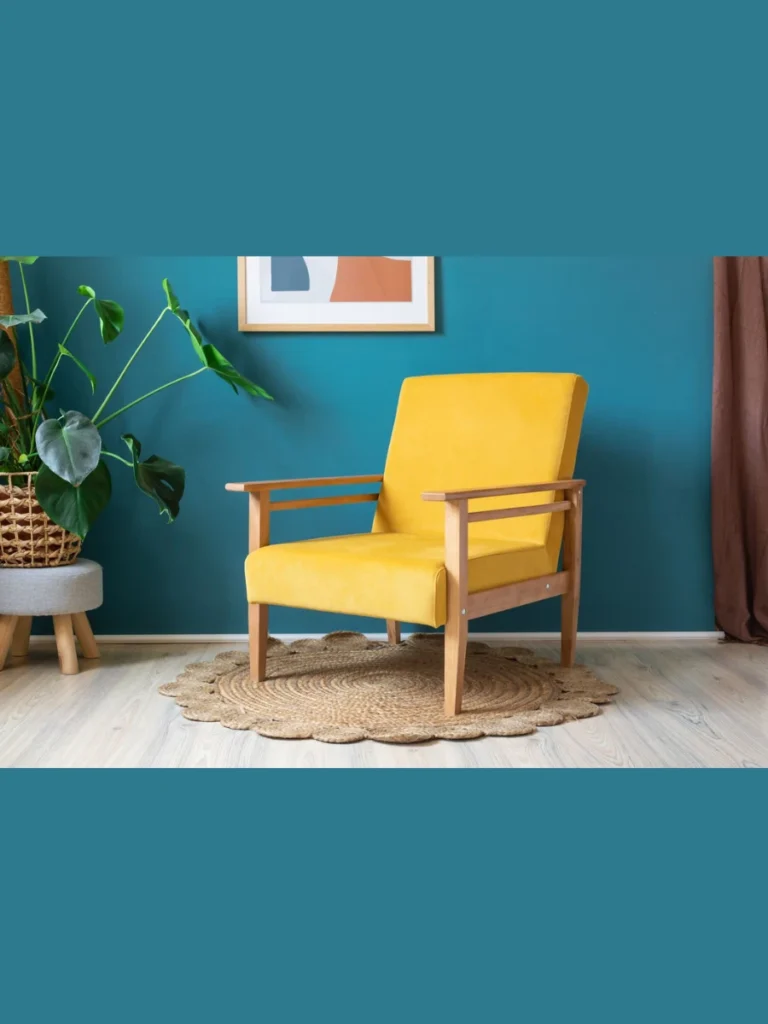
Changing the fabric on a dining chair seat is one of the fastest ways to update your entire kitchen. You generally only need a screwdriver to pop the seat out and a heavy-duty staple gun for the fabric.
I look for outdoor fabrics or high-performance blends because they resist stains from spills and general daily use much better. It allows you to introduce a bold pattern or a bright color without committing to a whole sofa.
The secret is to pull the fabric tight as you staple so you don’t end up with weird wrinkles. I always start in the middle of each side and work my way toward the corners for smoothness.
Neatly folding the corners is the hardest part, but it gets easier once you realize nobody looks at the bottom. It is a simple project that makes those old wooden chairs look brand new and significantly more comfortable too.
9. Creating a Faux Marble Finish with Epoxy or Paint
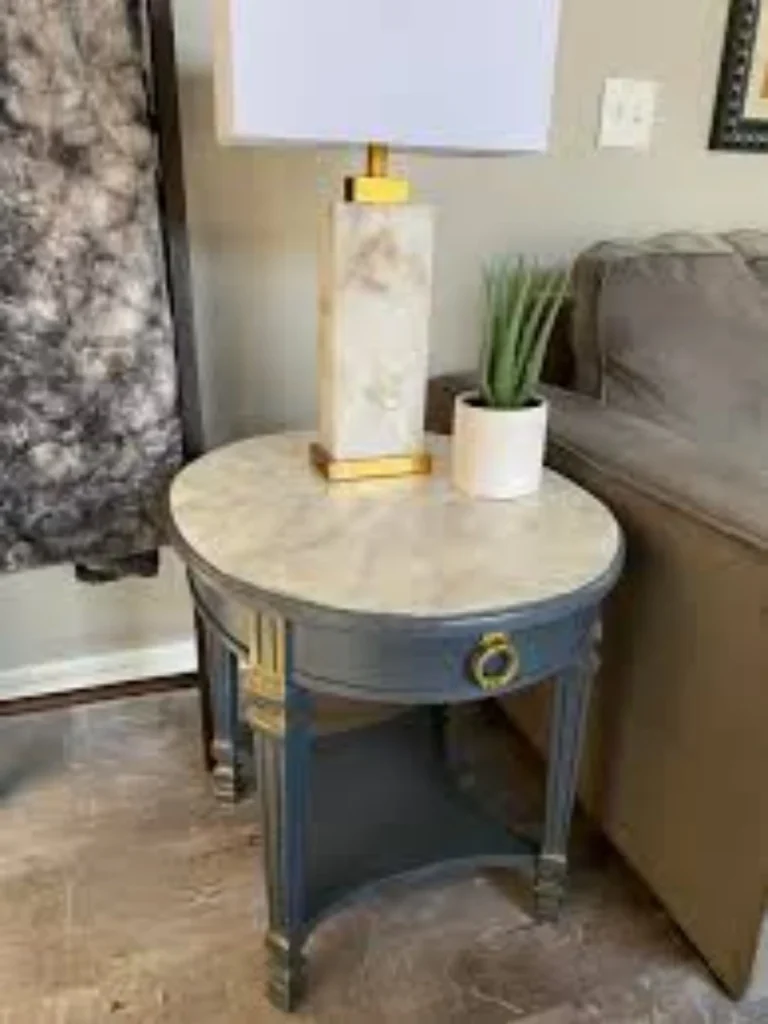
You can make a cheap laminate desk look like a heavy slab of Italian marble using a simple kit. I use a feather or a small sponge to veins of grey and charcoal into a white base.
The key to a realistic look is to keep the veins thin and irregular rather than drawing perfectly straight lines. Real stone is messy and unpredictable, so your hand should be just as relaxed while you are working.
I apply a thick coat of clear resin over the top to give it that deep, glossy shine of stone. It creates a waterproof surface that is tough enough to handle coffee mugs and heavy laptop chargers every day.
This makeover is perfect for small side tables or bathroom vanities that need a serious upgrade on a tiny budget. It looks so convincing that your friends will probably wonder how you managed to carry a marble table home.
10. Using Metallic Leaf for an Elegant Gold Accent
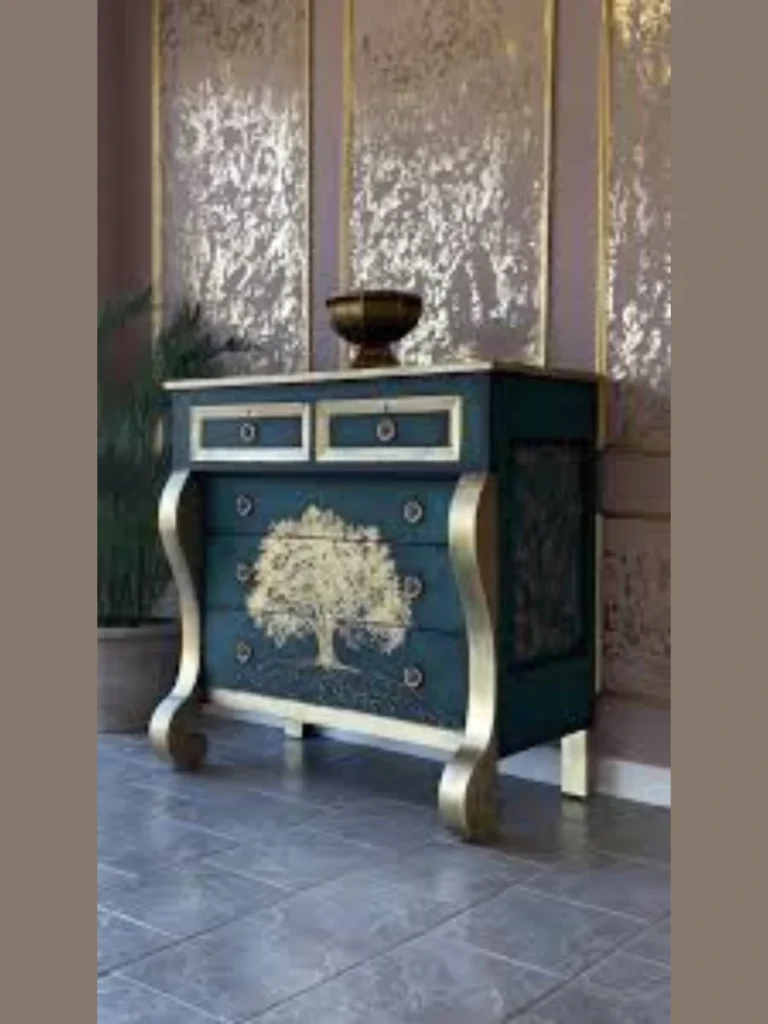
Adding gold or silver leaf to the recessed areas of a mirror frame or a dresser is pure magic. You apply a thin layer of adhesive “size” and let it get tacky before pressing the delicate sheets down.
The leaf is so thin that it picks up every detail of the wood grain underneath for a rich look. It provides a level of shine that even the best metallic spray paints simply cannot match in real life.
I use a soft brush to whisk away the excess flakes and burnish the metal until it glows beautifully. It is a bit of a messy process, but the results look like something from a high-end antique shop.
You should seal the leaf with a specialized topcoat to prevent it from tarnishing or rubbing off over time. It is a great way to add a touch of luxury to a piece that was otherwise headed.
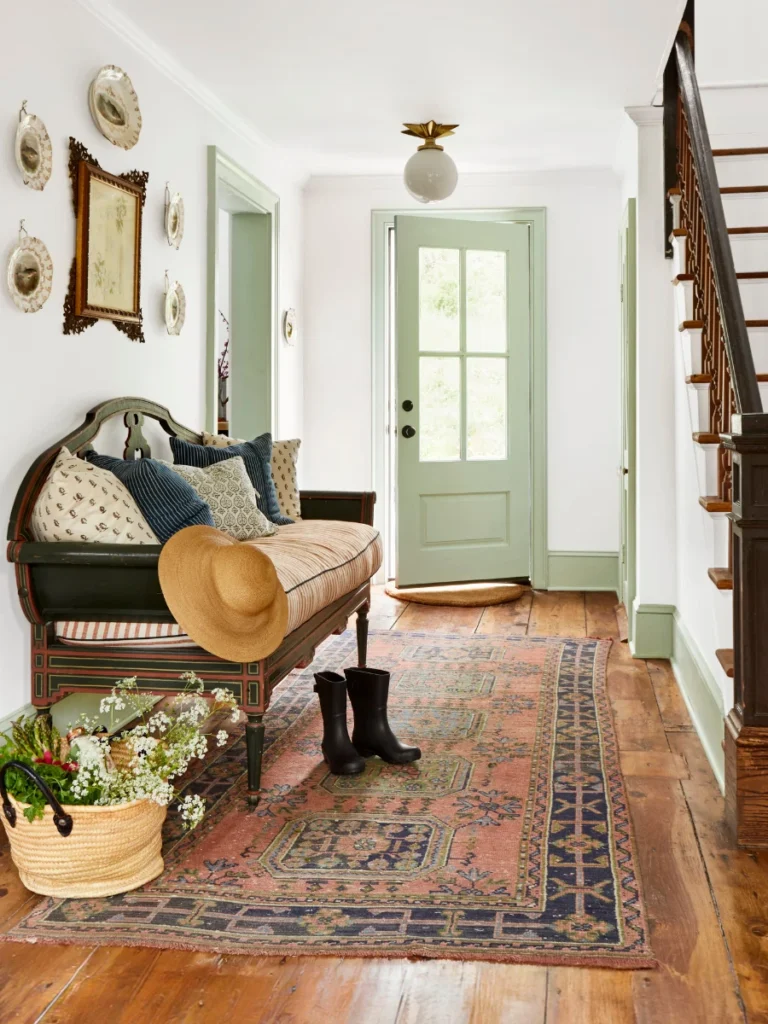
11. Whitewashing Wood for a Bright Coastal Feel
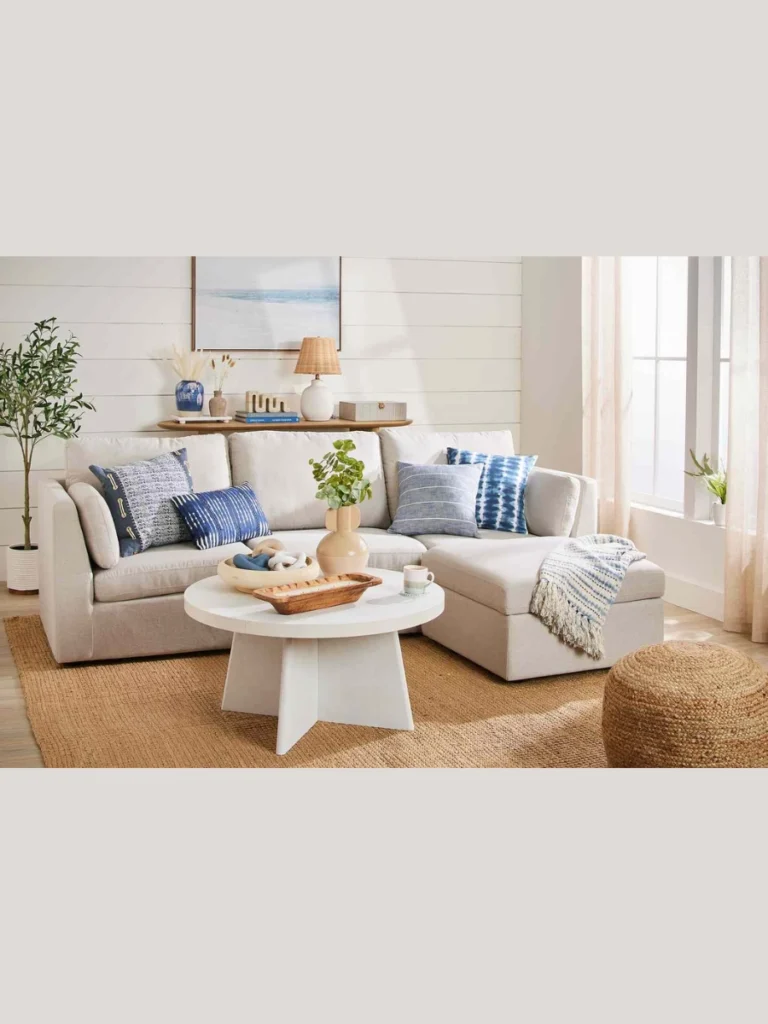
Whitewashing is the best way to lighten up heavy, dark wood furniture without completely hiding the natural grain underneath. I mix white paint with water until it has the consistency of thin milk before applying it.
You brush the mixture on and immediately wipe most of it off with a clean, lint-free cotton rag. This leaves a soft, hazy finish that looks like the wood has been bleached by the sun and sea.
It works incredibly well on large pieces like armoires or headboards that feel too “heavy” for a small, dark bedroom. The wood still looks like wood, but it feels much airier and modern than the original dark mahogany finish.
I usually finish with a matte sealer to keep that raw, natural look while still protecting the surface from dust. It is a foolproof method for anyone who wants a “boho” or coastal vibe without much effort.
12. Dipped Furniture Legs for a Playful Color Pop
Painting just the bottom few inches of your chair or table legs is a very trendy design move. I use painter’s tape to mark off a perfectly straight line at the same height on every leg.
It gives the appearance that the furniture was literally dipped in a bucket of bright, colorful paint for a fun look. This works best on mid-century modern pieces with tapered legs that already have a bit of a personality.
I like to use a bold neon or a soft pastel color to contrast against the natural wood of the piece. It is a subtle way to add color to a room without painting the entire surface of a large table.
This project takes less than an hour of active work but completely changes the silhouette of your furniture instantly. It is the perfect entry-level makeover for people who are still a little bit afraid of paintbrushes and mess.
Essential Tools for Furniture Makeovers
| Tool Category | Recommended Item | Purpose |
| Preparation | Sanding Block (120/220 grit) | Smoothing surfaces and removing old finishes. |
| Cleaning | TSP (Trisodium Phosphate) | Removing grease, wax, and dirt for paint adhesion. |
| Application | Synthetic Bristle Brush | Applying paint without leaving heavy brush marks. |
| Protection | Clear Finishing Wax | Sealing chalk paint and adding a soft luster. |
| Hardware | Power Drill | Installing new handles and fixing loose joints. |
Professional Tips for a Flawless Finish
- Always test your stain: Apply a small amount to the underside of the furniture to see how the wood reacts.
- Work in thin layers: It is much better to apply three thin coats of paint than one thick, drippy mess.
- Wait for the cure: Paint might feel dry to the touch, but it needs a few days to fully harden.
- Keep your rags: Use old cotton t-shirts for wiping stains and applying wax for a lint-free surface.
- Don’t skip the primer: If you are painting a dark wood white, a stain-blocking primer will save your sanity.
Conclusion
I hope these ideas show you that your old furniture isn’t trash; it is just waiting for a new personality. Taking the time to restore a piece is much more rewarding than clicking “buy” on a mass-produced item online.
You don’t need a huge workshop or a massive budget to start making your home look more like your Pinterest board. Just pick one small side table or a chair and see how much a little paint can do.
I have found that the best makeovers happen when you stop worrying about perfection and just start experimenting with different colors. Every mistake is just another opportunity to learn a new technique and improve your skills for the next.
Let me know which of these projects you decide to tackle first on your own home improvement journey this year. I can’t wait to see how you turn those thrift store finds into something truly special for your living space.
FAQs
You can definitely skip sanding if you use a high-quality chalk paint or a specialized “no-sand” bonding primer. However, a quick light scuff with sandpaper always helps the paint stick better and last much longer over time.
I always recommend chalk paint for beginners because it is very forgiving and hides brush strokes much better than glossy enamel. It dries very fast and doesn’t require a lot of technical skill to look professional and intentional.
I usually wipe the inside of the drawers with a mixture of vinegar and water to kill any lingering odors. If the smell persists, placing a bowl of baking soda or coffee grounds inside for a week works wonders.
Refinishing is almost always significantly cheaper, especially if you already have a few basic tools like a brush and sandpaper. You can often find high-quality solid wood pieces for free or cheap that outlast modern “flat-pack” furniture.
While the paint might feel dry in an hour, you should wait at least 24 to 48 hours before placing items. It takes about thirty days for most paints to fully “cure” and reach their maximum durability against scratches and spills.