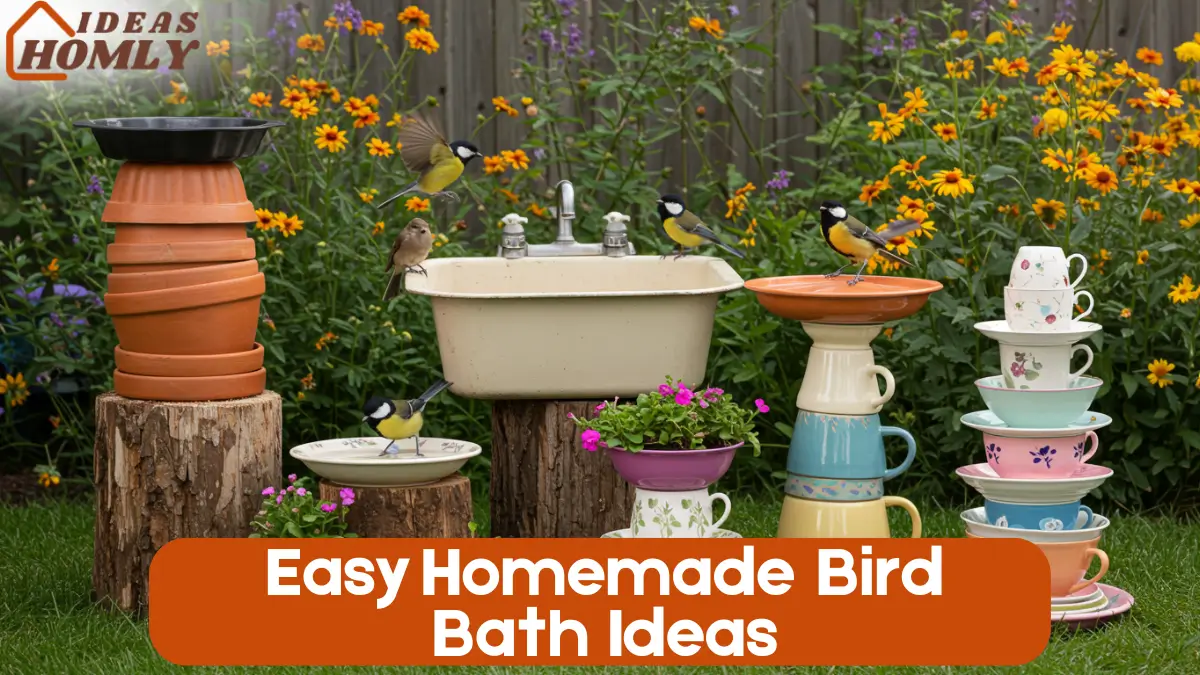
For years, I’ve loved turning my garden into a cozy, welcoming space not just for me, but for nature too. One of the easiest ways I’ve found to bring life and beauty into any outdoor corner is by adding a homemade bird bath. It’s affordable, fun, and surprisingly simple.
Homemade bird baths are budget-friendly, eco-conscious, and full of personal charm. You don’t need fancy tools or big expenses.
In fact, many of my favorite designs use what I already had lying around old dishes, planters, or that quirky teacup I couldn’t throw away.
These DIY bird baths help our feathered friends stay hydrated, especially during hot days. Plus, watching birds splash around brings joy that no store-bought decoration ever could.
Let me share seven of my favorite easy homemade bird bath ideas. You can build each one in a day and they’ll keep the birds (and you) coming back.
1. Bundt Pan Bird Bath
This is probably the quickest bird bath I’ve ever made, and it looks adorable in any garden. If you’ve got an old Bundt pan sitting in a kitchen drawer, you’re halfway there.
The ridges around the pan make it both decorative and functional. Birds love having something to grip with their claws, and the depth is just right for a small bath.
What You Need?
- 1 metal or silicone Bundt pan
- A sturdy base like an upside-down flower pot, plant stand, or even a tree stump
- Optional: spray paint for a fresh look
To build it, I simply placed the Bundt pan on top of the base and filled it with water. For extra stability, you can glue or screw it down, but mine stayed in place just fine without it.
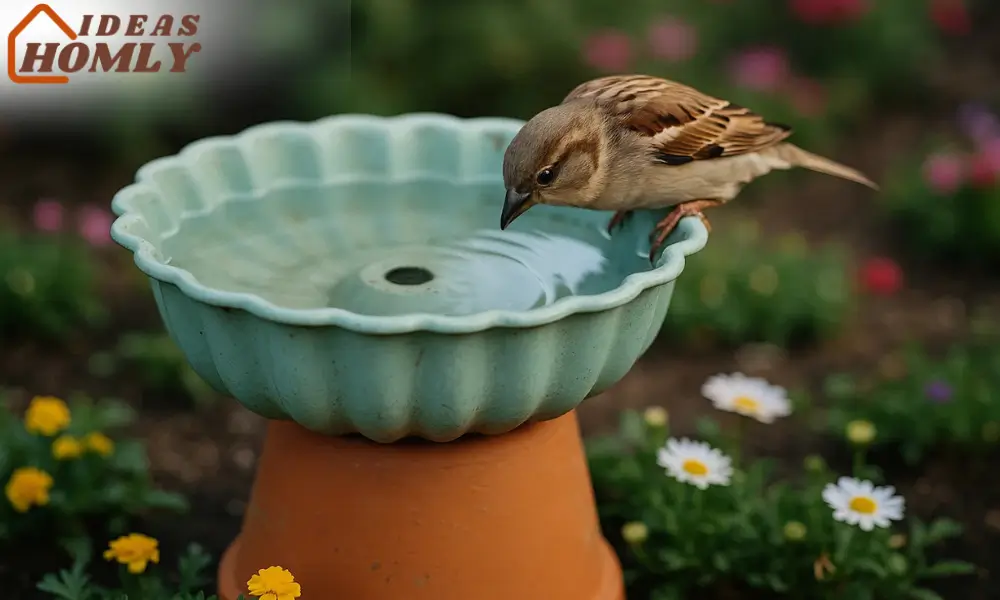
Tip: You can spray paint the Bundt pan in calming tones like soft blue or garden green to help it blend into your space.
2. Terra Cotta Pot Stack
This DIY bird bath has a farmhouse feel and makes a great centerpiece. It’s made by stacking different-sized terra cotta pots, then topping them with a large saucer or shallow bowl.
I like to use three pots in graduated sizes. The stacked look adds height and style. You can keep it simple with unpainted clay or paint them to match your outdoor décor.
Steps I Followed
- Choose 2–4 pots (sizes: small to large)
- Flip them upside down and stack them with a little adhesive for support
- Add a wide saucer on top and fill with water
Pro Tip: Add small stones or pebbles in the dish. Birds use them to perch while drinking or bathing.
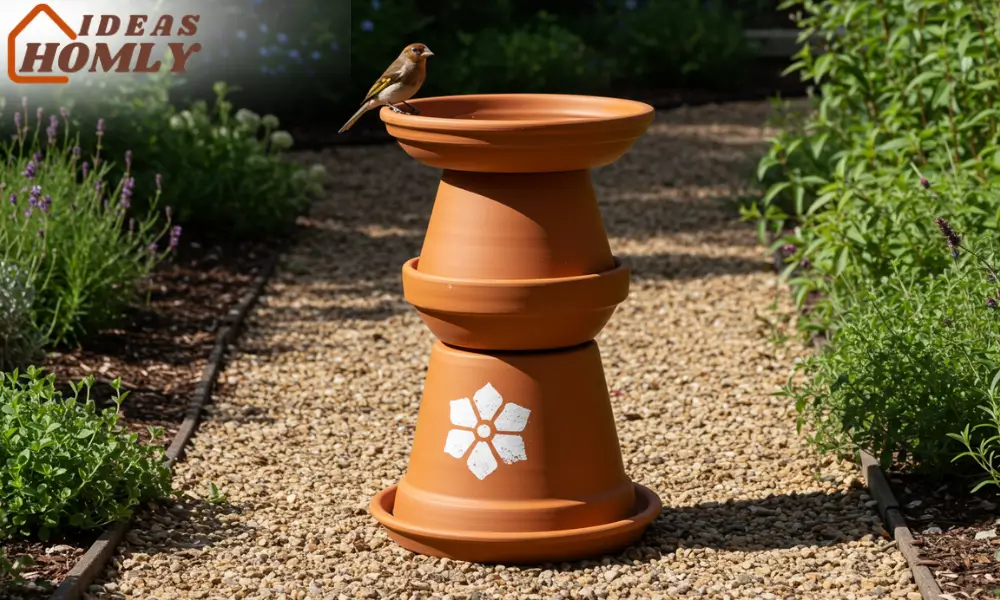
What I love most? It’s sturdy and doesn’t blow over easily in the wind. I’ve had mine up for two summers, and it’s still going strong.
3. Vintage Sink Upcycle
Old sinks can be quirky, rustic, and surprisingly perfect for a bird bath. If you’ve got a vintage sink from a bathroom renovation or a thrift store find, you can give it a whole new life.
I once used a deep porcelain sink with a chipped edge. It added that charming aged look birds (and I) seem to love.
How I Used It?
- I mounted it securely on a short wooden post (about 2.5 feet high)
- I filled it with clean water and added stones for grip
- I surrounded the base with wildflowers to make it look even more natural
The weight of the sink makes it very stable, which is a bonus. And since it’s deeper than most bowls, I keep the water level lower to make it safe for small birds.
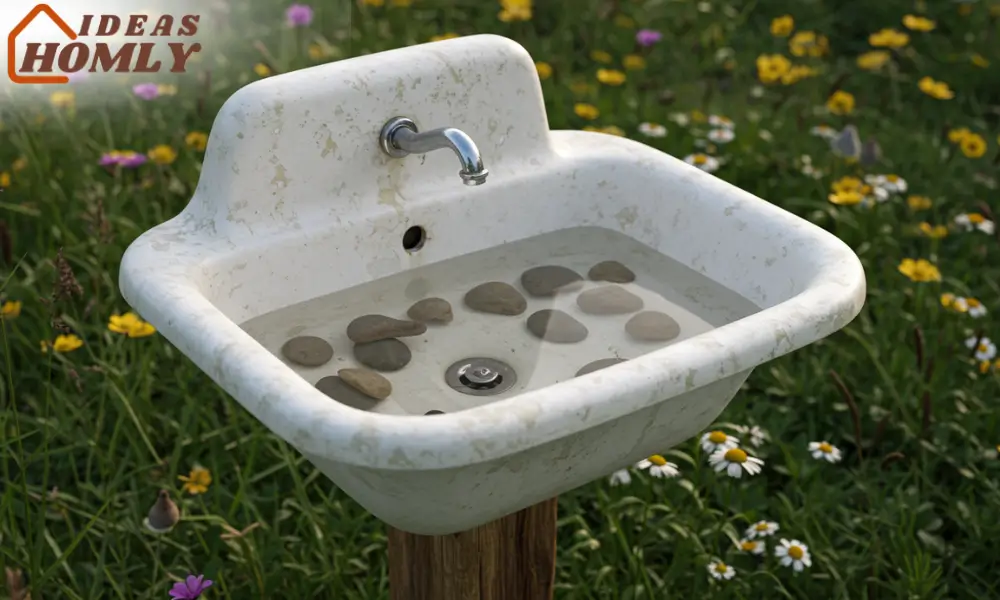
Important Note: Always clean your bird bath regularly, especially deeper ones like this, to avoid bacteria buildup.
4. Old Pots + Bowl Combo
This one came together on a lazy Sunday, and it’s been one of my most complimented bird baths ever.
If you’ve got a few old planters and a wide bowl, you already have everything you need. I stacked two unused garden pots upside down and balanced a lightweight bowl on top. It took me less than 15 minutes to build.
Here’s how I did it
- Chose two terracotta pots with flat bottoms
- Stacked them with heavy-duty outdoor adhesive between them
- Centered a ceramic serving bowl on top
- Added river stones and filled with water
The beauty of this idea is that it works in almost any garden setting. Whether your space is rustic, modern, or colorful, you can style it your way.
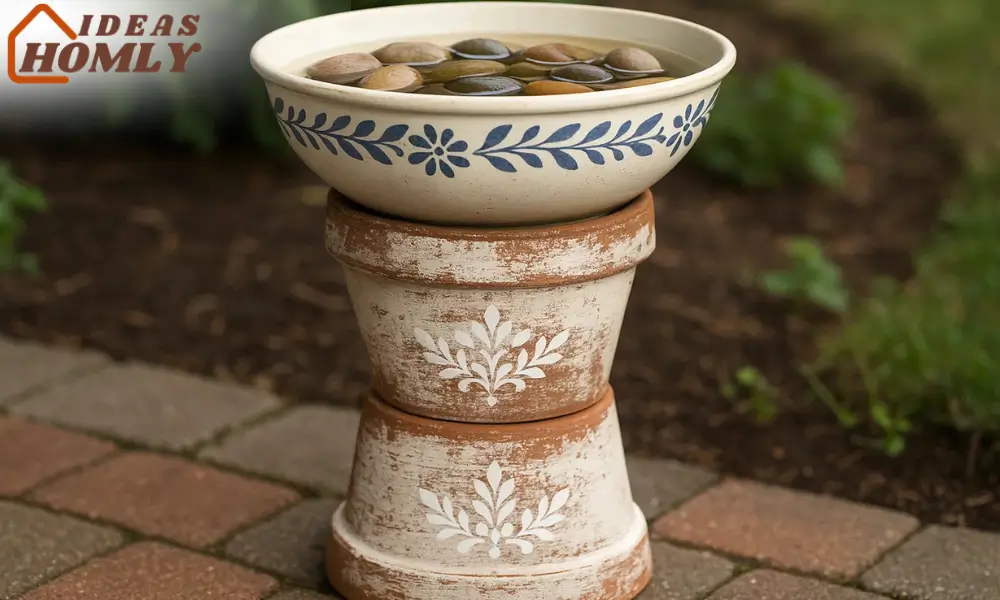
Optional Tip: I painted the pots white and added a few stencils with waterproof craft paint to give it a farmhouse look.
This version stands tall enough to keep ground critters away but low enough for small birds to feel secure. You can also adjust the height by using more or fewer pots.
5. Repurposed Doorknob Pedestal
I’ve always had a thing for old doorknobs, and turning one into a bird bath pedestal was one of my most creative projects yet.
It’s a mix of vintage charm and practical function. You just need a solid old doorknob (metal or ceramic), a wood stake or post, and a shallow bowl or dish.
My simple process
- I attached the doorknob to a wooden garden stake
- Fixed it into the ground about 1–2 feet deep
- Glued a decorative plate or bowl onto the flat top of the knob
What you get is a unique, custom bird bath that looks like art. I placed mine near a patch of lavender, and it blends in beautifully with the garden.
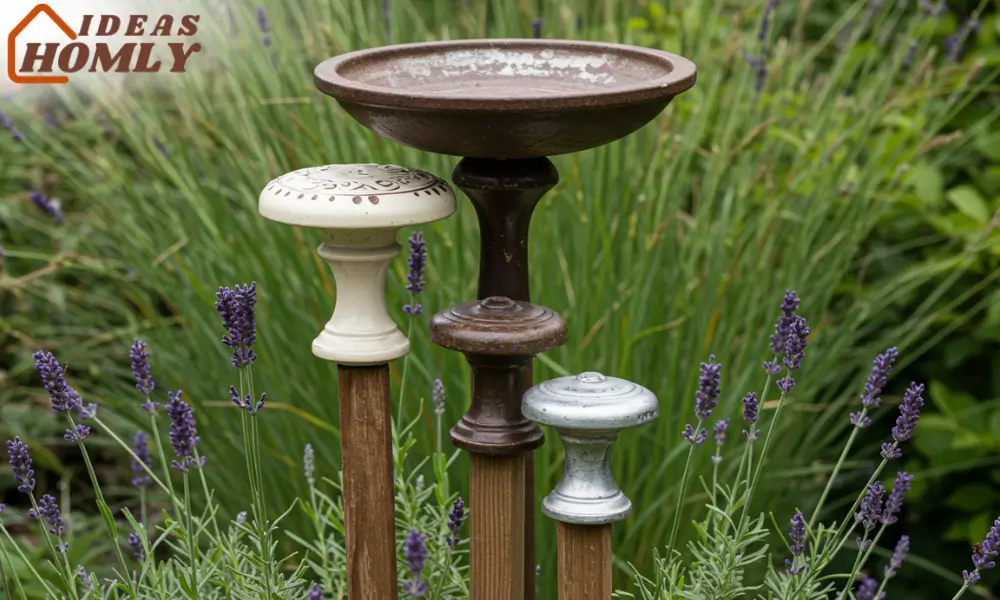
Best part? You can make a few at different heights to create a layered look across your yard.
Make sure the bowl is shallow and secure. If your climate has strong winds, consider anchoring the stake deeper or adding support at the base.
6. Dollar Store Dish Tower
This might be the cheapest DIY bird bath I’ve ever made, and it still holds up strong. I call it the “dollar store special” because all the supplies came from there.
You only need:
- 3–5 mismatched glass or ceramic dishes (bowls, cups, plates)
- Outdoor-safe glue
- Optional: spray paint or decorative stones
I built mine by stacking a wide base plate, then adding a bowl, smaller dish, and finishing it with a medium bowl on top to hold the water. Think of it like building a layer cake—just with dishes.
You can make it as tall or short as you like. It’s fun, functional, and easy to customize.
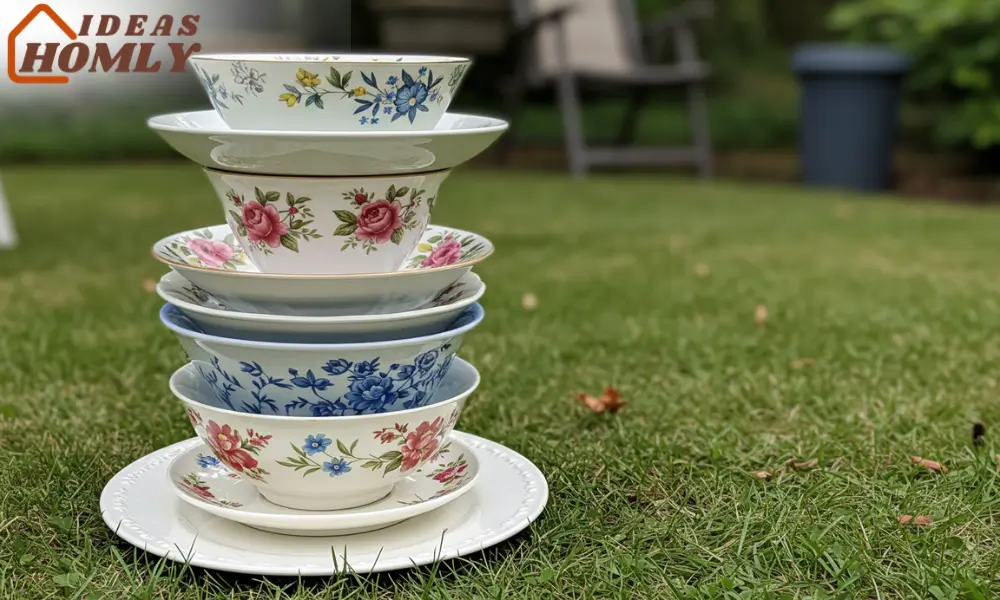
Style Tip: I’ve made one in blue and white tones to match my garden chairs, and it looks like a high-end garden accent.
Place it somewhere stable, and it becomes an instant bird magnet!
7. Teacup Stack Fairy Bath
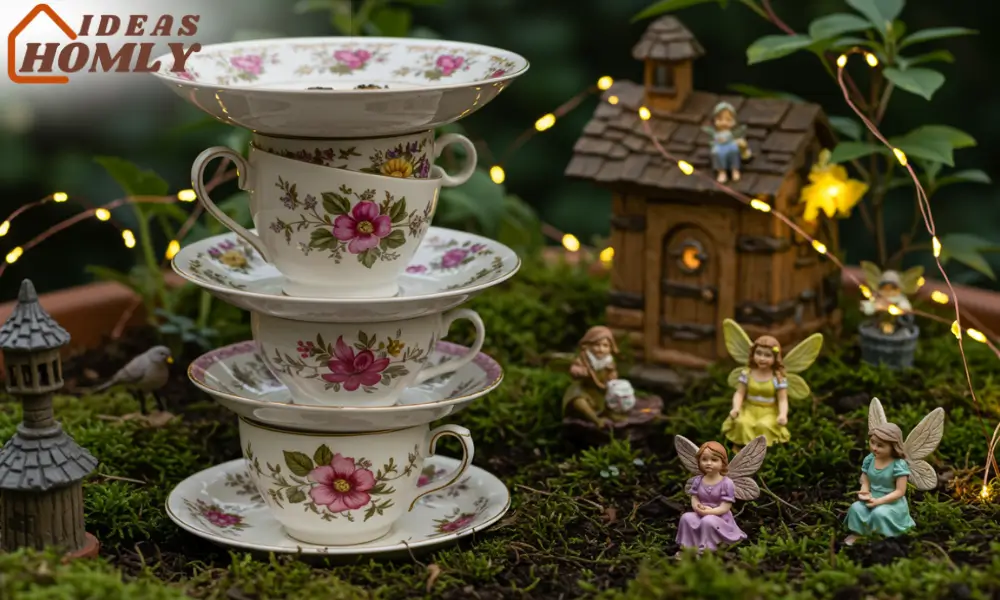
This one’s for the whimsical garden lovers like me. I had an old set of mismatched teacups and saucers gathering dust, and instead of tossing them, I turned them into a fairy-style bird bath.
It’s small, charming, and perfect for tight spaces or balconies.
Here’s how I built it:
- Glued 3 teacups and saucers into a spiraling stack
- Attached the stack to a clay pot for height
- Added a large shallow saucer on top to hold the water
The teacups add height and style, while the top dish is just the right size for tiny birds. I often see finches and sparrows hopping around it.
To make it extra magical, I surrounded the base with moss, fairy lights, and tiny garden figurines.
This bird bath is less about height and more about charm. It looks like something out of a storybook and adds personality to any corner.
Safety Tips for Homemade Bird Bath Designs
While making a bird bath is fun and simple, keeping birds safe should always come first.
Here are the important safety tips I always follow:
- Keep the water shallow (no deeper than 2 inches). Deep water can drown small birds.
- Add pebbles or flat stones for birds to perch on while drinking.
- Clean the bath 2–3 times a week to prevent algae, bacteria, or mosquito larvae.
- Use non-toxic, outdoor-safe glue or sealants if building stacked designs.
- Avoid placing bird baths under feeders—bird droppings and fallen seeds can spoil the water.
- Position near shrubs or trees, so birds feel safe from predators while bathing.
- Avoid slippery materials—opt for ceramic, clay, or textured glass instead of smooth plastic.
I always check my bird bath during hot weather to make sure it hasn’t dried out or overheated. A little daily care keeps birds safe and coming back.
Conclusion
Over the years, creating DIY bird baths has become one of my favorite parts of gardening. Not only do these homemade designs add charm and creativity to my outdoor space, but they also give back to nature in the most rewarding way.
From a simple Bundt pan to a fairy-tale teacup tower, each idea I’ve shared can be made with love, leftovers, and a little imagination.
You don’t need to spend a lot to make something beautiful. With recycled materials, basic tools, and a few spare minutes, you can invite joy, birdsong, and natural beauty into your backyard.
I’ve personally built every one of these bird baths and I can honestly say they’ve transformed the way my garden feels and sounds. So go ahead, pick the idea that fits your style, and build it today. Your garden will thank you and so will the birds.
FAQs
The ideal depth for a bird bath is 1 to 2 inches. Birds aren’t strong swimmers, so keeping it shallow helps prevent accidents. I always add a few flat stones for them to perch on safely. This also helps smaller birds feel more confident using the bath.
I always place mine near shrubs, low branches, or garden walls. Birds need nearby cover in case of predators. Avoid placing baths in full sun all day, as the water can get too hot. Also, keep them away from feeders to avoid contamination from bird droppings and spilled seeds.
Clean it 2–3 times per week, or daily in hot weather. I use a scrub brush and a mix of water and vinegar. Avoid using soap or bleach, as they can be harmful to birds. Regular cleaning keeps algae, mosquitoes, and diseases away.
You can, but I personally avoid them. They’re often too lightweight and can tip over easily. Plastic also gets slippery and hot in the sun. I prefer ceramic, clay, or metal because they stay cooler and last longer. If you do use plastic, weigh it down and roughen the bottom for grip.
They can, but it’s preventable. I make sure to change the water every day or two. Mosquitoes lay eggs in stagnant water, so regular cleaning stops this. You can also add a small solar fountain or a moving-water feature. Mosquitoes don’t like moving water, but birds love it.
I keep mine out year-round, except during freezing weather when it can crack or freeze over. Spring and summer are especially important, as birds need fresh water during hot days. In winter, you can use a heated bird bath or bring it inside during frost.

