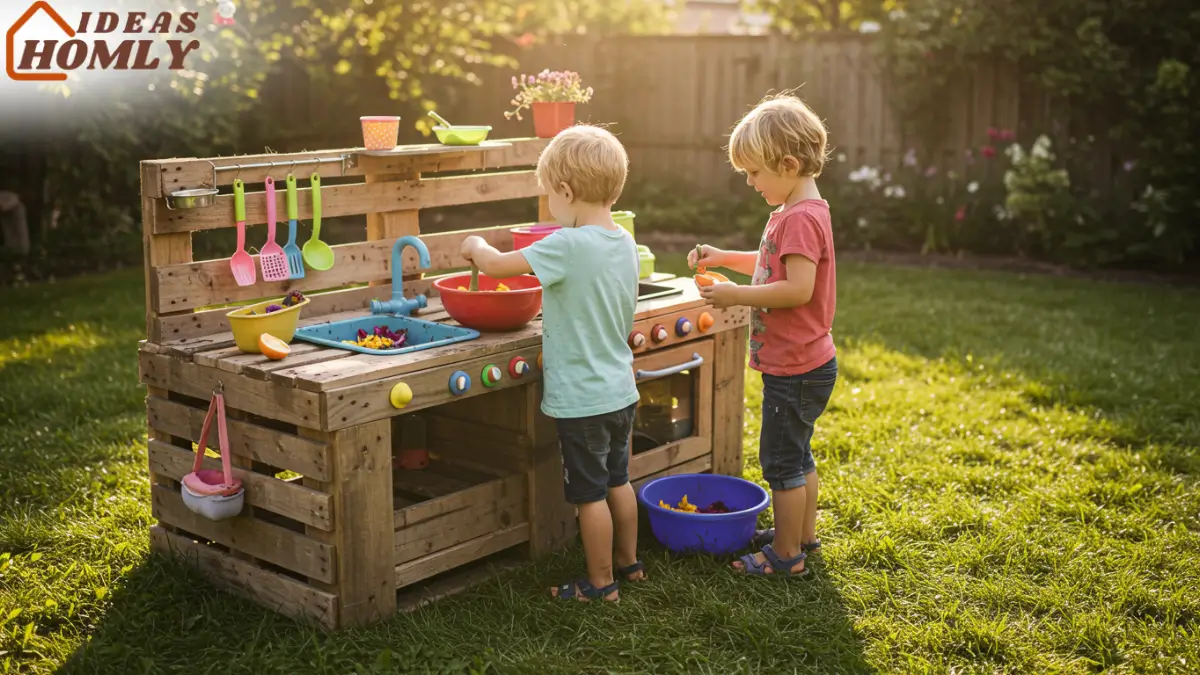
Getting kids outside and engaging in messy play isn’t always easy. I remember watching my own children grow bored of the usual backyard toys and screen time. They needed a new spark of outdoor creativity. I was worried they weren’t getting enough fresh air or sensory play.
Mud pies in old flower pots only held their attention for so long. Enter the mud kitchen – a mini outdoor play kitchen where kids can mix mud “stews,” bake pretend pies, and create endless muddy concoctions.
Not only do mud kitchens provide hours of backyard mud play fun, they also support sensory exploration and even help build children’s immune systems. In fact, research suggests playing in dirt has real health benefits for kids. After introducing a mud kitchen, I saw my kids’ imaginations come alive as they cooked up “meals” from twigs and dirt.
In this guide, I’ll share 15 mud kitchen setup ideas grouped into fun themes to inspire your own build. Whether you love bright & colorful designs, prefer a rustic & natural look, or need a space-saving solution for a small yard, there’s an idea here for you.
I’ve organized ideas into three categories to help you find the perfect fit. Each idea comes with tips and creative twists (learned from experience as a parent and DIY enthusiast).
By the end, you’ll be brimming with inspiration to create an outdoor mud kitchen that will have your little chefs happily cooking up mud pies for hours.
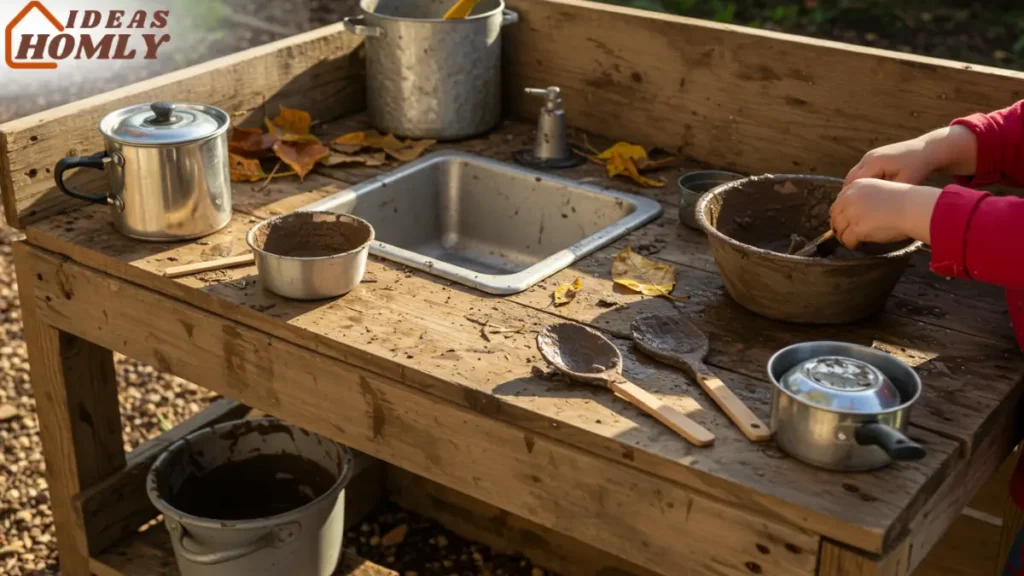
What is a Mud Kitchen?
Simply put, it’s an outdoor play kitchen for children – usually a DIY setup with a counter, “stove” and sink (often just bowls or bins), and plenty of mud and nature ingredients.
Think of it as the ultimate mud pie station! It can be as simple as a few pots and pans next to a dirt patch, or as elaborate as a pretend café complete with a menu board. The best part is that you can customize a mud kitchen to fit your space, budget, and style. And oh boy, there are so many styles to choose from.
Bright & Colorful Mud Kitchen Setup Ideas
Does your heart sing at the sight of rainbow colors and whimsical decor? Bright & colorful mud kitchens are all about visual appeal and playful vibes.
These ideas will turn your backyard into a lively, Pinterest-worthy play zone that invites kids to explore. From painted pallets to themed setups, let’s explore some vibrant mud kitchen designs.
1. Rainbow Pallet Mud Kitchen
Imagine a mud kitchen bursting with color! This idea combines the rustic charm of pallets with a coat of vibrant paint. Start with a basic pallet kitchen structure (pallets make an easy DIY frame for counters and shelves).
Then, show your creativity with paint: you can give it a solid, bold color or paint each slat a different hue for a rainbow effect. Kids adore a rainbow-themed kitchen – it feels like it’s straight out of a fairy tale. Add painted stovetop burners on the counter (stencils or upcycled plastic discs work great) and maybe a bright blue or red bowl as the “sink.”
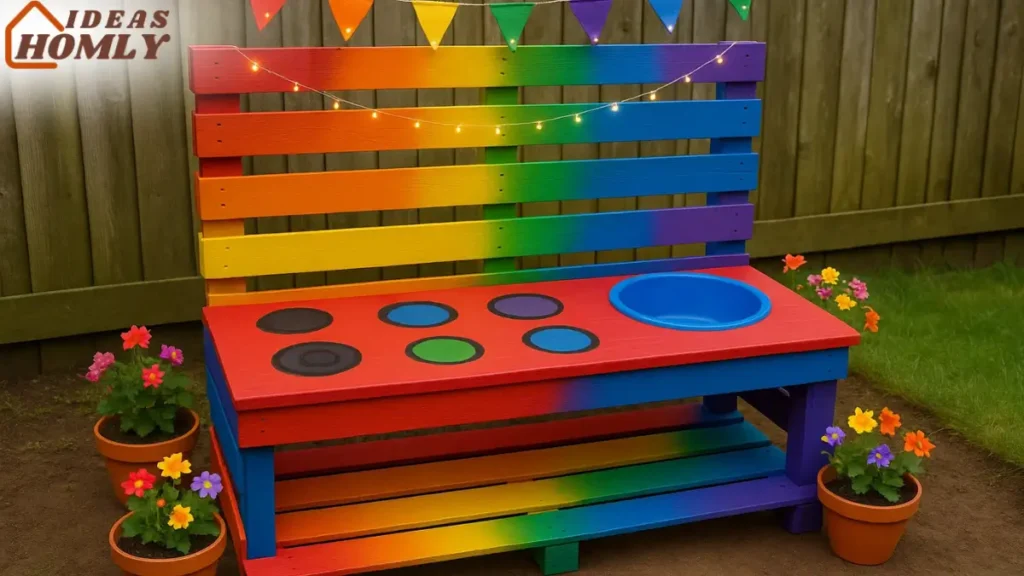
The result is a colorful mud kitchen that’s as fun to look at as it is to play in. Not only does a rainbow pallet kitchen stand out visually, but the bright colors also stimulate creativity and make the play space feel joyful.
To finish the look, consider hanging some bunting or outdoor fairy lights above it for extra sparkle. This pallet kitchen design is both eco-friendly (reusing wood) and exciting for kids, blending DIY ingenuity with a splash of color.
2. Mud Kitchen Café with Chalkboard Menu
Why settle for a plain mud kitchen when you can have a bustling mud café? This idea turns your setup into a pretend outdoor café, complete with a chalkboard menu for imaginative play. Paint a section of the mud kitchen’s backboard with chalkboard paint (or hang a small chalkboard sign).
Kids can draw today’s “specials” – think mud pie à la mode or stone soup – and take orders from siblings or friends. To make it bright and inviting, decorate the stand with bold colors: perhaps a red-and-white striped fabric canopy for a charming market stall vibe, or simply paint the frame in cheerful tones.
I added colorful accessories like a toy cash register, play food containers with fun labels, and a little bell for the “service counter” when I set up our mud café. The chalkboard not only adds a cute aesthetic touch but also encourages writing and reading skills as kids scribble menus and recipes.
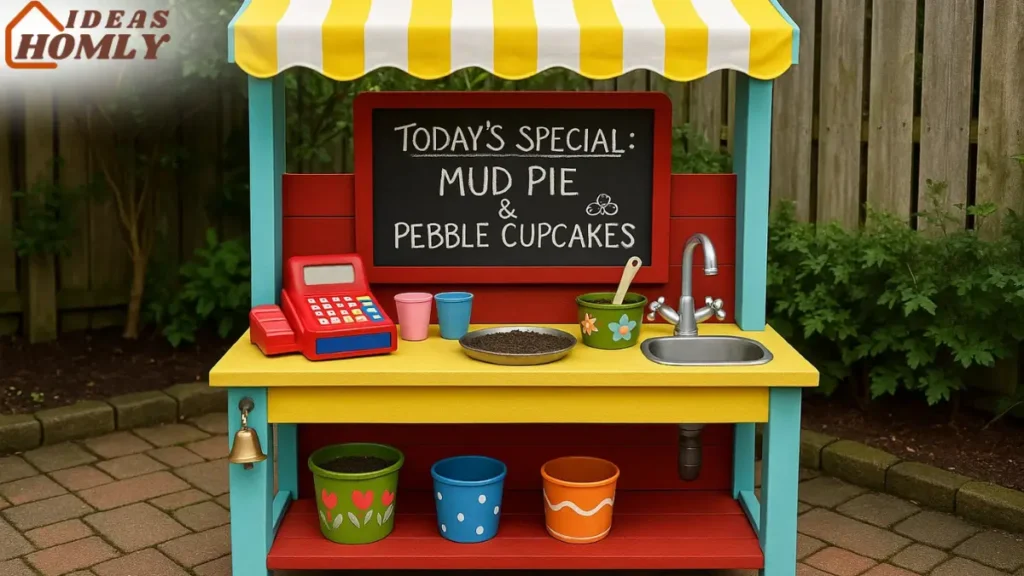
This setup truly comes to life when children start role-playing – suddenly they’re proud chefs and waiters serving up mud lattes and pebble cupcakes. It’s a fantastic way to blend creative pretend play with the classic mud kitchen experience, and the colorful cafe decor makes it feel like a special little spot in your backyard.
3. Repurposed Plastic Play Kitchen (Outdoor Conversion)
If you have an old plastic play kitchen indoors that’s gathering dust, here’s a bright idea: move it outside for muddy fun! Repurposing a pre-made toy kitchen is a quick way to set up an outdoor mud kitchen, and those plastic play sets often come in eye-catching colors by design.
Kids love the familiarity of their beloved play stove and oven – except now they’re allowed to get it really messy. To convert an indoor play kitchen for outdoor use, first give it a good cleaning, then place it in a safe spot outside (preferably on a tarp or in a mud zone where you don’t mind spills).
You can even anchor it or weigh it down so it stays put. Stock the shelves with durable metal or plastic bowls and old utensils for digging and mixing. Because these toy kitchens typically have bright primary colors (or you can spray paint them with plastics-friendly paint if you want a new palette), they naturally create a bright & colorful focal point in your yard.
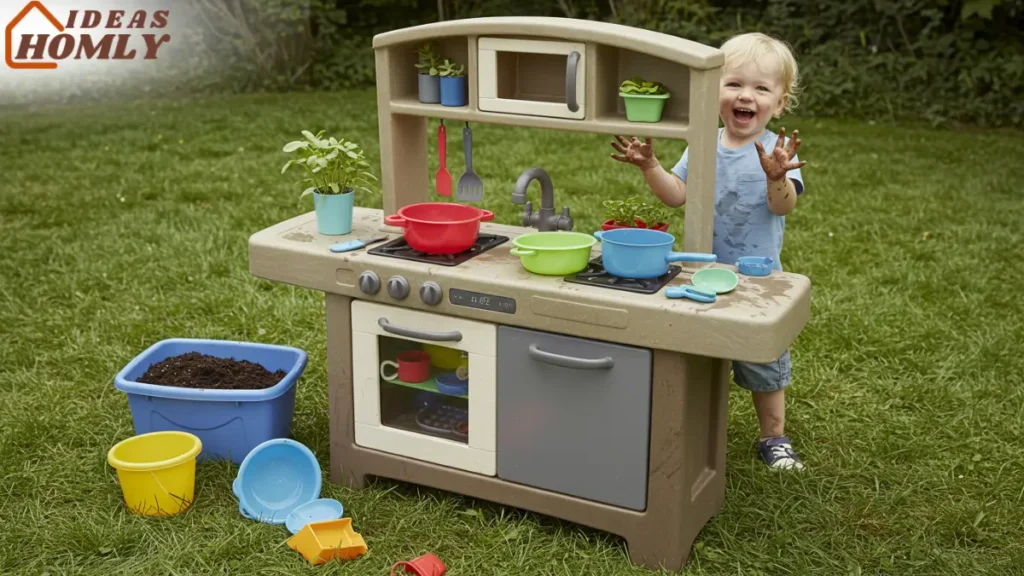
One parent’s tip: add a big plastic bin or tub next to it filled with soil or sand, so kids have a ready supply of “ingredients” to cook with. This repurposed kitchen is cost-effective (no building required) and it saves a bulky toy from the landfill.
Plus, it’s designed for play – meaning it’s already kid-sized and often has fun features like pretend knobs and doors. Now it just gets the added element of real mud, which ups the excitement tenfold!
4. Whimsical Themed Mud Kitchen (Pirate Ship or Fairy Garden)
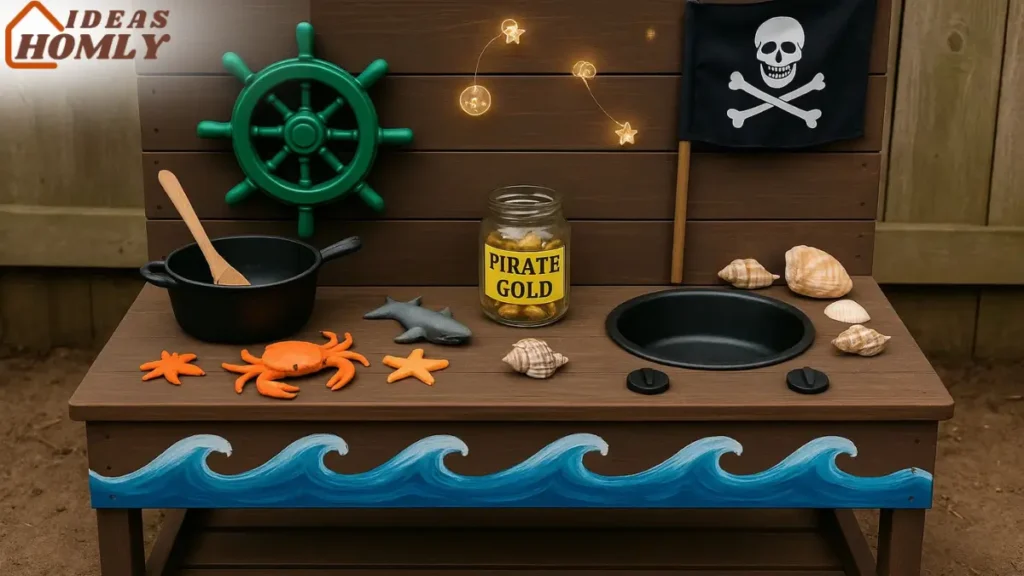
Take your mud kitchen to the next level with a creative theme. By adding thematic decorations, you transform a basic setup into an immersive play world. Two popular themes I’ve tried: a Pirate Ship Galley and a Fairy Garden Kitchen.
For a pirate-themed mud kitchen, paint part of the kitchen a sea-blue or ocean wave motif, add a little toy steering wheel on the side, and maybe a Jolly Roger flag overhead. An old wooden spoon becomes a pirate’s spoon, and you can label a jar “pirate gold” filled with yellow glass pebbles.
My kids loved making “seaweed stew” in our pirate mud kitchen, complete with plastic sea creature toys in the mix. On the other hand, a fairy garden theme might include pastel colors, flower garlands draped around the kitchen, and a few twinkling solar fairy lights.
Encourage the kids to use flower petals, colored water, and glitter (biodegradable, ideally) in their mud recipes for a magical touch. You could even place small fairy figurines or fairy house accents on the counter. Themed mud kitchens are extremely Pinterest-friendly – they look adorable and inspire endless storytelling.
One week, your mud kitchen could be a pirate cookout, the next week a woodland fairy tea party. Feel free to get crafty: cardboard cutouts, stickers, and outdoor-safe props will all help bring the theme to life.
The key is colorful design elements that make the space feel like a tiny fantasy world. Your kids will be thrilled to play along, and you’ll have as much fun setting it up as they do playing in it!
5. Colorful Accessories and Painted Details
Sometimes, you don’t need to rebuild the whole kitchen – you can brighten up an existing mud kitchen with clever accessories and paint. This idea is perfect if you already have a simple setup (even just a table or old bench as a mud station) that needs a pop of personality.
Start by gathering some old pots, pans, and utensils and give them new life with color: non-toxic spray paint can turn an old metal pot into a bright red “soup cauldron” or a wooden spoon into a rainbow stirring stick. I once helped my kids paint a collection of smooth rocks in various colors to serve as “play food” – we had red rocks for tomatoes, green for cucumbers, even polka-dotted ones as sprinkle-covered cookies.
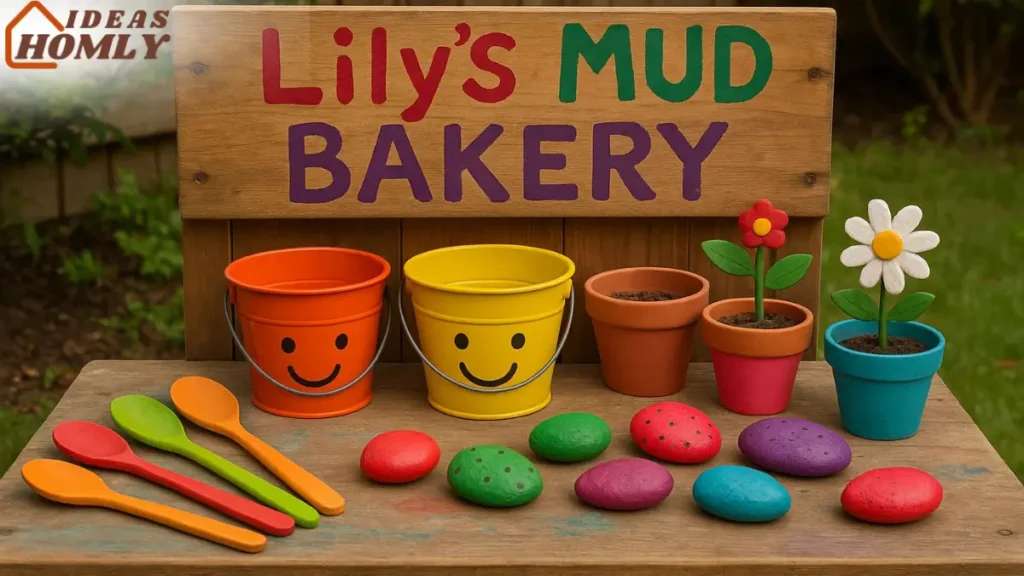
These painted rock ingredients not only add color but also spark creativity (“I’ll have a purple rock donut, please!”). Hang some colorful buckets or flower pots on hooks for storage – they can hold water, sand, or mud mixtures and look cheerful hanging off the side. You can also paint the backsplash or rear wall of your mud kitchen with a mural or bright patterns.
Even adding a simple string of brightly colored pennant flags or wind chimes will make the area more inviting. The idea is to accessorize with color: brightly patterned aprons for the kids, a painted sign with the kitchen’s name (“Sophie’s Mud Bakery” in bright letters), or a row of sunflowers planted behind the kitchen.
These little details make a big difference. They transform a plain mud play area into an engaging, stimulating environment without a full construction project. Plus, involving your kids in crafting the accessories (like painting rocks or making a sign) gives them a sense of ownership and pride in their outdoor play kitchen.
Rustic & Natural Mud Kitchen Ideas
If you prefer an earthy, natural vibe for your mud kitchen, these rustic ideas will speak to you. Embracing raw wood, plants, and upcycled materials, rustic mud kitchens blend right into the garden. They feel like part of nature – perfect for little ones to connect with the outdoors.
From pallet wood projects to using tree stumps and herbs, here are some natural mud kitchen ideas that are charming and eco-friendly.
6. Upcycled Pallet Mud Kitchen (Rustic Charm)
For a sturdy, rustic mud kitchen that looks straight from a cozy cabin, try building one from upcycled pallets and scrap wood. This classic DIY approach uses wooden pallets as the framework – often one pallet as the back (for a nice backsplash and support) and another as the counter or work surface.
The weathered wood of old pallets gives a lovely rustic character, and you can choose to leave it as is or apply a light coat of wood stain to enhance the grain. I personally love that lived-in, natural look, so I left our pallet kitchen unpainted for that forest-school aesthetic. Pallets are great because they already have built-in slats that can act as shelves for storing bowls and pans or slots to hang utensils.
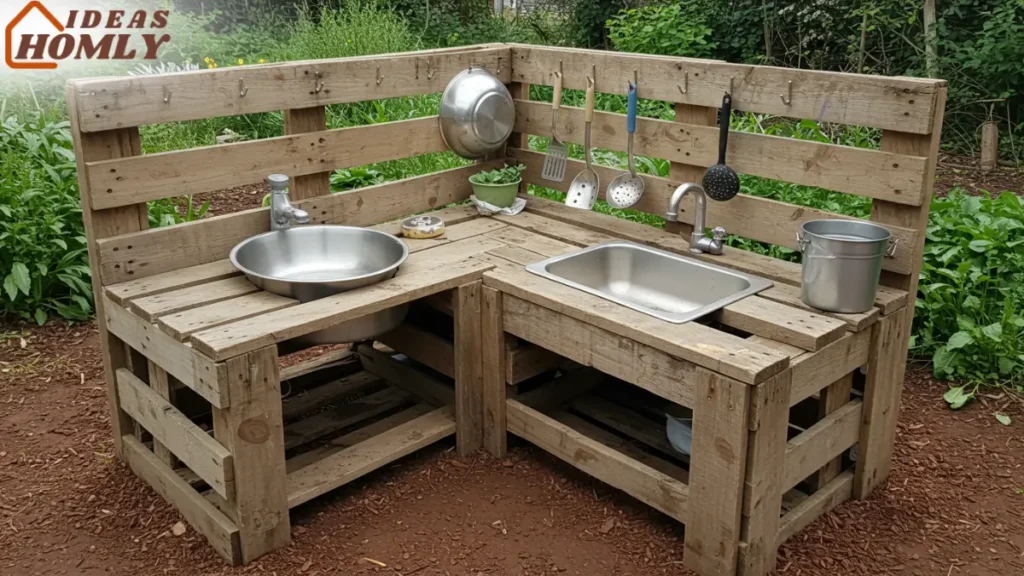
Attach a couple of metal or plastic bowls as sinks (cut a hole in the counter and drop them in), and add some hooks to the backboard for hanging ladles and spoons. You’ll have a fully functional mud kitchen that’s heavy-duty and full of character. The best part? It’s extremely budget-friendly – pallets and reclaimed wood are often free or cheap, making this a sustainable choice.
As one DIY enthusiast put it, pallet kitchens are highly customizable: you can always add a splash of paint or a chalkboard sign later if you want a bit of color. But even in their natural wood state, pallet mud kitchens invite kids to engage in outdoor mud play in a down-to-earth way. Bonus tip: Sand the wood thoroughly to avoid splinters and seal it with a child-safe outdoor sealant if you want it to withstand the elements longer.
7. Nature-Inspired Forest Kitchen
Sometimes the best mud kitchen isn’t really a “kitchen” structure at all – it’s an arrangement that lets nature be the star. A nature-inspired forest kitchen focuses less on built components and more on the natural materials around you. For example, set up a simple wooden plank or a low bench as the workspace under a tree or next to some bushes.
Then let the kids forage for their “ingredients” – twigs, bark, smooth stones, acorns, pine cones, flowers, you name it. In our forest-style mud kitchen, we skipped bright plastics and instead provided baskets and metal pails for collecting cool natural items. The kids ended up making leaf salads, dandelion soup, and mud pies decorated with flower petals.
This setup blends right into a wooded or garden area and feels like an extension of the earth. It’s a fantastic natural mud kitchen idea for those who subscribe to forest school or Montessori philosophies, where children use open-ended natural materials in play.
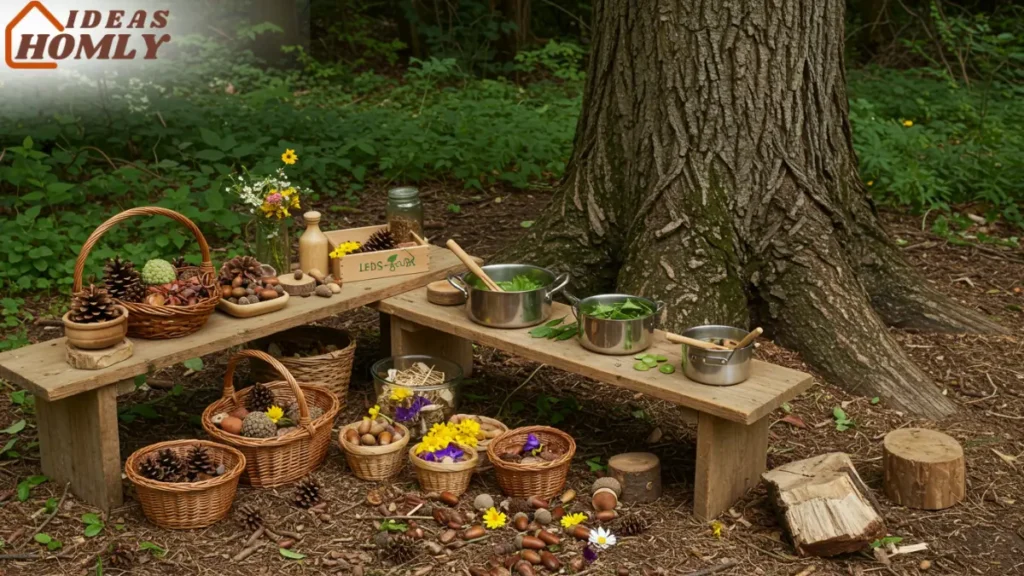
You can enhance the space by adding a tree stump or large flat rock as a pretend stovetop or “mixing table.” Also consider planting some sensory herbs (like mint, basil, or lavender) nearby – kids can pinch off leaves to add real scents and textures to their mud recipes (and bonus, it smells lovely).
This kind of mud kitchen teaches kids to appreciate the textures and colors of the natural world around them while they play. It’s eco-friendly, minimalistic, and ideal for backyards that already have trees or gardens. Plus, there’s virtually no cost – Mother Nature provides the supplies!
8. Log and Stump Mud Kitchen
For the ultimate rustic statement, consider using tree stumps and logs as part of your mud kitchen. I’ve seen (and later created) setups where a thick tree stump becomes the base for a countertop or even a pretend oven. For instance, you can place a sturdy wooden board across two strong logs or tree stumps to form a simple table.
The logs act as the “legs” and blend perfectly with an outdoor setting. If you have access to a large cross-section of a tree trunk, it can be propped upright to be a mini table all on its own. I’ve even carved a semi-circle out of a stump to create an oven door outline, then painted it black inside to look like a tiny wood-fired oven – the kids were thrilled to “bake” mud bread in their very own stump oven!
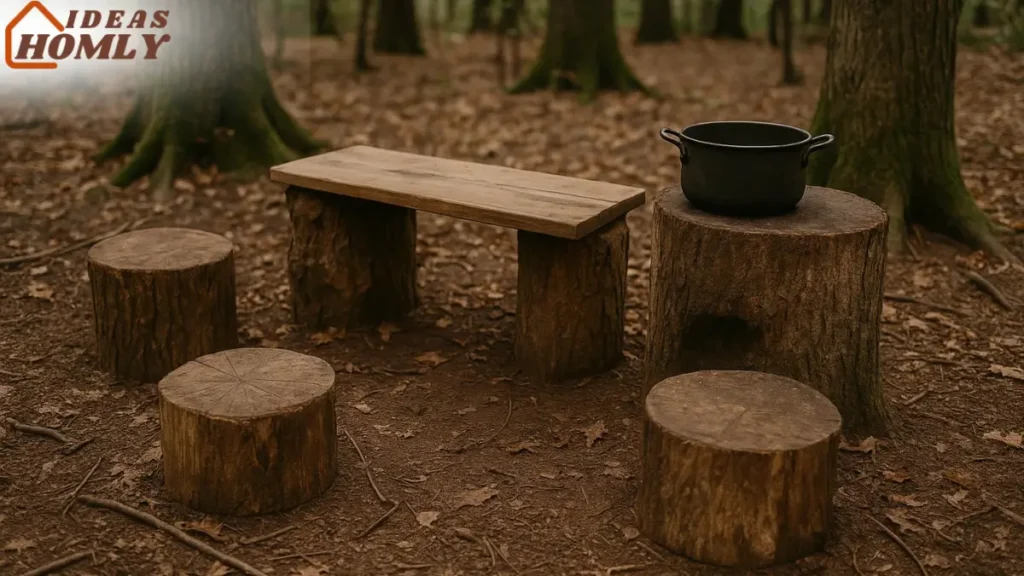
Arrange smaller stump pieces around as seats or as spots to set bowls. Kids naturally gravitate to these, hopping from one “seat” to another while stirring their concoctions. This approach uses all-natural materials, so it truly feels like the mud kitchen grew out of the ground. It’s great for encouraging imaginative play (“Is that stump a stove or a table today?” – it can be whatever they decide).
One tip: if you’re using fresh logs or stumps, make sure they’re stable (dig them in a bit if needed so they don’t roll). Over time, untreated wood in the elements will decay, but that process can take years, and in the meantime, you have a wonderfully authentic play space.
If you want to get a bit crafty, you could also attach a slice of log as a shelf on a tree or on the side of a pallet kitchen, or cut one into a round “burner” shape to glue onto a countertop. Rustic log kitchens truly make kids feel like they’re cooking in the great outdoors.
9. Garden-Inspired Mud Kitchen with Herbs and Flowers
One of my favorite ways to enhance a mud kitchen is by integrating it with your garden. A garden-inspired mud kitchen not only looks beautiful with greenery all around, but it also gives kids a chance to include fresh herbs and flowers in their mud recipes. If you have a garden bed or some large pots, designate a corner for the mud kitchen setup.
Position the kitchen so it’s adjacent to soil where you can plant hardy, kid-friendly herbs like rosemary, mint, or thyme. These plants are great because they’re resilient and can handle a bit of rough picking. Teach your little chefs to pluck a few leaves to add “flavor” to their mud stews – it’s a wonderful sensory experience as they smell the mint or rosemary oils on their hands.
You can also encourage flower potion-making: grow some brightly colored flowers (marigolds, nasturtiums, pansies – many of which are edible and safe) and let the kids add petals to their mixtures for color. I once helped my children set up “mud tea” by steeping rose petals and lavender from our garden in water – it was the prettiest mud concoction you’ve ever seen!
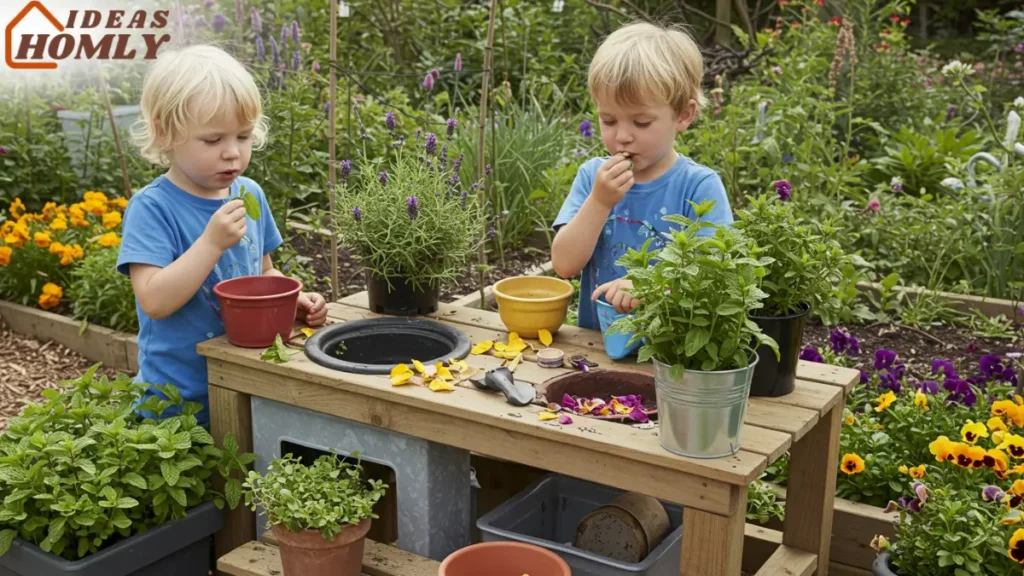
To blend the kitchen into the garden, use natural wood for the structure, and consider a living roof or wall: maybe plant some succulents or small vines in pots attached to the mud kitchen’s frame. It gives a magical secret garden feel. Not to mention, this encourages kids to gently tend the plants (learning about watering and growth) as part of their play.
By incorporating live plants, your mud kitchen becomes a dynamic part of the backyard ecosystem – kids will learn to identify different herbs by smell and appearance, and they’ll gain respect for living things while playing. It’s an educational twist wrapped in fun. Just be sure any plants within reach are non-toxic and safe for little hands, since they will definitely get up close and personal!
10. Playhouse or Old Furniture Conversion
You don’t always need to build from scratch – sometimes the perfect rustic mud kitchen starts with something old. Upcycling an existing structure like a small playhouse, a used cabinet, or a potting bench can give you a charming mud kitchen with minimal work.
For example, if your kids have outgrown a wooden playhouse or you find a second-hand playhouse, consider turning it into a mud kitchen cabin. The playhouse walls can act as a backdrop (you can mount utensils or a chalkboard menu on them), and the windows become a cute serving hatch for mud pies.
Some parents even add a simple shelf or counter under the window to serve as the kitchen counter inside the playhouse. It instantly creates a little mud bakery where kids feel like they have their own clubhouse kitchen. On a smaller scale, an old wooden cabinet or dresser can be converted by removing a couple of drawers to create an open shelf and maybe cutting a hole in the top for a bowl sink.
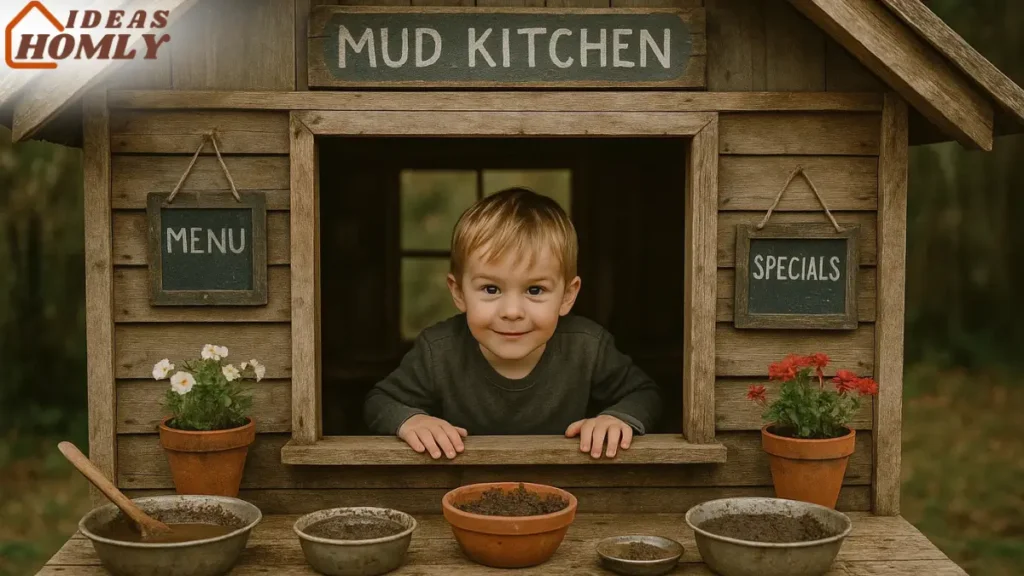
An unused nightstand, TV stand, or end table can similarly be reimagined: a coat of outdoor-safe paint or stain, and you have a vintage-looking mud kitchen. I once repurposed a beat-up potting bench I found at a garage sale – it already had a lower shelf and a main work area, perfect for a mud kitchen! We just added some hooks and a basin.
The beauty of using old furniture or structures is that they often have that weathered, homey feel, which suits a rustic design. Plus, you’re giving new life to an item that might otherwise be tossed – great for the environment and your wallet. Secure the furniture well (attach it to a fence or stake it down if needed, for safety), and double-check for any nails or staples if it’s older.
With a bit of imagination, that discarded piece of furniture can become the heart of an outdoor mud kitchen, complete with history and character. The kids won’t care that it’s repainted or patched – they’ll be too busy whipping up mud pancakes in their “vintage” kitchen!
Space-Saving & Compact Mud Kitchen Ideas
Short on space? No problem! Not everyone has a big backyard, but that doesn’t mean your kids have to miss out on mud play. This section covers mud kitchen setups that are space-saving, compact, or portable – ideal for small gardens, patios, or even balconies.
These designs maximize fun while minimizing the footprint, proving that even in a small area you can create a delightful small-space mud kitchen for your little ones.
11. Portable Mud Kitchen Cart
When you need flexibility and a small footprint, a portable mud kitchen cart is a game-changer. I built one of these when we lived in a house with basically no yard – just a patio. The idea is to use a cart on wheels (an old bar cart, a metal utility trolley, or a sturdy rolling plant stand all work) and transform it into a mini mud kitchen.
Because it has wheels, you can move it around as needed: roll it into the sunshine or shade, bring it out only during playtime and tuck it away in a corner when done, or even wheel it into a garage for storage. To set up a mud kitchen cart, choose a cart with at least two levels (shelves).
The top can serve as the counter for “cooking,” and the lower shelf can hold supplies like a bin of dirt, extra containers, or water jugs. I attached a few S-hooks to the side for hanging a small whisk and spoon, and placed a plastic dishpan on the top as a removable sink.
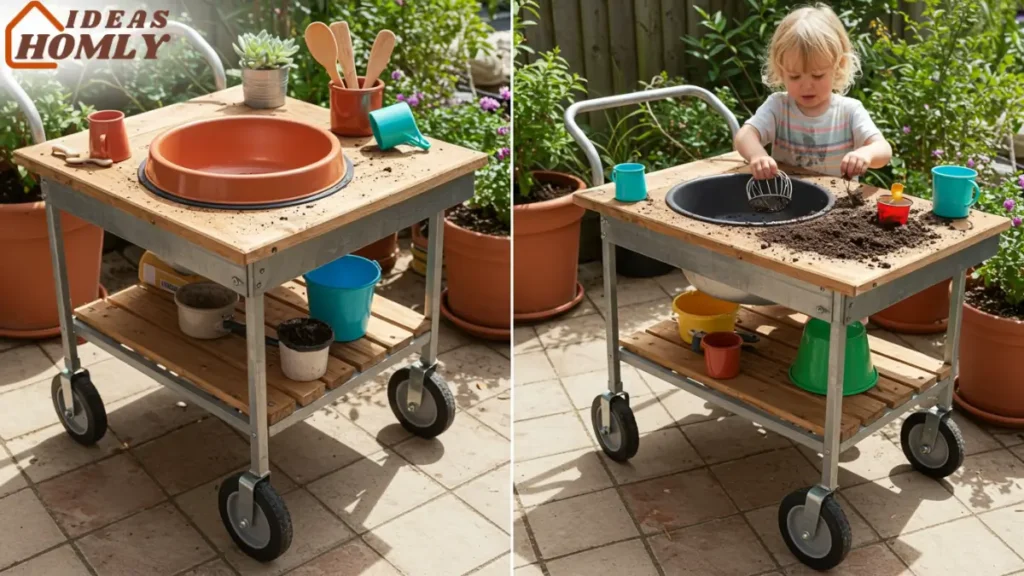
An advantage of this compact design is that you can incorporate it into other play or chores – for example, roll it over to the garden for some mud painting or to wash freshly picked veggies with the hose (turning play into a learning moment). Since space is tight, prioritize a couple of versatile tools: a mixing bowl, a big spoon, and maybe a small bucket.
The portability also means it’s great for multi-purpose use. One mom I know repurposes her mud kitchen cart as an outdoor art station when not in mud-play mode – just swap the mud tools for paint brushes and voila. This idea shows that even if you’re renting or have a tiny yard, you can create a movable mud kitchen that delivers all the muddy fun without a permanent installation.
12. Wall-Mounted or Fence-Mounted Mud Kitchen
No ground space? Use the vertical space! A wall-mounted mud kitchen is perfect for small areas because it attaches to an existing wall or fence, keeping the footprint super slim. Imagine a folding shelf or narrow ledge that acts as the countertop, and above it, maybe some hanging utensils or planters.
You can DIY this with a simple piece of timber hinged to a fence – when it’s down, it’s a table, and it can fold up against the wall when not in use (that covers the collapsible idea as well). Even a fixed narrow shelf can do the trick if you have a fence you don’t mind screwing into.
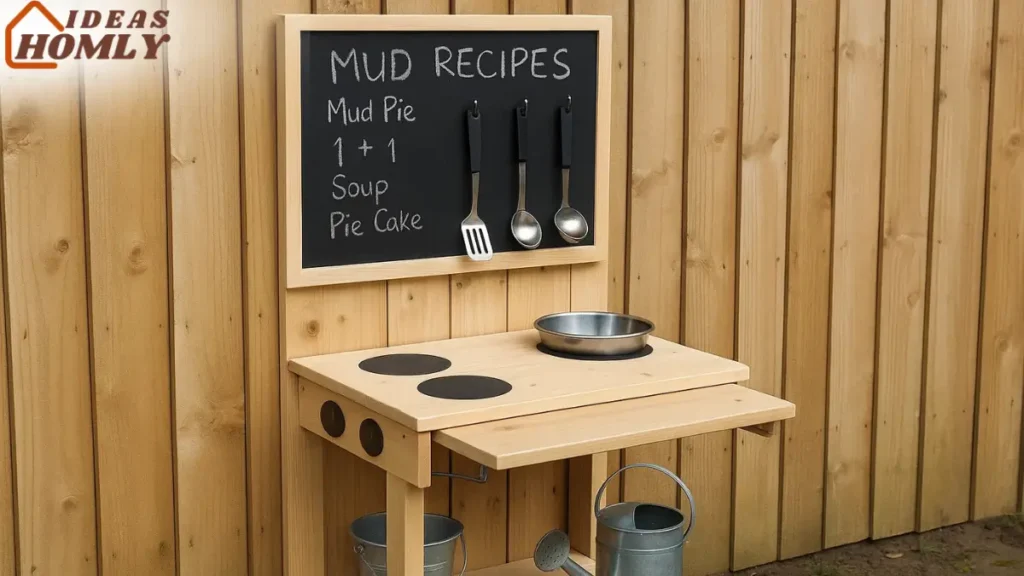
I’ve seen cute examples where people mount an old cabinet door or pallet flat against a fence; the pallet slats then act as ready-made shelves for pots and bowls. One family I visited had a marvelous fence mud kitchen: they painted a section of the fence as a backdrop with bright colors, attached a row of knobs (from an old stove) onto the fence to simulate oven controls, and hung a chalkboard for recipes.
Below that, a slim bench sat against the fence with a basin inset. It was all contained in about 1 foot of depth from the fence – talk about space-saving! This setup is also great for toddlers since you can adjust the height to be toddler-friendly when you mount it. And cleaning up is easy – you can hose down the fence area if things get too mucky.
Just be sure that whatever you mount is secure; use sturdy hardware because kids might lean on that fold-down shelf. A wall-mounted design keeps your yard looking tidy because everything has its place on the wall. Plus, it’s a visually appealing feature – kind of like those wall herb gardens, but for mud play.
If you live in an apartment with a balcony, you could adapt this by attaching a mini shelf and hooks to the balcony railing for a tiny mud kitchen station. When it comes to compact mud kitchens, thinking vertically is your best bet!
13. Foldable / Pack-Away Mud Kitchen
For ultimate convenience in a small space, consider a mud kitchen that can fold up or be disassembled after play. A foldable mud kitchen might sound fancy, but it can be as simple as using a folding workbench or a drop-leaf table that doubles as a mud kitchen. For instance, a wall-mounted fold-down table (similar to a foldable laundry table) can serve as the mud kitchen counter when it’s down.
When the kids are done playing, just fold it up and latch it, and the space is clear again. I once rigged a foldable setup using a sturdy folding picnic table: during playtime, the table held our bowls and utensils, and I clamped a removable backsplash (a painted piece of cardboard with pretend stove burners) to it.
Afterward, I could fold the legs and slide the whole table behind the shed. You can also create a lightweight mud kitchen from a plastic tote or suitcase – yes, a suitcase! I’ve tried a “mud kitchen in a box” concept: fill a large plastic storage bin with mud kitchen supplies (small pots, spoons, cups, maybe a bag of dirt if you don’t have a natural spot).
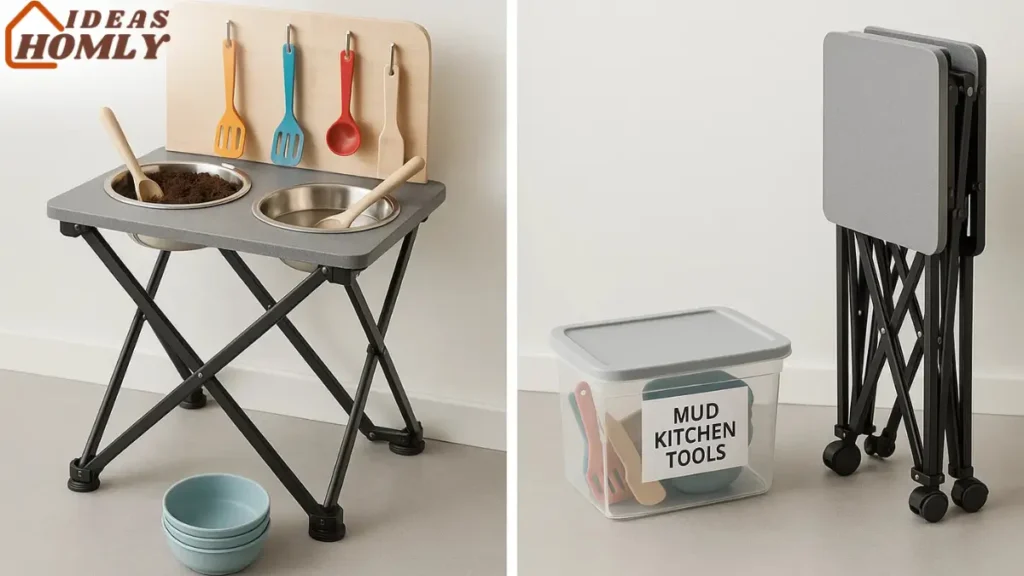
When it’s time to play, open the bin and use it as the play sink or mud mixing container. The lid of the bin can serve as a tray or tabletop. Afterward, everything stores back into that same bin. This is a lifesaver for apartment dwellers or anyone who doesn’t want a constant mud station left out. Kids get their messy play, and then it all packs away neatly.
If using a foldable table or wall unit, ensure there are no pinching hazards for little fingers when folding. And if your foldable design has any hinges or latches, double-check that they’re child-safe or out of reach.
A pack-away mud kitchen proves that you don’t need a dedicated corner of the yard 24/7 for mud play – you can set up a whole mud laboratory in minutes and then reclaim your space when needed. It’s flexibility at its finest.
14. Mini Mud Kitchen for Patios & Balconies
Urban parents, this one’s for you. You can absolutely create a mini mud kitchen even if you only have a patio, deck, or balcony instead of a grassy yard. The key is thinking small and contained. One idea is to use a sensory table or a large shallow storage bin as the base of your mud kitchen.
Those plastic sand-and-water tables (the kind with two compartments) are actually fantastic mini mud kitchens – one side can hold dirt or sand, the other water. Kids can mix directly in those bins, and there’s usually a flat area to pretend it’s a stove. If you don’t have one, a wide plastic bin or even an old drawer can be set on a low bench or sturdy crate to serve as the “mud counter.”
Surround it with a few potted plants or a little artificial turf mat to make it feel like an outdoor zone, even on a balcony. When I lived in a second-floor apartment, I gave my toddler a “mud tub”: basically a big storage tub filled with soil and a little water, set on an old coffee table on our balcony. I added a couple of spoons and a muffin tin, and that kept her busy making mud muffins with zero fancy setup.
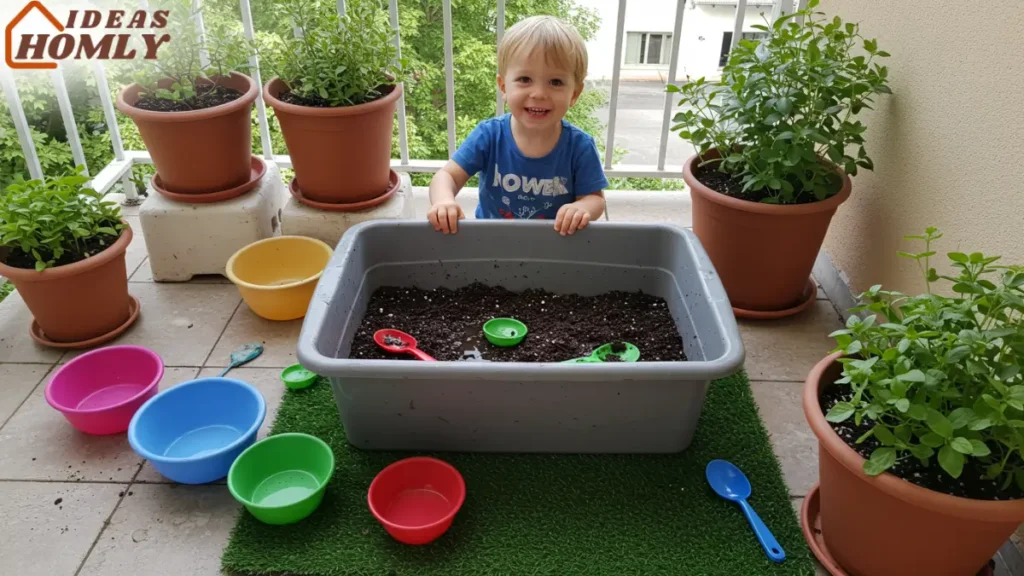
We laid out a cheap plastic tablecloth under it to catch spills (you could also use a big tray). For easy cleanup in a small space, consider using potting soil or sand as a cleaner mud alternative – it’s less clumpy and easier to brush off concrete, but still gives a muddy feel when wet.
Also, having a bucket of clean water nearby helps for quick hand rinsing (or use a watering can to add water to recipes without huge spills). The beauty of a mini mud kitchen is that it brings nature play into an unlikely spot.
Kids living in apartments get a chance to squish mud and pick leaves to stir in, just like they would in a big yard. And when playtime is over, you can cover the bin with a lid or garbage bag and store it in a corner. It’s proof that backyard mud play can happen even without a traditional backyard!
15. Corner & Vertical Mud Kitchen (Maximize Small Spaces)
When every square foot counts, making use of a corner or vertical height can turn a tiny area into a functional mud kitchen. A corner mud kitchen is designed to tuck into the corner of a fence or patio, using two sides for support. For example, you might have two small benches or crate stacks meeting at a right angle, creating an L-shaped countertop.
This not only gives a bit more surface area in a compact zone but also feels like a cozy nook for kids. I built a corner mud kitchen for a friend who only had a narrow side yard – we used one pallet against one wall and another against the adjacent wall, then added a triangular corner shelf to connect them. It fit perfectly in an unused corner and provided both a work surface and storage shelves.
Now, for vertical elements: think ladder shelves or tall thin bookcases that can live outdoors (secure them so they don’t tip!). A wooden ladder shelf can act as a multi-level mud kitchen: the lower shelf for mixing bowls, middle for ingredients, top for decor or plants. Kids can use the different levels as pretend “oven” and “fridge” or simply as storage for their pinecones and utensils.
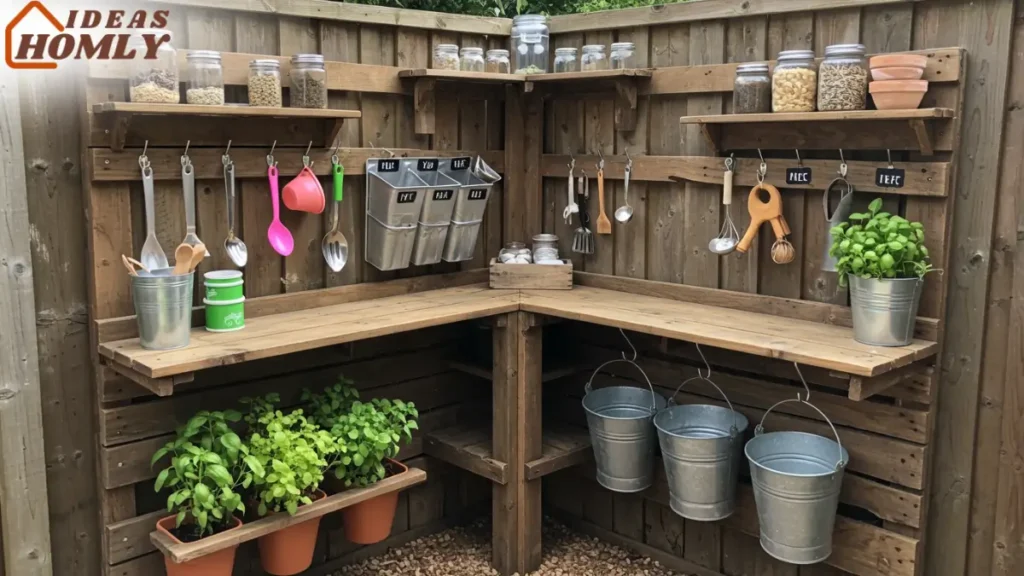
One creative solution I’ve seen is using a vertical pallet garden frame – the kind meant for planting herbs vertically – and adapting it. The staggered shelves on it became mini counter surfaces for a child’s mud concoctions. The key with vertical designs is to ensure stability (anchor to a wall if possible) and consider height: you want at least one lower surface at kid level.
Everything above is bonus for storage or for older kids to reach. In our corner setup, we also hung an old shoe organizer on the fence next to it, with each pocket holding a different mud kitchen accessory (spoons, small toys, water spray bottle, etc.). It utilized vertical space and kept things organized. Even in the smallest corners, a little creativity can yield a fully featured mud kitchen.
It might not be grand in scale, but from a child’s perspective, that compact mud kitchen can feel just as exciting and inviting. After all, kids are masters of using small spaces in big ways – give them a nook, and they’ll create a whole world within it.
Conclusion & Key Takeaways
Building a mud kitchen – whether it’s a brightly painted pallet creation, a rustic log setup, or a compact cart – is one of the most rewarding DIY projects for families. It doesn’t have to be expensive or complicated.
From my own experience, I can tell you that a mud kitchen becomes more than just a plaything; it becomes a little outdoor classroom and a cherished memory-maker.
Your children will learn cooperation as they “cook” together, practice creativity by inventing mud recipes, and even pick up a bit of responsibility (you’d be surprised how proudly a three-year-old can wash their toy dishes in a mud kitchen sink).
As a parent or educator, you’ll love watching their confidence and curiosity grow. And hey, you might even find yourself joining in to bake a pretend mud pie or two – I always do!
FAQ
Mud kitchens are great for kids from toddler age up to around 8 or older. Even 1–2-year-olds can enjoy supervised sensory play, while preschoolers dive into imaginative cooking. Older kids love creating “mud restaurants” or experiments. Just tailor the setup to their age and height, and avoid small parts for younger kids.
You can use soil, sand, water, and nature finds like leaves, flowers, or pebbles. For tools, grab old kitchen items—spoons, bowls, pans, and muffin tins work well. Add measuring cups, funnels, or recycled containers. Even empty spice jars or old teapots can spark creative play. The more variety, the better the fun!
Place it on grass, dirt, or a tarp for easy cleanup. Keep a rinse bucket or hose nearby for washing hands and tools. Dress kids in “mud clothes” and have them clean up before coming inside. Wipe down the kitchen occasionally—rain often helps! Using sand or potting soil can also reduce mess.
Not usually—just avoid leaving out real food or standing water. Clean up after play to prevent ants or mosquitoes. Natural ingredients like leaves may draw bugs if left too long, so refresh often. Keeping things tidy and using lids or covers when not in use helps keep pests away.
DIY with old furniture, pallets, or crates. Use thrifted or donated kitchenware, and repurpose items like bowls, buckets, or bottle caps. A dirt patch or bag of soil is all you need for ingredients. Look on local buy-nothing groups for free supplies—kids don’t care about fancy, just fun!
Make sure the kitchen is stable and splinter-free. Avoid breakable or sharp tools. Supervise toddlers, especially around water. Teach kids that mud pies aren’t for eating and have a solid handwashing routine. Keep play shaded on hot days and avoid allergens if adding flowers or soaps.

