When I first started carving pumpkins, my designs looked… let’s say “abstract.” That changed when I discovered pumpkin carving stencils, my secret to creating clean, professional-looking Jack-O’Lanterns without losing a fingertip.
If you’ve ever wondered how people carve those picture-perfect pumpkins for Instagram, here’s the answer: they use stencils.
Using stencils isn’t cheating; it’s smart. They save time, improve precision, and let even beginners make jaw-dropping designs.
Whether you’re prepping for a Halloween party, creating curbside décor, or competing with your neighbor’s spooky setup, stencils can transform your pumpkin into something worth showing off.
In this article, I’ll share five creative stencil ideas that will make your Jack-O’Lanterns stand out plus practical tips for transferring, carving, lighting, and customizing your designs.
How to Use Stencils Effectively
Before diving into the stencil designs, it’s worth understanding the basics of using them properly. Trust me, once you get this part right, everything else feels effortless.
Transferring the Stencil to the Pumpkin
One of the first lessons I learned? Pumpkins are round, stubborn, and never cooperate with flat paper. To make a stencil sit smoothly:
- Tape or Pin Method: Secure your printed stencil with painter’s tape or small push pins.
- Poking Technique: Use a small pin or sewing needle to poke tiny holes along the stencil lines. Once you remove the paper, the dotted outline will guide your knife.
- Carbon Paper Trick: For highly detailed stencils, place carbon paper between the pumpkin and stencil, then trace over the design with a pen. You’ll get a crisp outline without tearing the paper.
Chill your pumpkin in the fridge for 20-30 minutes before carving, it firms up the surface, making tracing easier.
Thinning and Scrub Carving Tips
Thinner walls make carving more precise and lighting more beautiful. I usually scoop out the pumpkin until the wall is about an inch thick.
If your design involves partial shading (like glowing effects), use a scrub carving technique, gently scrape away the skin layer with a clay loop tool or spoon to let soft light pass through without cutting all the way.
| Technique | Purpose | Best Tool |
|---|---|---|
| Poking transfer | Create dotted guide lines | Pin or needle tool |
| Scrub carving | Shaded light effects | Loop tool or scraper |
| Full cut-out | Bold silhouettes | Pumpkin saw or mini knife |
Tools Suited for Stencil Edges
The right tools can make or break your pumpkin (literally). Here’s what I keep in my toolkit:
- Mini saws for smooth, rounded cuts.
- X-Acto knives for fine details like spider webs or bat wings.
- Clay loop tools for surface carving and shading.
- Drill bits for dot patterns or precision holes.
If you’re planning to carve multiple pumpkins, invest in a pumpkin carving kit with replaceable blades. It’s worth it and trust me, a kitchen knife just won’t cut it (pun intended).
The 5 Stencil Designs
Here’s where things get exciting. I picked five stencil ideas that balance creativity and practicality, easy enough to carve in an afternoon, but unique enough to get compliments from anyone passing by.
1. Art-Deco Bat Border
If you like a classy Halloween look, this design is for you. Imagine a band of sleek, symmetrical bats wrapping around your pumpkin’s midsection, elegant yet spooky.
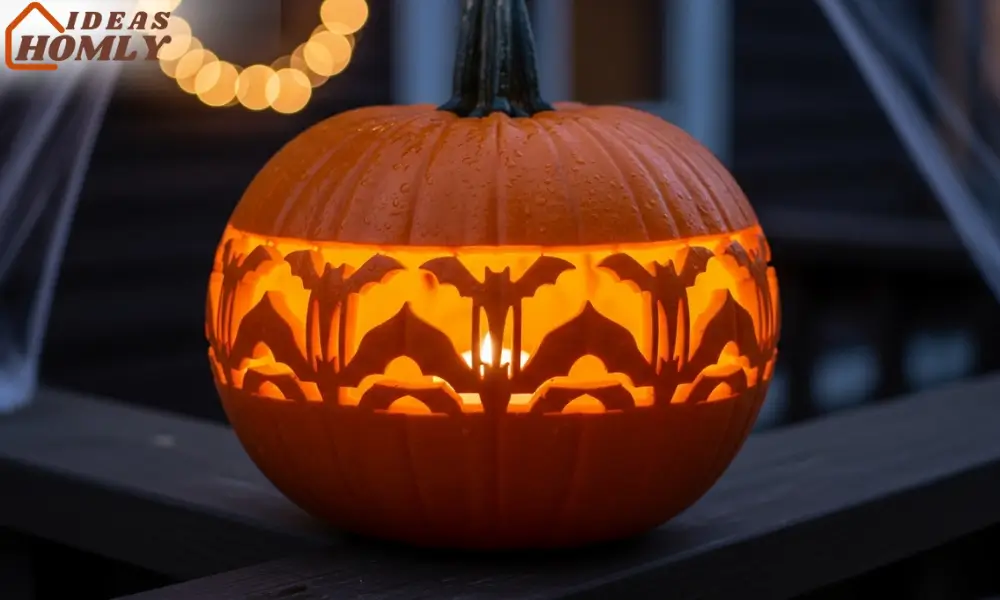
Drawing Notes: Start with a repeating bat outline about two inches tall. Keep consistent spacing between each bat to form a continuous border.
Carving Instructions: Use a fine-tooth saw for the wing edges. You can also alternate between cut-out and scrub-carved bats to add texture.
Photo Idea: Display it on your porch railing with a candle inside. The repeating silhouettes create a glowing bat halo effect that looks stunning after dark.
2. Geometric Spiderweb
This design combines Halloween charm with modern geometry. Think clean lines and sharp angles, the kind of pumpkin that looks like it came from a design studio.
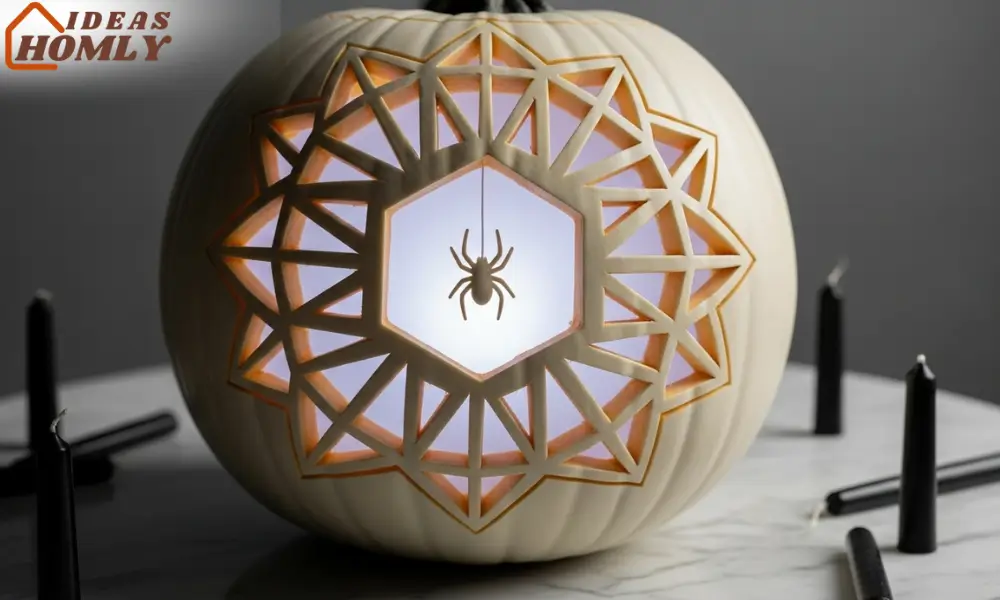
Drawing Notes: Print a geometric web pattern or draw it freehand using intersecting triangles radiating from a central hexagon.
Carving Instructions: Use a precision knife and remove thin triangles for a crisp web. You can leave a small spider silhouette in the center for extra detail.
Photo Suggestion: Place it beside a white or gray pumpkin for a high-contrast, minimalist setup perfect for Pinterest shots.
3. Vintage Matchbook Skull
This one’s a personal favorite. It has an old-school, tattoo-inspired charm slightly mischievous, but stylish enough for grown-up décor.
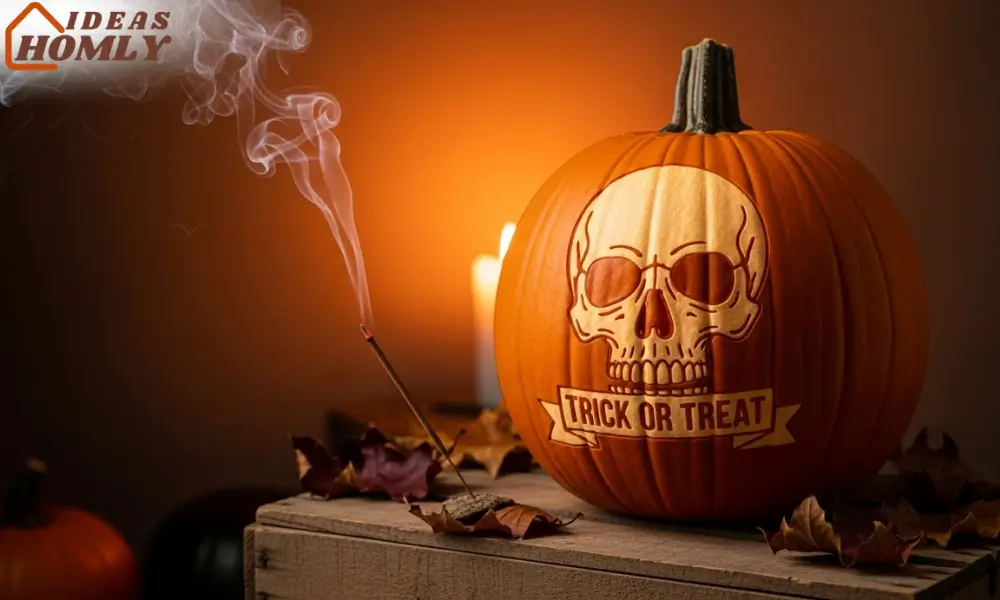
Drawing Notes: Search for “vintage skull stencil” and choose one with clean, defined outlines rather than hyper-realistic details.
Carving Instructions: Focus on the eyes, nose cavity, and jawline. Avoid over-carving; too much detail can weaken the pumpkin wall. If you’re feeling fancy, add text like “Trick or Treat” underneath in a retro font.
Photo Suggestion: Pair it with a smoky candle or incense stick to create that eerie, vintage glow in your photos.
4. House Number Jack-O’
If you love adding a personal touch to your Halloween décor, the House Number Jack-O’ idea might just become your favorite.
Instead of carving another scary face, carve your home address number right into the pumpkin. It’s practical and stylish plus, your visitors (and delivery drivers) will thank you.
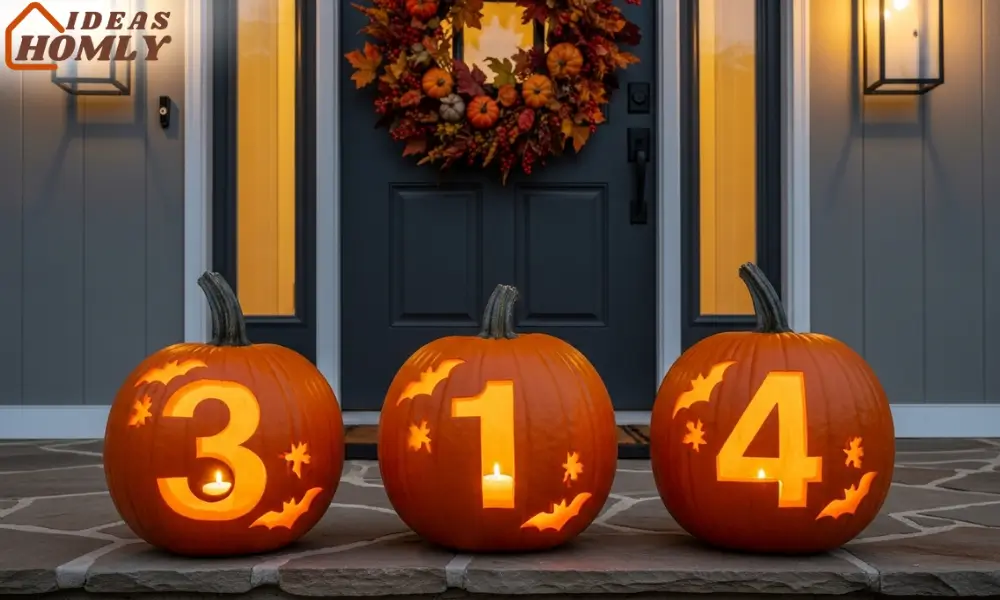
Concept: This design works best with bold, block-style fonts that are easy to see from a distance. You can use printable number stencils or make your own using Word or Canva.
Carving Instructions: Tape your stencil to the pumpkin, poke along the edges, and use a small saw for sharp corners. Clean up the inside so the candlelight glows evenly through each digit. If you want more flair, carve a small bat or leaf beside the number.
Photo Suggestion: Line up two or three pumpkins to display multi-digit numbers in sequence. Set them on your porch steps, it creates a welcoming glow that doubles as your house marker.
5. Playlist QR Panel
Now here’s a clever twist for the tech-savvy crowd: carve a QR code panel that links to your favorite Halloween playlist.
Imagine guests scanning your pumpkin and instantly hearing “Monster Mash” or spooky ambient tunes, talk about next-level hosting.

Concept: You’ll need to print a scannable QR code large enough to carve the main squares clearly. Upload your playlist link (Spotify, YouTube, or Apple Music) to a QR generator and test it before transferring the stencil.
Carving Instructions: Tape your QR stencil to the flattest part of the pumpkin. Use a thin drill bit or needle tool to poke around each black square. When carving, keep shapes simple, you only need partial depth to let light define the code.
Photo Suggestion: Place your pumpkin on a table at your Halloween party entrance with a small sign that says, “Scan for Spooky Tunes.” It’s geeky, creative, and guaranteed to impress.
Creating & Customizing Your Own Stencil
Once you’ve mastered ready-made designs, making your own stencil opens up endless possibilities. I’ve made everything from my pet’s face to simple abstract patterns. Here’s how you can do it without needing design school credentials.
Design Tools You Can Use
You don’t need fancy software. Some of the best free tools for creating custom stencils include:
| Tool | Use Case | Skill Level |
|---|---|---|
| Canva | Ready-to-use shapes, text, and images | Beginner |
| Photopea | Free Photoshop alternative | Intermediate |
| Adobe Illustrator | Perfect for scalable custom stencils | Advanced |
| Rapid Resizer | Great for enlarging small designs | Beginner |
These platforms let you import an image, convert it to black-and-white, and adjust contrast for stencil clarity. Just remember: bold shapes carve best, avoid overly thin lines that could snap.
Scaling and Mirroring for Perfect Fit
Every pumpkin is shaped differently, and no one wants to waste a perfect stencil on the wrong size. I like to measure the pumpkin’s smoothest area first, then resize the design accordingly.
If your image has text or a logo, mirror it before printing so that when transferred, it reads correctly once carved. This tiny step saves a lot of frustration later.
Adding “Bridges” for Floating Elements
This is one trick even experienced carvers sometimes skip. When your design has floating parts (like the inner eyes of a skull or letters with holes like “O” or “P”), you’ll need bridges, thin uncut connections that keep those pieces attached.
Example: For a skull stencil, you can leave two tiny bridges on each eye to prevent the entire section from falling out. These connections won’t be visible when lit from inside, but they’ll hold your design perfectly in place.
Pro Tip: Use a fine permanent marker to draw bridge lines before you start cutting. It’s easier to carve clean edges when you know exactly where support is needed.
Display & Lighting for Stenciled Pumpkins
You’ve carved your masterpiece, cleaned the edges, and your hands are probably covered in pumpkin guts, now it’s time to show off your work. A good display setup makes a huge difference in how your carved designs look at night.
Uniform Illumination
The most common mistake I see is uneven lighting. One side of the pumpkin glows like a furnace while the other looks dead. The solution? Use LED tea lights or battery-operated fairy lights instead of candles.
They produce a steady glow and reduce heat buildup (your pumpkin lasts longer, too). For large pumpkins, place two lights inside, one near the back and one near the front for balanced brightness.
| Lighting Option | Effect | Safety Level |
|---|---|---|
| LED tea lights | Warm flicker, safe for indoor/outdoor use | High |
| Fairy string lights | Soft glow with even distribution | High |
| Small candle | Natural flame, classic look | Medium |
Creative Backdrops and Group Arrangements
If you’re carving multiple stenciled pumpkins, arrange them in a theme. For example:
- Align stencils along the rim edges of two pumpkins to create a wraparound design.
- Group pumpkins of different sizes, the tallest at the back, smallest upfront for depth in photos.
- Use simple black cloth, hay bales, or wooden crates as backdrops to enhance contrast.
When I display mine outdoors, I usually sprinkle a little fake cobweb or dry leaves around the base. It instantly adds Halloween charm without distracting from the carvings.
Preserving Your Carved Pumpkin
Here’s a bonus tip: after carving, lightly brush the cut edges with petroleum jelly or spray with a pumpkin preservative.
It seals in moisture and keeps your design looking fresh for several extra nights. Nobody wants a wilted Jack-O’Lantern halfway through Halloween week.
Conclusion
Pumpkin carving doesn’t need to be a stressful, sticky battle with knives and failed sketches. Stencils make the process faster, safer, and a lot more satisfying.
Whether you’re carving a sleek Art-Deco Bat Border, showing off your House Number Jack-O’, or setting the mood with a Playlist QR Panel, each idea adds a creative twist to your Halloween décor.
The key is to plan smart, carve patiently, and light strategically. Every stencil can tell a different story, spooky, classy, or clever and that’s what makes pumpkin carving one of my favorite traditions.
Before you toss those pumpkin scraps, remember: with the right stencil and a steady hand, even a simple design can look professional. Grab your tools, pick your favorite idea from this list, and create a Jack-O’Lantern that makes your porch glow with personality.
FAQs
The simplest method is the poking technique: tape your stencil, poke tiny holes along the design, and remove the paper. The dotted pattern will guide your carving perfectly. If your stencil has detailed sections, try carbon paper to trace cleaner lines.
Absolutely. I usually print two copies, one to carve with and one as a backup. If you laminate or store them flat in a folder, they’ll last for years. You can also trace them onto plastic transparency sheets to make them even more durable.
Choose a smooth, medium-sized pumpkin with a flat surface. Lighter-colored pumpkins reflect candlelight better through the carved areas. Avoid deeply ridged pumpkins; they make stencil alignment harder and can distort the design.
After carving, rinse it in a mild bleach solution (1 tablespoon of bleach per quart of water), then dry it completely. Apply petroleum jelly to all cut edges or spray with a pumpkin preservative. Keep it in a cool, shaded spot during the day.
Yes, and it’s surprisingly easy. Use tools like Canva or Photopea to turn photos or graphics into black-and-white outlines. Adjust contrast, simplify shapes, and print at your pumpkin’s size. Add bridges for floating parts so your stencil doesn’t fall apart during carving.

