Halloween is never complete without at least one terrifying pumpkin on the porch. A spooky face glowing in the dark instantly sets the mood for a night of screams and candy chaos.
I’ve noticed that scary pumpkin carving ideas are the real showstoppers; those twisted faces and eerie effects always grab attention, especially under flickering candlelight.
If you’re like me and want something that looks actually scary, not cute or cartoonish, then this is for you. I’ll share realistic and creepy pumpkin carving ideas that anyone can try at home without expert sculpting skills.
Each one is practical, spine-chilling, and guaranteed to become the talk of the neighborhood.
Before we get into the terrifying designs, let’s make sure we have the right setup.
Tools & Techniques for Horror Effects
Creating a creepy pumpkin isn’t just about cutting random shapes. It’s about texture, lighting, and illusion. The tools and techniques you use can completely change how horrifying your final design looks.
Here’s what I usually keep on hand:
| Tool | Purpose | Why It Helps |
|---|---|---|
| Serrated knives | Cutting outer shapes | Helps create jagged, torn edges for “decayed” looks |
| Clay loop or ribbon tools | Thinning skin layers | Perfect for creating cracked or translucent sections |
| Power drill with bits | Precise holes | Great for fungal effects or eye spirals |
| Black and red paint | Finishing | Adds blood or shadow depth |
| LED tea lights | Lighting | Safer and easier to adjust brightness than candles |
For more realistic horror effects, try thinning the inner pumpkin wall in certain areas. It lets light seep through and makes faces or designs glow unevenly like a haunted lantern.
When carving scary features such as teeth or eyes, slightly roughen the cuts instead of keeping them smooth. The imperfect edges create a more natural “rotting” vibe.
A trick I learned from horror prop makers: lightly burn the carved edges with a candle flame. It adds a smoky, aged look. Just do it carefully and away from the inside lighting source.
1. Spiral Hypno Eyes
There’s something unsettling about spirals. They mess with your head, and when you add glowing eyes into the mix, it becomes a pumpkin no one wants to stare at for long.
For this design, start by sketching two large eyes slightly tilted in opposite directions. Then use a drill or carving tool to cut spiral patterns inside each eye.
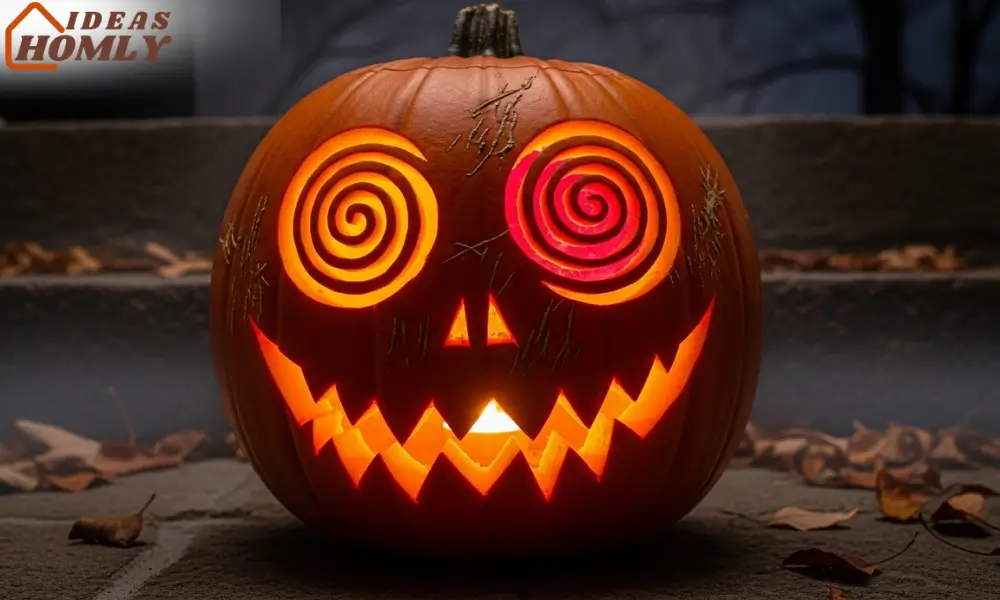
I like to carve the spirals shallowly instead of all the way through. When you light the pumpkin from inside, it creates a creepy hypnotic swirl that looks alive.
To make it even scarier, carve a small jagged mouth with uneven teeth or an exaggerated grin underneath.
The asymmetry makes it more disturbing, especially when one eye spiral glows brighter than the other. You can use black paint or marker to deepen the grooves for extra contrast.
Lighting tip: Use a flickering LED candle or orange-and-red mixed glow to mimic a demonic trance effect. It looks hauntingly real in the dark and perfect for outdoor displays.
2. Zip-Mouth Maw
This one’s a classic psychological horror design; it looks like something out of a nightmare. The idea is simple: a pumpkin face with a zipped-shut mouth, as if something terrifying is trapped inside.
Start with a clean, tall pumpkin. Carve basic eye holes but leave the mouth area uncut. Use a utility knife to slice a long horizontal slit for the mouth, then carve shallow lines around it to form stretched “skin.”
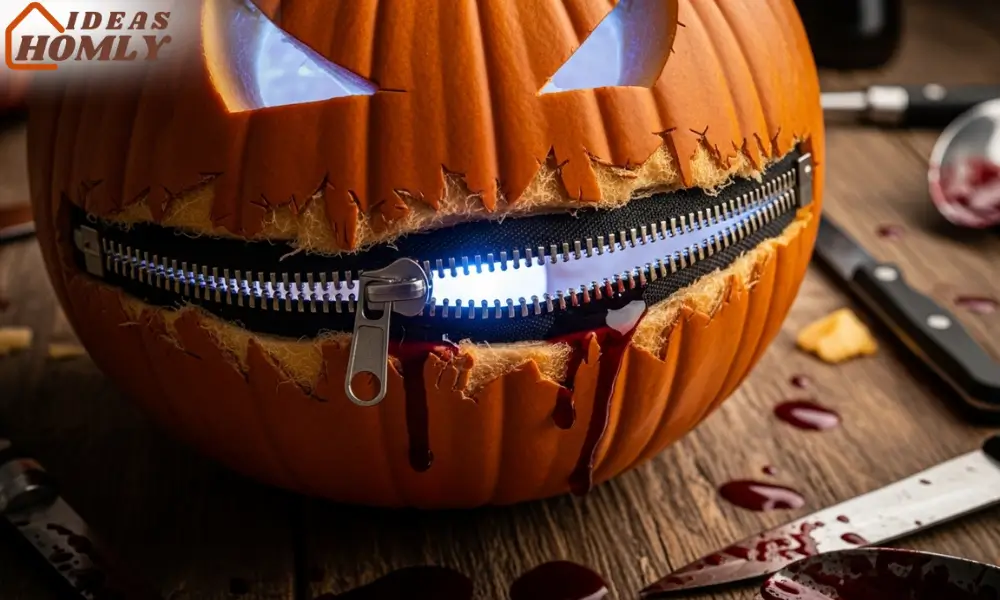
Now, insert a real zipper (from an old jacket) into the slit using pins or glue. It immediately looks disturbing as if the pumpkin is trying to keep a secret.
I once saw someone fill the slit with fake blood gel, and it looked horrifyingly good. You can also stick a plastic tongue halfway out for a more grotesque twist.
The best lighting here is a white LED, which highlights every gruesome detail without making it too warm or cozy.
This design is surprisingly easy but looks like a prop straight out of a haunted movie. Every guest I’ve shown it to either laughs nervously or refuses to look twice—and that’s the reaction we want, right?
3. Cracked Porcelain Face
Few things are creepier than a doll face that looks innocent at first glance but shattered on closer look. That’s exactly what makes the Cracked Porcelain Face pumpkin design so disturbing. It combines fragility with horror, like something straight from an abandoned nursery.
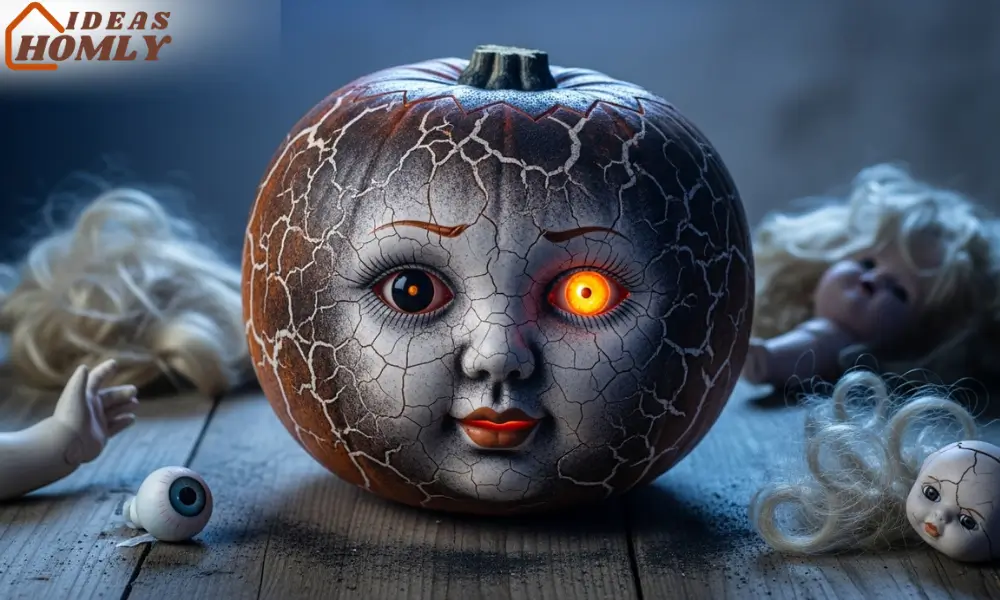
Start by drawing a smooth oval face with small delicate features; soft eyes, a tiny nose, and a faint smile. Then use a craft knife or fine carving tool to etch long, thin cracks across the surface.
The key is to make the cracks irregular, branching and spreading randomly like spiderwebs. Don’t carve too deep; you want the pumpkin’s glow to peek through the thinner skin areas, highlighting those fractured lines.
To make it feel even more eerie, you can carve just one eye deeper so it shines brighter than the other.
That uneven glow adds a haunting personality. I also like dusting a bit of black or gray powder (charcoal or makeup works fine) over the cracks, it enhances the “broken porcelain” illusion.
Lighting tip: Soft white or pale blue LEDs give it a ghostly, cold appearance. It’s perfect for anyone who prefers psychological horror over gore.
4. Handprint Escape
This one never fails to freak people out. The “Handprint Escape” pumpkin makes it look like something inside is desperately trying to claw its way out. It’s simple, visual, and absolutely terrifying at night.
Begin by scraping the inside wall of your pumpkin very thin, almost translucent on one side. Then, using your hands (or a template), trace five-finger handprints onto the outer skin.
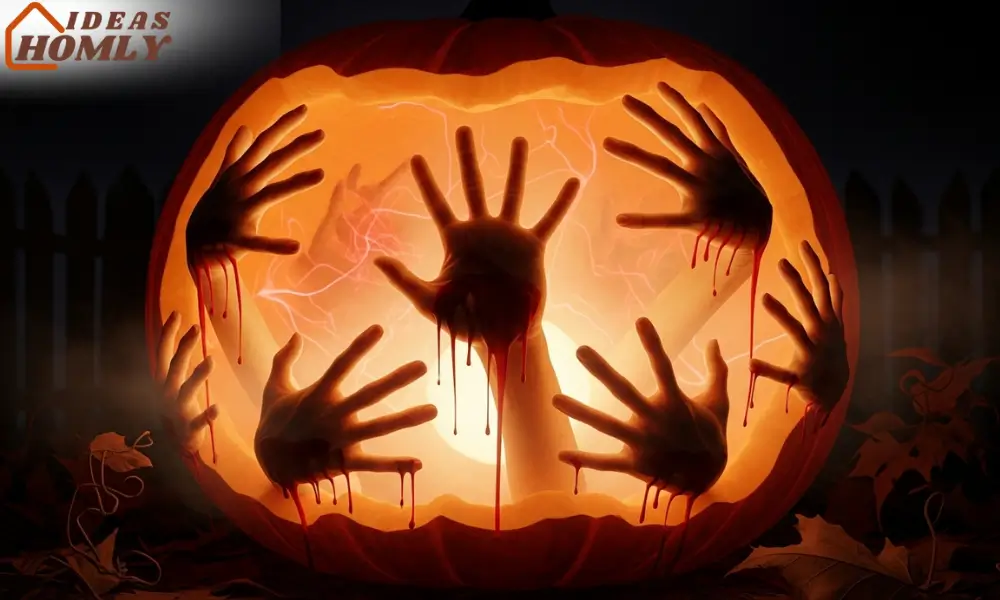
Carefully shave the top pumpkin layer away along the hand shapes but don’t cut through completely. When lit, the glow shines through the thin flesh, creating the illusion of glowing hands pressed from inside.
You can add multiple handprints, some overlapping or at different angles, to make it look like there’s chaos inside. It’s one of those designs that doesn’t need a face; the imagery alone sends shivers down spines.
For an extra layer of realism, drip a little fake blood or melted red wax along the edges of the prints.
I once used red LED lights for this design, it made it look like someone was truly trapped in there. If subtle horror isn’t enough for you, this one’s a guaranteed jump-scare.
5. Fungal Rot Holes
This idea is creepy because it’s realistic. Nature’s decay has its own kind of horror, and a pumpkin designed to look like it’s being consumed by fungus or rot captures that perfectly.
To start, pick a pumpkin that already has a few blemishes or uneven textures. Using a melon baller or carving loop, scoop out clusters of small, uneven holes across the surface.
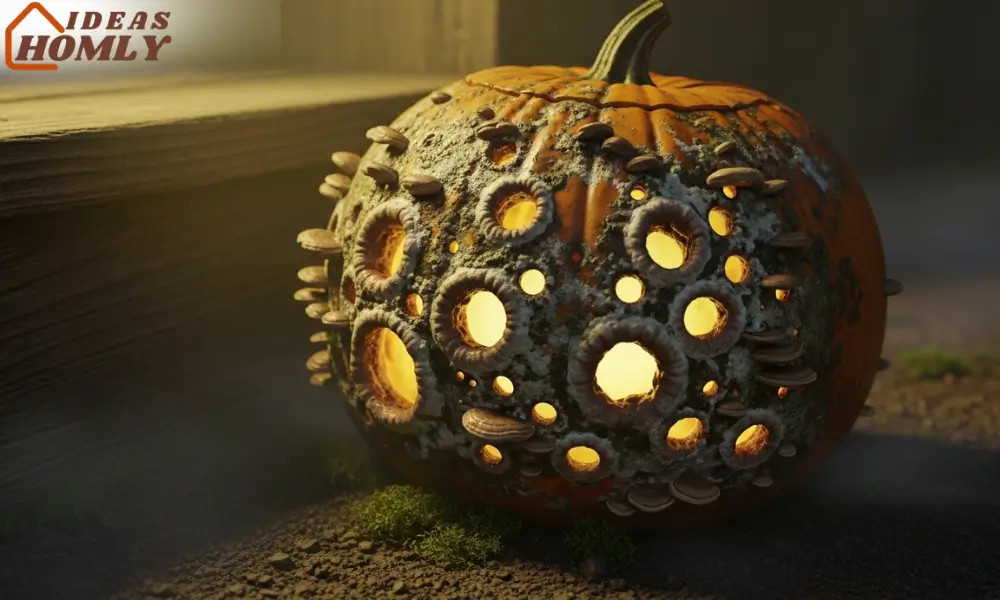
Avoid perfect circles, they should vary in depth and size to resemble rotting cavities. Then, around each hole, lightly shave the pumpkin skin to give a spreading, infected look.
Now comes the fun part: texture. Mix brown, green, and gray acrylic paint and dab it around the holes to mimic mold or fungus growth.
You can even stick small bits of dried moss or tissue paper for a decaying skin texture. When you add a dim yellow light inside, it glows faintly through the holes like toxic rot.
This one looks incredible for outdoor setups. It gives that perfect “abandoned farmhouse” vibe, especially when placed next to other distressed or half-carved pumpkins. It’s messy, but the realism makes it unforgettable
6. Ribcage Cutaway
If you want something that instantly grabs attention, the Ribcage Cutaway design is your best bet. It looks terrifying, especially when lit from the inside, as if a creature is glowing through its own skeleton. The best part? It’s not hard to make, it just requires careful planning.
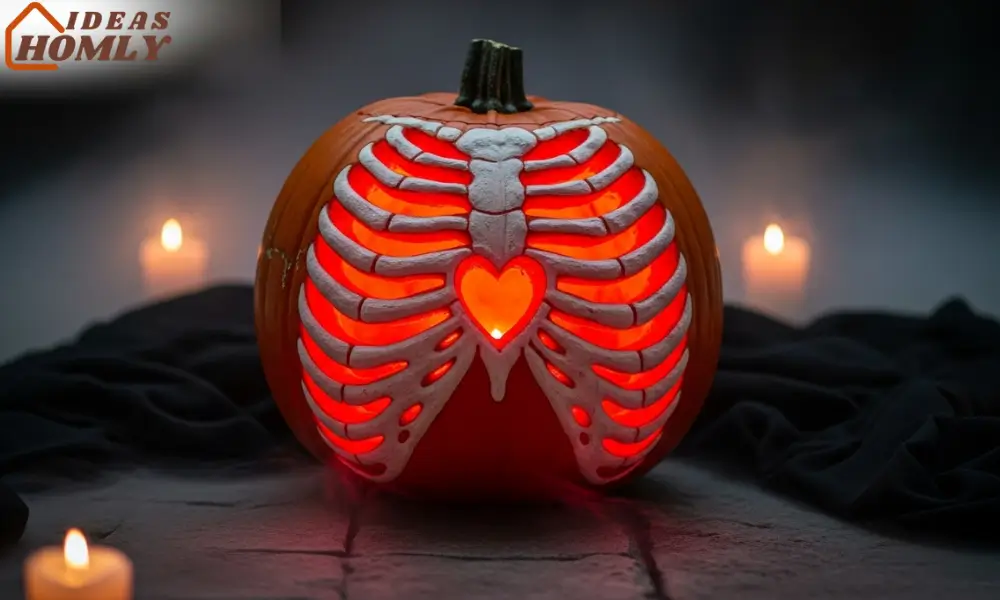
Start by sketching a vertical oval shape on the front of your pumpkin. Inside that shape, draw rib-like arcs on each side, leaving a central gap for the “spine.” Carve out the spaces between the ribs, not the ribs themselves.
This keeps the glowing effect consistent. For added realism, carve a faint heart or stomach shape in the center, it gives the illusion of exposed organs glowing within.
I once tried spraying a light coat of white paint over the carved ribs to give them a bone-like contrast. It made the design pop under flickering orange light.
You can also tuck a small piece of black cloth behind the open ribs to hide the light source and give more depth to the look.
This pumpkin works best with amber or red LED lighting. The red glow makes it look freshly ripped open, while amber gives it that candlelit “monster lab” feel. It’s one of those pumpkins that makes people take a step back before they get closer.
Enhancing Horror with Props & Effects
Once your pumpkins are carved, it’s time to give them context. Horror works best when it feels like part of a larger story. Adding props and small set pieces around your pumpkins multiplies the fear factor.
Here’s what I usually experiment with:
- Fake cobwebs stretched thinly around the display. They diffuse the light and create eerie shadows.
- Doll parts or rubber insects placed near the Cracked Porcelain pumpkin. They make it look like something’s crawling out.
- Fog machines or dry ice under the setup for that haunted mist effect. It makes the light flicker and move, especially in outdoor spaces.
- Black fabric or cheesecloth as a backdrop to absorb light and make your pumpkins stand out in photos.
- Motion-sensor sound effects, like faint whispers or creaking noises, for an unexpected scare when guests walk by.
A little bit of planning here goes a long way. Even a simple light flicker can turn a good carving into something unforgettable.
And if you’re hosting a Halloween party, your photo wall is practically ready—just place a few candles and fog around the display, and you’ll have people taking pictures all night.
Photo & Video Tips
Capturing your scary pumpkin in photos is as important as carving it. A perfectly lit, well-angled photo can turn your design into Pinterest or Instagram gold.
Over the years, I’ve tested what makes pumpkin shots look cinematic instead of flat or washed out.
- Shoot during twilight. The “blue hour” gives enough ambient light for background detail but keeps the pumpkin’s glow visible.
- Use a tripod or steady surface. Even the slightest shake can blur the glowing areas.
- Try colored lighting. A small flashlight wrapped in colored film (red, purple, or green) creates eerie tones without editing.
- Add perspective. Photograph from slightly below eye level—it makes the pumpkin look dominant and lifelike.
- Record short clips. A slow pan or flickering-light video gets more engagement on social media than a static photo.
If you’re posting online, add tags like #scarypumpkincarving, #halloweenpumpkinideas, and #haunteddecor to attract the right audience. People love watching creative yet achievable designs, so don’t be afraid to show your process.
Conclusion
Creating scary pumpkin carving ideas that truly send chills down the spine isn’t about perfection, it’s about storytelling. Each cut, shadow, and flicker of light builds suspense.
Whether you go with the hypnotic Spiral Eyes, the eerie Zip-Mouth, or the decaying Fungal Rot, your pumpkin becomes more than decoration, it becomes part of the night’s mystery.
I’ve seen firsthand how much people love seeing creativity mixed with just the right amount of creepiness.
So pick your favorite design, grab your tools, and get carving. Halloween comes once a year, but those terrified gasps from your guests? Priceless every time.
FAQs
I prefer medium to large pumpkins with smooth, firm skin. They’re easier to carve detailed shapes like cracks and rib structures. Avoid overly soft ones; they collapse quickly.
After carving, coat the exposed edges with petroleum jelly or vegetable oil. It slows down dehydration and mold. You can also refrigerate it overnight if it’s warm outside.
Absolutely! Painting can mimic cracks, rot, or shading that’s tricky to carve. Acrylic paint works best, and sealing it with a clear spray keeps it from fading outdoors.
LED candles or small battery-powered string lights are safest. They last longer than real candles and reduce the risk of fire or overheating.
Mix corn syrup, red food coloring, and a drop of blue or black dye for a dark tone. Drip it around mouths or cracks for a realistic, dripping-blood effect. It’s messy but looks spectacular.

