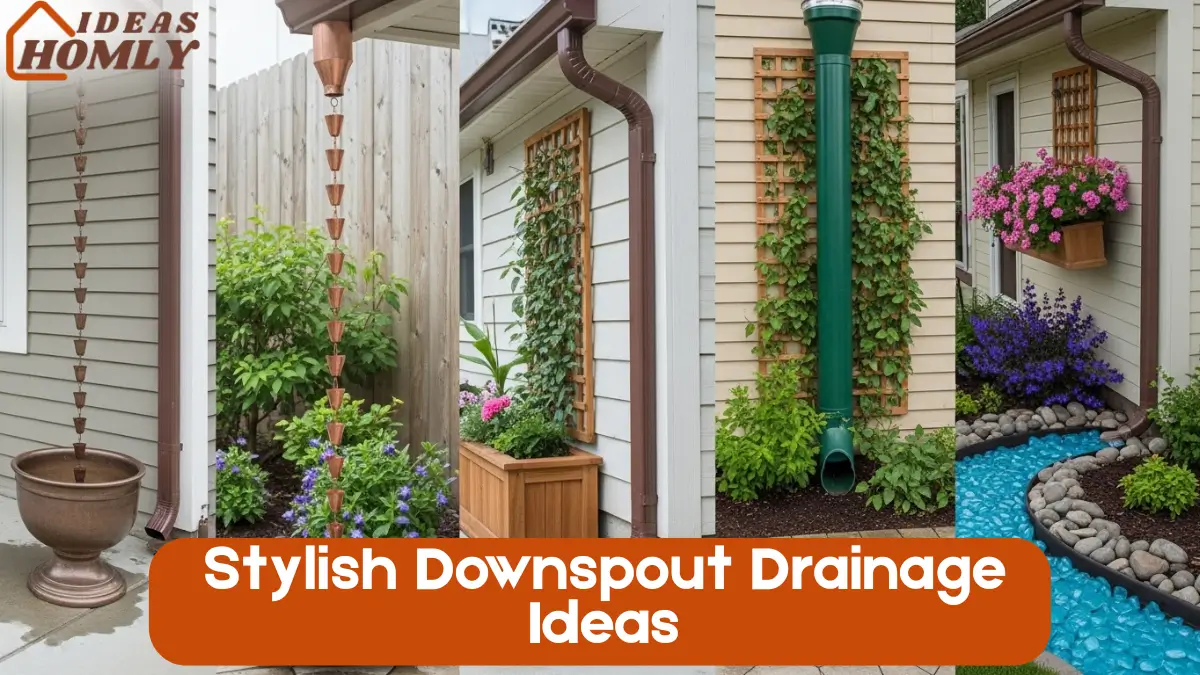
Let’s be honest, when someone says “downspout drainage,” your mind probably jumps straight to boring black pipes and ugly runoff. That was me too… until I realized that functional doesn’t have to mean flat-out unattractive.
If you’re like me and care about every corner of your yard looking beautiful, even those often-ignored areas, then stay with me. Because yes, you can manage water runoff and make it look stunning at the same time.
Let’s take that dull little downspout and turn it into something that actually adds style to your landscaping. I’ve rounded up five of my favorite ideas that are both practical and stylish. You don’t have to choose between beauty and utility. You can totally have both.
And no, I’m not talking about just painting the drainpipe and calling it a day. These are real, creative, and surprisingly easy ways to upgrade your home’s drainage in style.
Why Drainage Doesn’t Have to Be Boring
Drainage is one of those “out of sight, out of mind” home projects. Until it floods your yard. Then it becomes a major concern. But why wait until it’s a problem?
Your downspout can do more than just direct water away from your foundation. It can become part of your yard’s overall vibe, modern, rustic, whimsical, or even nature-inspired.
In fact, every one of these ideas adds visual interest, curb appeal, and even eco-friendly benefits.
Let’s jump into the first idea that completely changed the way I looked at my own downspout.
1. Copper Rain Chain + Hammered Basin
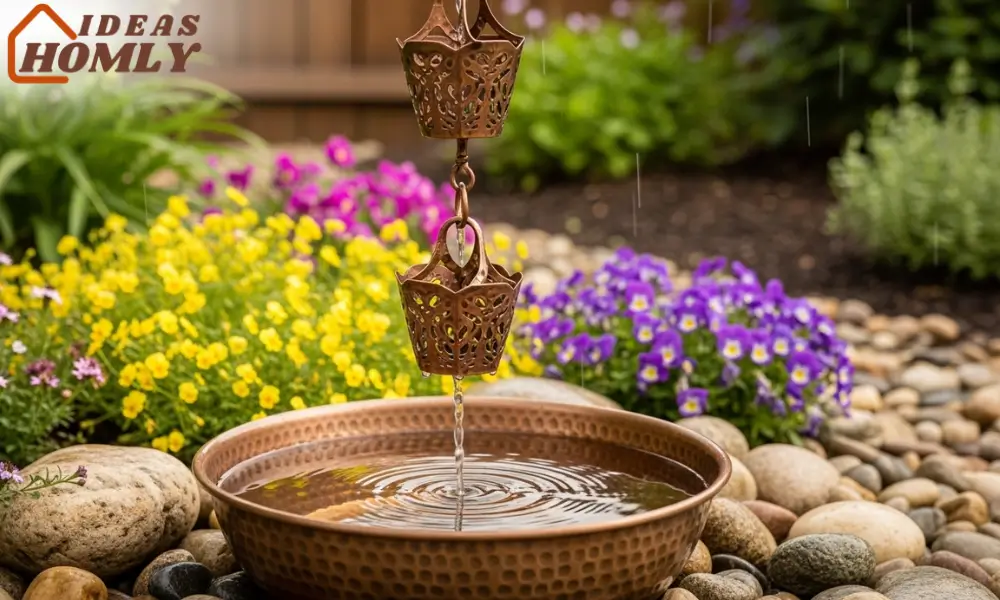
I’m obsessed with rain chains. I mean, they just look and sound magical when the water trickles down them. Instead of a boring plastic or metal pipe, imagine a series of copper cups or loops cascading water down in the most satisfying way. It’s not just eye-catching, it’s relaxing. Like nature’s own wind chime.
I paired mine with a hammered copper basin at the bottom. Not only does it catch the water and prevent erosion, but it also acts as a statement piece. Over time, the copper develops a patina, giving it a rustic charm that blends beautifully with greenery or gravel paths.
Here’s a quick comparison of typical vs. rain chain drainage:
| Feature | Standard Downspout | Copper Rain Chain |
|---|---|---|
| Aesthetic Appeal | Low | High |
| Sound Factor | None | Soft, tranquil water sounds |
| Maintenance | Low | Moderate (clean leaves/debris) |
| Cost | Low | Medium to High |
| Visual Statement | None | Strong decorative accent |
So, if you want drainage that doubles as garden art, this one’s worth the splurge.
2. Pollinator-Friendly Planter Box
Now, this one combines two of my favorite things, plants and practical design.
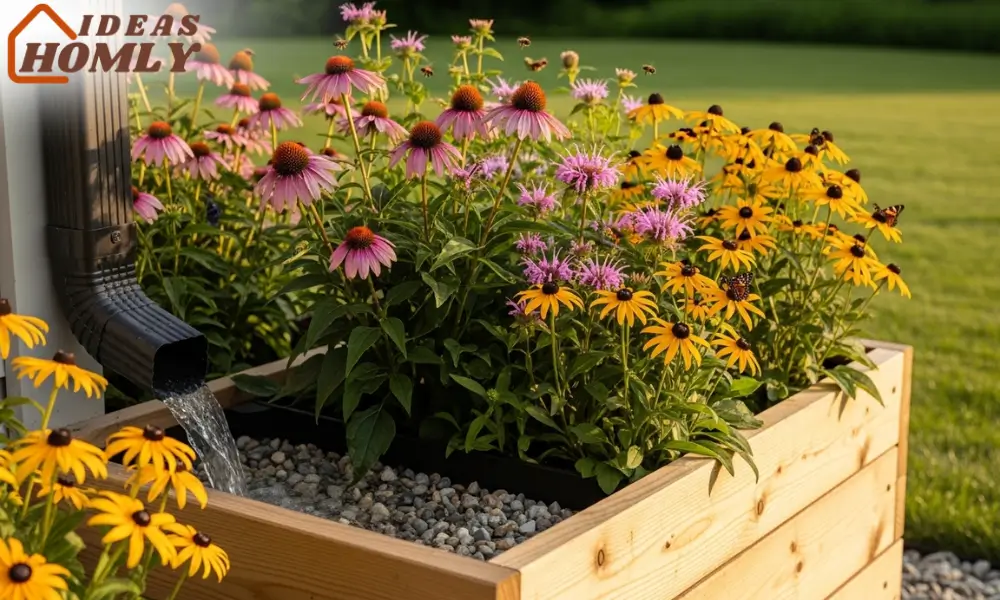
Instead of a plain splash block, I built a planter box directly beneath the downspout. I chose native flowers like coneflowers, bee balm, and black-eyed Susans. These beauties don’t just soak up the rainwater, they also invite butterflies and bees. Talk about multitasking.
I lined the bottom with gravel for drainage, added a layer of sand and then nutrient-rich soil. The best part? It’s all natural and no more muddy puddles near the foundation.
Here’s what I included in my planter:
- Layered gravel base for fast draining
- Moisture-loving perennials
- Mulch top layer to hold in water and keep weeds away
What surprised me most was how it transformed a forgotten corner of my yard into a blooming little ecosystem. It adds color, life, and actually helps reduce the water load around the house.
And yes, it gets compliments every time someone walks past it.
3. Trellis-Covered Downspout
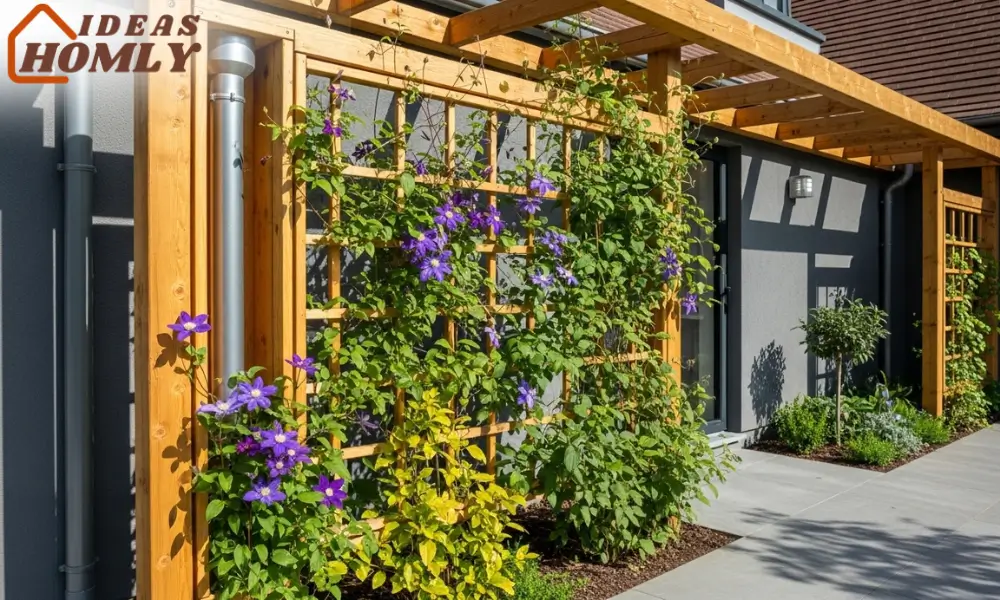
This one was a total game-changer for me. I’d always hated the way my downspout stuck out like a sore thumb right near the patio. So, I decided to build a vertical trellis around it and honestly, it turned out better than I imagined.
I went for a narrow wooden frame with horizontal slats, stained to match my fence. Then I planted fast-growing vines at the base, clematis and climbing hydrangea are my go-tos. Within a few months, the trellis was covered in greenery, and the downspout? Virtually invisible.
Here’s why this idea works so well:
- It hides the eyesore without messing with function
- The vines help slow runoff naturally
- It adds vertical interest to otherwise bland walls
- You get year-round beauty, especially if you pick evergreen vines
You just need to make sure the trellis is securely mounted, and the plants are spaced far enough to allow airflow around the downspout. Trust me, mildew is not your friend.
Oh, and don’t be surprised if the birds start nesting nearby. Mine sure did.
4. Mosaic Splash Block Pathway
You know how most splash blocks are just plain old concrete slabs that sit there like they’ve given up on life? Yeah, I wasn’t about to let that slide in my yard.
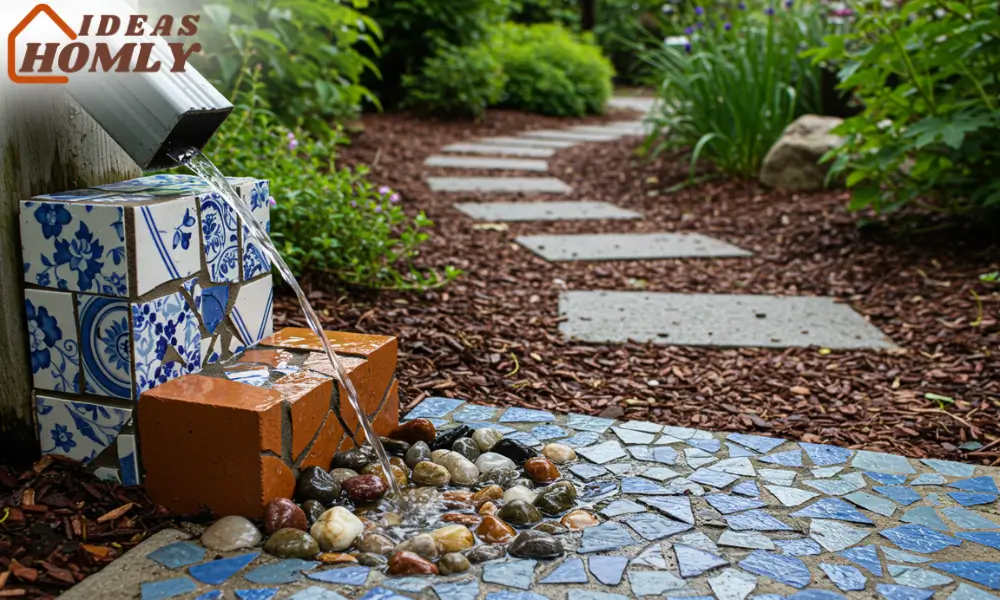
So I made a mosaic version using broken tiles, river stones, and leftover ceramic bits from a failed DIY project. I laid them into a concrete mold and created a custom splash block that not only redirects water, but actually leads into a stepping stone pathway.
Functional? Yes. Eye-catching? Absolutely.
I added a bit of slope to help the water flow away smoothly. The tiles give it a colorful pop, and the stones provide grip during rainy days. Plus, it makes walking through the garden feel like stepping onto an art piece.
Quick tip: Use frost-resistant grout and seal everything, especially if you live where winter loves to ruin outdoor projects.
Here’s a little checklist I followed:
- Use durable outdoor adhesive for securing tile pieces
- Keep slope angle around 1 inch per 5 feet for smooth flow
- Seal the surface to prevent water absorption
- Blend colors to complement nearby plants or mulch
The end result? My guests always ask where I bought it. They’re shocked when I say, “Oh that? I made it myself one weekend!”
5. LED-Lit Glass Rock Creek Bed
Okay, I’ll admit, I went a bit extra with this one. But the results were worth it.
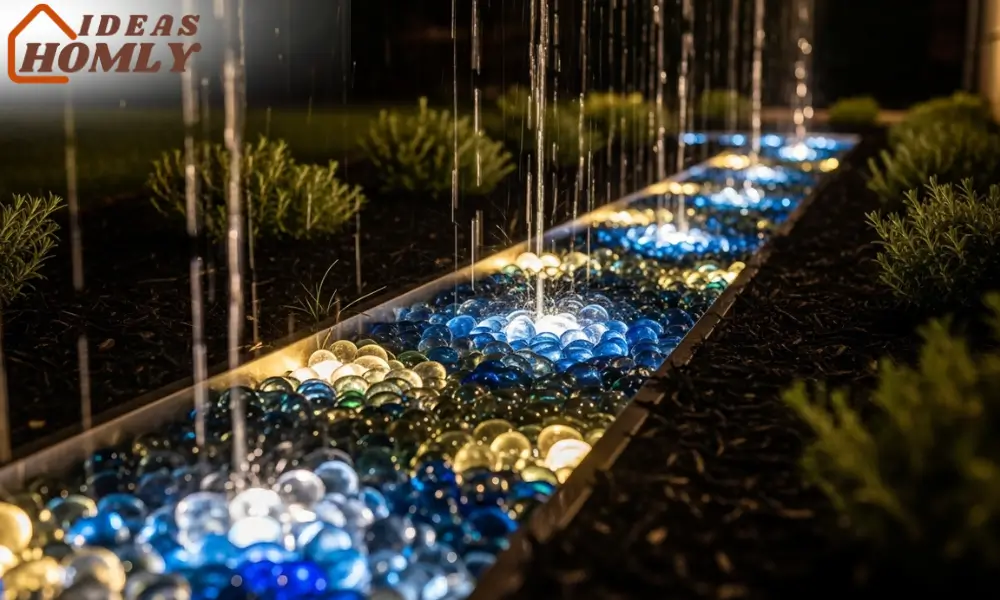
Instead of letting the water pool at the end of the downspout, I carved out a shallow trench, lined it with landscape fabric, and filled it with smooth glass rocks in shades of blue, clear, and aqua.
At night, I added low-voltage LED lights beneath the glass. When it rains, the whole thing sparkles. And when it’s dry, it still looks like a pretty little river winding through my garden.
It’s a total backyard flex. And it actually works to direct the water exactly where I want it toward my rain garden in the corner of the yard.
What I love most is that it’s:
- Low maintenance
- Built to last (I used UV-stable materials)
- Great for modern, coastal, or even zen-themed yards
- Surprisingly easy to install once you map out the flow
I recommend using solar-powered LED pucks or weatherproof strip lights tucked into the sides of the trench. No digging wires, no drama.
And yes it looks just as good during a thunderstorm as it does on a dry summer evening.
Installation & Water Flow Tips
Now, here’s the part most people skip. The ideas above are gorgeous but none of them will work well unless you’ve got the right water flow setup.
Here are the things I always double-check before installing any decorative drainage feature:
| Tip | Why It Matters |
|---|---|
| Slope Direction | Prevents pooling and directs water correctly |
| Water Volume | Avoids overflow during heavy rain |
| Foundation Distance | Keeps water at least 3-5 feet from foundation |
| Soil Type | Determines if you need a gravel base or liner |
| Seasonal Checkups | Stops leaves, ice, or roots from clogging things |
No matter how pretty your rain chain or planter box looks, if the water backs up or damages your siding, it’s not worth it.
That’s why I always use a mix of gravel layers, rain barrels, or dry wells to give the water somewhere safe to go. Especially after a heavy downpour.
Conclusion
Most people don’t even think about their downspout until there’s a muddy mess or a soggy lawn staring them in the face. But the truth is, your drainage system is one of those things that quietly keeps your home healthy and your yard happy.
And the best part? It doesn’t have to look ugly while doing it.
From the gentle elegance of a copper rain chain, to the pollinator magnet planter box, or even the glow-up glass creek bed, every idea I’ve shared has one thing in common: it makes your yard look better and work smarter.
What I’ve learned is this, functional landscaping doesn’t have to sacrifice beauty. With just a little planning, some creativity, and a bit of personal flair, even your downspout can become a highlight instead of a headache.
FAQs
Absolutely, and I actually recommend it. I use a rain chain in the front yard for that visual wow factor, and a mosaic splash block in the back where it connects to my garden path.
Mixing styles not only enhances the look but also improves drainage in different zones of your yard. Just be sure each idea suits the slope and water volume of that spot.
If you’re just getting started, I’d say go for the pollinator-friendly planter box. It doesn’t require any major construction or tools. Plus, it instantly adds beauty and helps with minor runoff issues. Just line it well and choose plants that can handle occasional heavy watering.
They can but not all rain chains are created equal. Go for sturdier models with deeper cups that can handle more volume. Pair the chain with a large catch basin or a small gravel-filled pit to handle overflow. And always check your roof’s pitch. If water comes down like a waterfall, you might need to combine the chain with a diverter.
Great question, I learned this one the hard way. The trick is to install gutter guards or strainers at the top of the downspout. That way, leaves and twigs don’t make it down in the first place. Also, check everything seasonally especially after a storm. It only takes 5 minutes and can save you hours of fixing.
Yes, especially if done well. Stylish landscaping and visible upgrades like a rain chain or a custom splash block pathway can absolutely boost curb appeal. Buyers love low-maintenance solutions that look great and function well. It’s a small investment that pays off, both aesthetically and financially.

