
Bathroom shiplap is one of those design choices that looks like it belongs in a magazine but actually works in real life too. I have seen plain bathrooms completely transform just by adding shiplap to one wall. It adds texture, warmth, and character that tiles or plain paint simply cannot match.
Most people think shiplap is only for farmhouse-style homes. That is far from the truth. Today, shiplap works in modern, rustic, coastal, and even minimalist bathrooms without looking out of place.
If you are planning a bathroom refresh, shiplap gives you the most visual impact for your effort. It is relatively affordable, easy to install, and the results are always worth it.
Why Bathroom Shiplap Ideas Are Trending Right Now
Homeowners today want bathrooms that feel personal and designed, not just functional. Shiplap delivers that designer look without the designer price tag, which is exactly why it keeps showing up on every home improvement list.
Social media has played a big role in its popularity too. Platforms like Pinterest and Instagram are flooded with shiplap bathroom photos because the look photographs beautifully and feels fresh every single time.
The best part is that shiplap works on walls, ceilings, and even around vanities. You get a lot of creative freedom with one simple material.
14 Unique Bathroom Shiplap Ideas Worth Trying
These ideas cover all bathroom sizes, styles, and budgets. Read through each one and you will likely find at least two or three that feel perfect for your space.
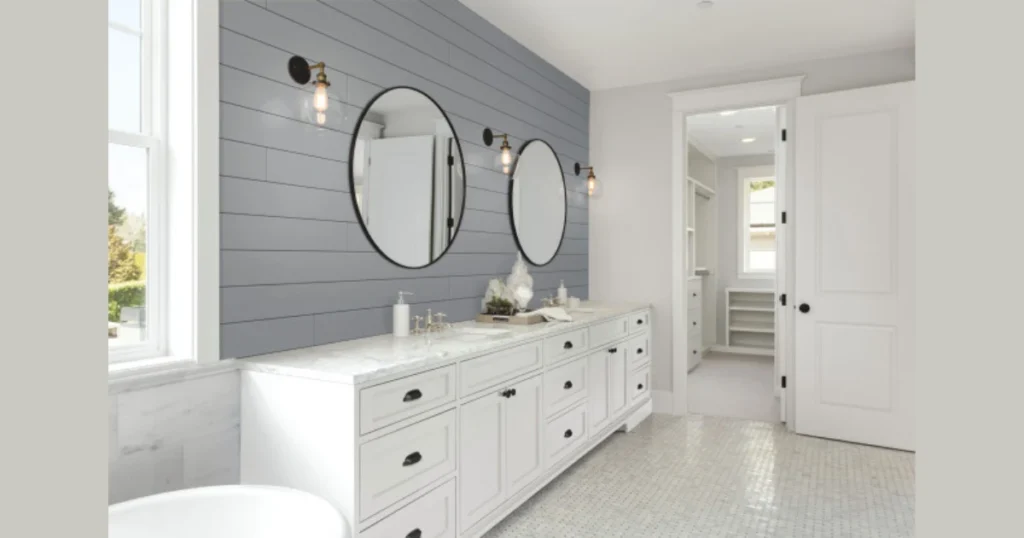
1. Classic White Shiplap Accent Wall
White shiplap on a single bathroom wall is the most popular starting point for good reason. It instantly brightens the room and creates a clean, airy feel that works with almost any existing decor.
I personally think the accent wall approach is smarter than covering all four walls. It gives you that shiplap statement without making the bathroom feel too busy or visually heavy.
The trick is to pick the right wall. Most designers recommend placing it behind the vanity or the bathtub, as those are the natural focal points of any bathroom.
For paint, a crisp white like Benjamin Moore Chantilly Lace or Sherwin-Williams Alabaster keeps it bright and timeless without looking stark or cold.
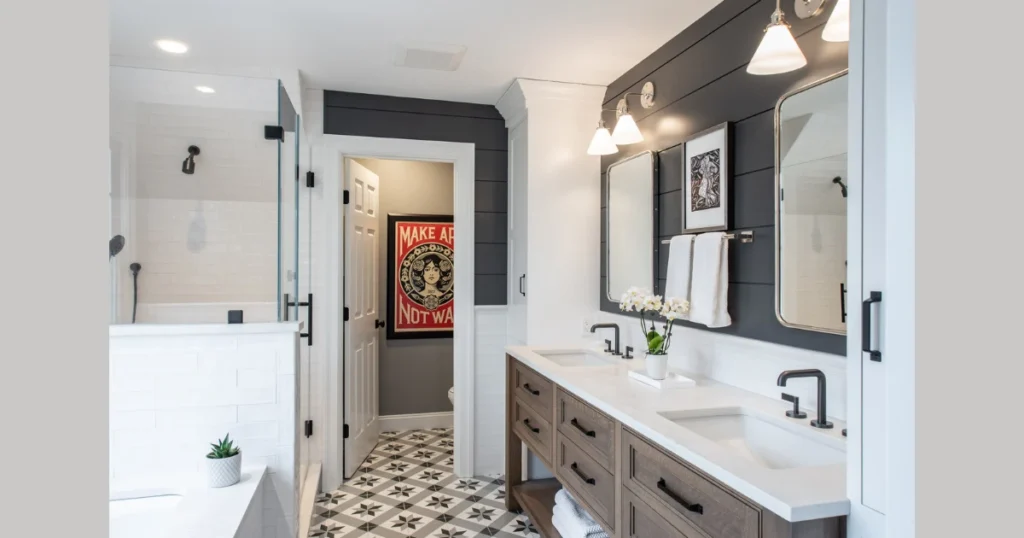
2. Shiplap Behind the Bathroom Vanity
Using shiplap specifically behind the vanity creates a built-in, custom look that feels intentional and polished. It frames your mirror and lighting beautifully, almost like a backdrop designed just for that space.
This is one of my favorite ideas because even a small section of shiplap here makes the whole vanity area feel upgraded. Pair it with black fixtures and a simple mirror and the result is genuinely stunning.
You do not need to tile this area unless water directly hits it. A good coat of semi-gloss or satin paint protects the wood from humidity perfectly well.
Keep the shiplap boards horizontal for a classic look, or go vertical if you want to add height and make low ceilings feel taller.
3. Floor-to-Ceiling Shiplap for a Bold Statement
Taking shiplap all the way from floor to ceiling is a bold move that pays off in a big way. It wraps the room in texture and makes even a small bathroom feel like a fully designed space rather than an afterthought.
This works especially well in powder rooms and half baths where there is no shower or tub to worry about. Those small spaces actually benefit most from full coverage because they have only one job: to impress guests.
Paint the floor-to-ceiling shiplap in a deep, moody color like navy, forest green, or charcoal for a dramatic effect. Lighter colors work too, but the bold tones really make this idea sing.
Keep your fixtures minimal when going floor to ceiling. Simple faucets, a clean mirror, and one good light fixture are all you need to complete the look.
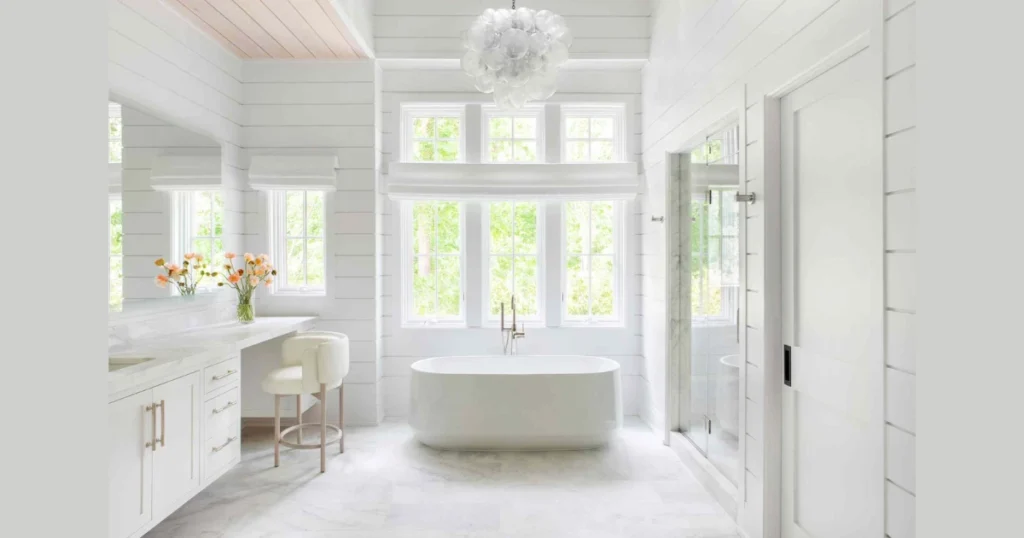
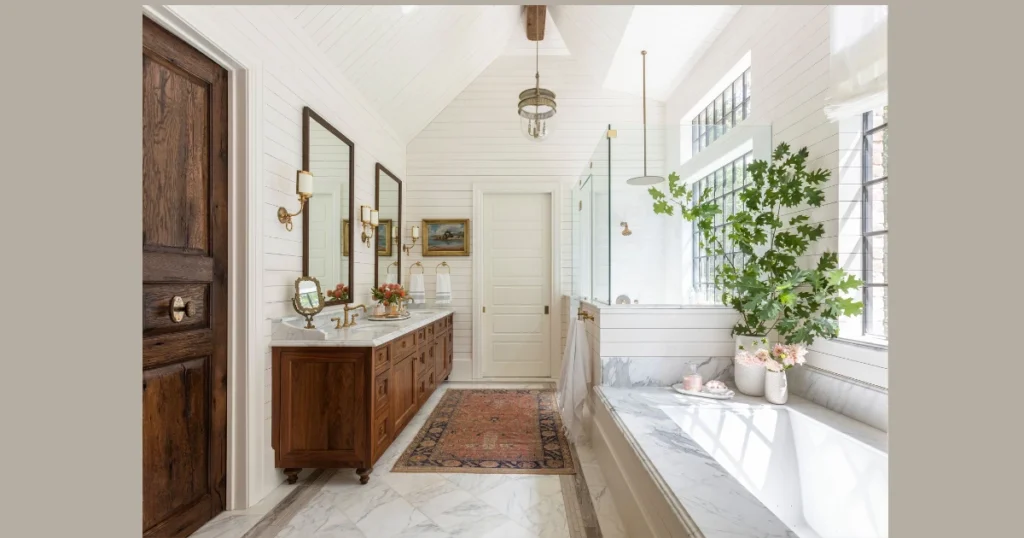
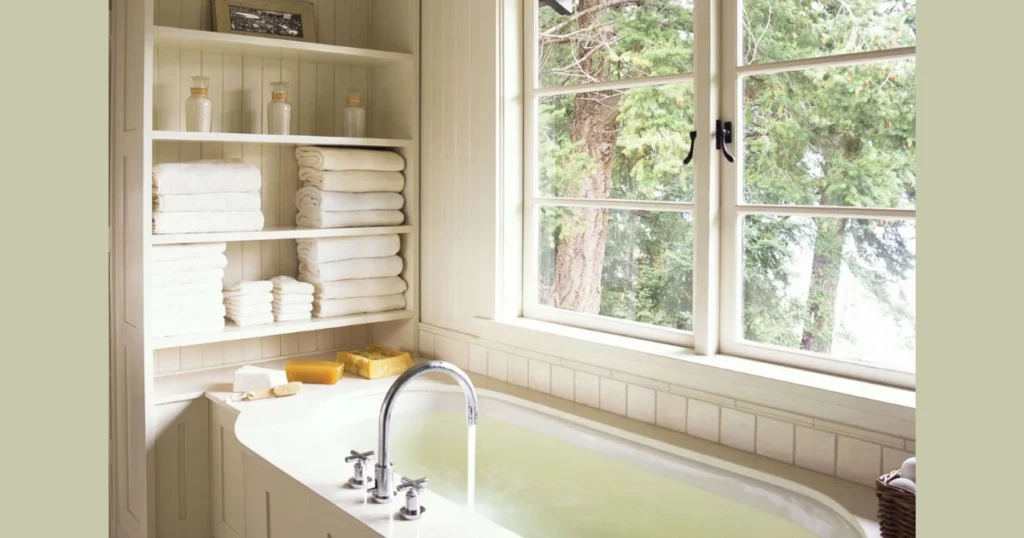
4. Shiplap Around the Bathtub Surround
Shiplap around the bathtub is one of the most unique uses of this material, and it works surprisingly well in the right setting. It gives a freestanding tub a cozy, cottage-style backdrop that tile just cannot replicate.
The key here is moisture protection. You need to use primed, sealed, and properly painted shiplap, and it should not be in direct water contact. Keep it on the wall behind and beside the tub, not on surfaces that get splashed constantly.
I have seen this done in white, soft gray, and even a sage green, and every version looks warm and inviting. Add some candles and a wooden bath tray and you have a bathroom that feels like a boutique hotel.
If you have a clawfoot or freestanding tub, this idea is practically made for you. The combination of the classic tub silhouette and the textured wall behind it is a timeless pairing.
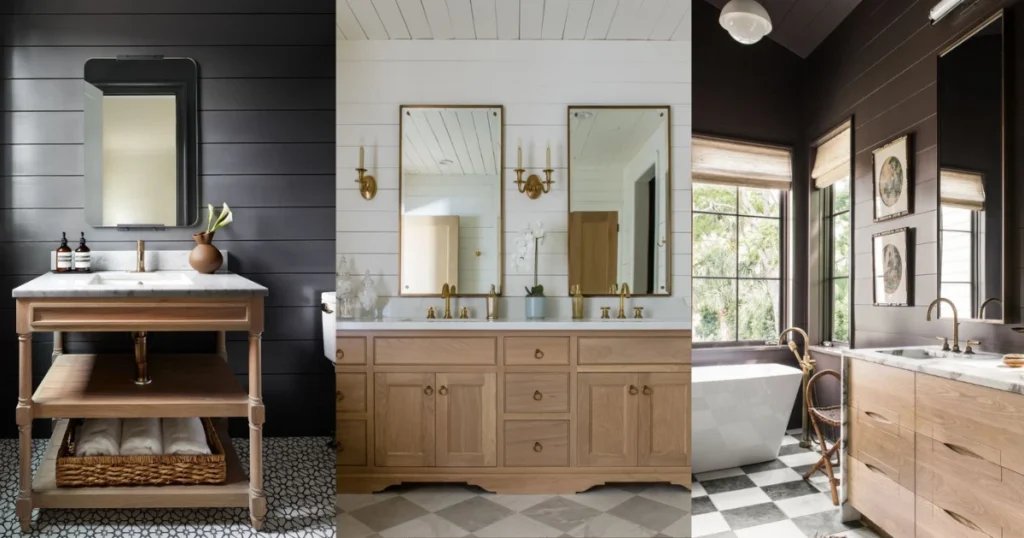
5. Painted Shiplap in a Bold Color
Most people default to white shiplap, but painted shiplap in a bold color is where things get really interesting. A deep blue, terracotta, black, or even dusty rose shiplap wall completely changes the mood of the bathroom.
Bold colored shiplap works especially well in small bathrooms because it leans into the coziness rather than fighting it. Instead of trying to make the room feel bigger, you make it feel intentional and designed.
The horizontal grooves of shiplap catch light differently depending on the color you choose. Darker tones create subtle shadows that add depth, while warmer tones like terracotta create a soft, earthy glow.
My advice is to test at least two or three paint swatches on the actual shiplap before committing. The texture changes how color looks compared to a flat painted wall, so always sample first.
6. Shiplap on the Bathroom Ceiling
Most people forget the ceiling exists when decorating a bathroom, and that is honestly a missed opportunity. Adding shiplap to the ceiling creates a wow factor that hits the moment anyone walks through the door.
A shiplap ceiling works best in bathrooms with decent ceiling height. If your ceiling is already low, go with narrow boards and a bright white paint to keep things feeling open and not cramped.
This idea pairs beautifully with a simple, clean wall treatment below. Let the ceiling be the star and keep the walls neutral so the eye naturally travels upward.
I think a shiplap ceiling with a statement pendant light or a vintage-style fan fixture is one of the most underrated bathroom combinations out there. It is simple to execute but looks like you hired an interior designer.
7. Vertical Shiplap for a Modern Bathroom Look

Horizontal shiplap is the classic choice, but vertical shiplap brings a completely different energy to a bathroom. It draws the eye upward, makes ceilings feel taller, and gives the space a cleaner, more contemporary feel.
Vertical installation works particularly well in narrow bathrooms. Instead of making the space feel like a tight corridor, vertical lines actually make it feel more structured and intentional.
Pair vertical shiplap with modern matte black fixtures, a floating vanity, and concrete-look tiles on the floor. That combination sits perfectly between warm and contemporary without leaning too far in either direction.
The installation process for vertical shiplap is slightly different from horizontal, so make sure your studs are properly located. Secure attachment is more important here because gravity works against you a little more.
8. Two-Tone Shiplap With Wainscoting Style
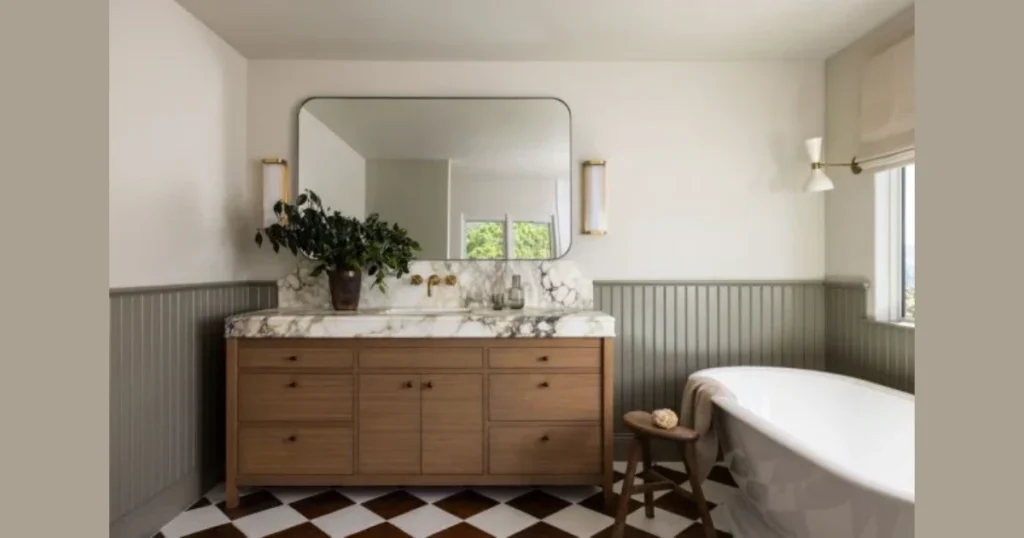
Two-tone shiplap uses two different colors divided at a midpoint on the wall, usually around chair-rail height. It is a classic wainscoting layout but executed with shiplap boards instead of traditional paneling.
This idea works in both traditional and modern bathrooms. A white lower half with a soft sage or warm greige upper half creates a bathroom that feels curated and layered without being overdone.
The dividing line between the two tones is usually marked with a thin trim piece or a simple painted stripe. That small detail makes the whole design look intentional and professionally finished.
I personally love this look in family bathrooms because it hides scuffs and splashes on the lower half better than a single light color across the whole wall. It is practical and pretty at the same time.
9. Shiplap in a Small Powder Room
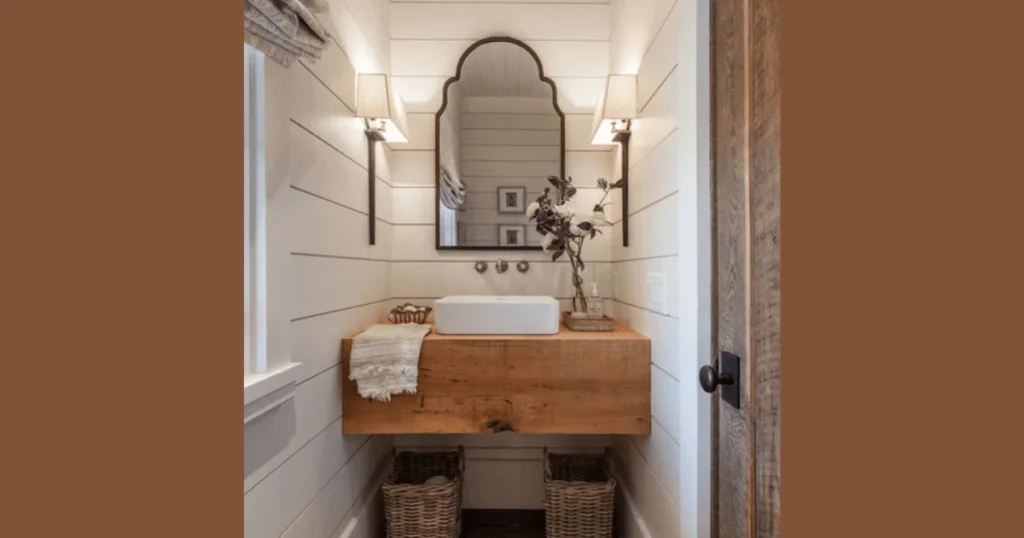
A powder room is the perfect place to take design risks because it is small, low-commitment, and used by guests. Shiplap in a powder room makes a massive impression in a space that only takes a few boards to cover.
Because powder rooms have no shower or bath, moisture is rarely a concern here. That means you can use standard shiplap without worrying too much about sealing and waterproofing every inch.
Go bold in the powder room. Dark shiplap, a vessel sink, an oversized mirror, and dramatic lighting create a space that guests genuinely talk about after leaving your home.
I have seen powder rooms with black shiplap and brass fixtures that looked more stylish than entire master bathrooms that cost ten times more. Small space, big personality, that is the powder room shiplap formula.
10. Shiplap Mixed With Tile for a Textured Bathroom
Combining shiplap with tile is one of the more creative bathroom ideas that does not get enough attention. The two materials complement each other well when you plan the layout thoughtfully.
A common approach is to use tile in the wet zones like the shower and around the tub, and then bring shiplap onto the dry walls around the vanity or opposite the shower. It creates zones within the bathroom that feel purposeful.
The key to making this combination work is choosing materials that share at least one common element. A white subway tile with white shiplap ties the room together, while the difference in texture keeps it visually interesting.
Mixing materials also makes practical sense because you protect the areas that need waterproofing with tile, while using the more affordable and warm shiplap everywhere else. Smart design and smart budgeting at the same time.
Practical Tips for Installing Bathroom Shiplap the Right Way
Before you pick up a nail gun, there are a few things worth knowing about bathroom shiplap installation. The bathroom environment is unique, and preparation makes the difference between shiplap that lasts years and shiplap that warps in a few months.
Getting the prep work right is more important than the installation itself. Here is what you need to keep in mind before you start.
| Factor | What to Do |
|---|---|
| Wood Type | Use MDF, pine, or moisture-resistant boards |
| Priming | Always prime all four sides before installation |
| Paint Finish | Use semi-gloss or satin for humidity resistance |
| Caulking | Seal all edges and gaps with paintable caulk |
| Ventilation | Ensure bathroom has a working exhaust fan |
| Wet Zones | Never use bare shiplap near direct water contact |
Choose the Right Wood for Your Bathroom
Not all wood is suitable for bathroom shiplap. MDF shiplap is a popular choice because it is smooth, affordable, and takes paint extremely well in humid conditions.
Solid pine is another good option if you seal and prime it properly on all sides before installation. Leaving any raw wood exposed is the fastest way to invite warping and mold growth.
Always Prime Before You Paint
Priming is the step most DIYers skip, and it is also the reason most DIY shiplap jobs fail within a year. Prime every board on all four sides, including the back, before you put it on the wall.
This seals the wood from moisture that gets in from behind the wall, not just from the front. One extra hour of priming saves you from pulling the whole wall down two years later.
Seal the Gaps and Edges Properly
The small gaps between shiplap boards are where moisture sneaks in and causes damage over time. Fill every gap and edge with a good quality paintable caulk after installation.
Run a thin bead along the top, bottom, and sides where the shiplap meets the ceiling, floor trim, and adjoining walls. It takes twenty minutes but adds years to the life of your shiplap wall.
Ventilation Is Non-Negotiable
No amount of good wood or quality paint will save bathroom shiplap if the room has poor ventilation. A working exhaust fan is the single most important thing in any bathroom with wood elements.
Run the fan during every shower and for at least fifteen minutes afterward. That simple habit prevents the moisture buildup that damages shiplap, paint, and grout over time.
11. Shiplap Around the Bathroom Mirror
Framing a bathroom mirror with shiplap is a small detail that makes a surprisingly big difference. It turns a plain builder-grade mirror into a custom focal point that looks like it was always meant to be there.
You can frame just the mirror itself or extend the shiplap outward to cover the entire wall section around it. Both approaches work well, but the extended version creates a more dramatic and layered effect.
This idea works in any bathroom size and pairs well with both modern and traditional styles. A white shiplap frame on a round mirror with matte black hardware is one of those combinations that just works every single time.
The installation here is simple even for beginners. Cut your shiplap boards to size, frame them around the mirror edge, secure them to the wall, caulk the joints, and paint. Done in an afternoon.
12. Gray Shiplap for a Contemporary Bathroom Feel
Gray shiplap is the middle ground between the warmth of white and the drama of dark tones. It gives the bathroom a calm, sophisticated feel that works equally well in modern and transitional style homes.
Light gray shiplap with chrome or brushed nickel fixtures creates a spa-like atmosphere that feels clean and relaxing. It is a color combination that does not go out of style quickly, which matters when you are making a semi-permanent design choice.
Darker gray shiplap leans more dramatic and pairs well with wood accents, warm lighting, and matte black fixtures. That combination sits in a sweet spot between cozy and contemporary.
One thing I appreciate about gray shiplap is how forgiving it is with other colors. Whether your tiles are white, beige, or even a soft blue, gray shiplap tends to play nicely with almost everything already in the room.
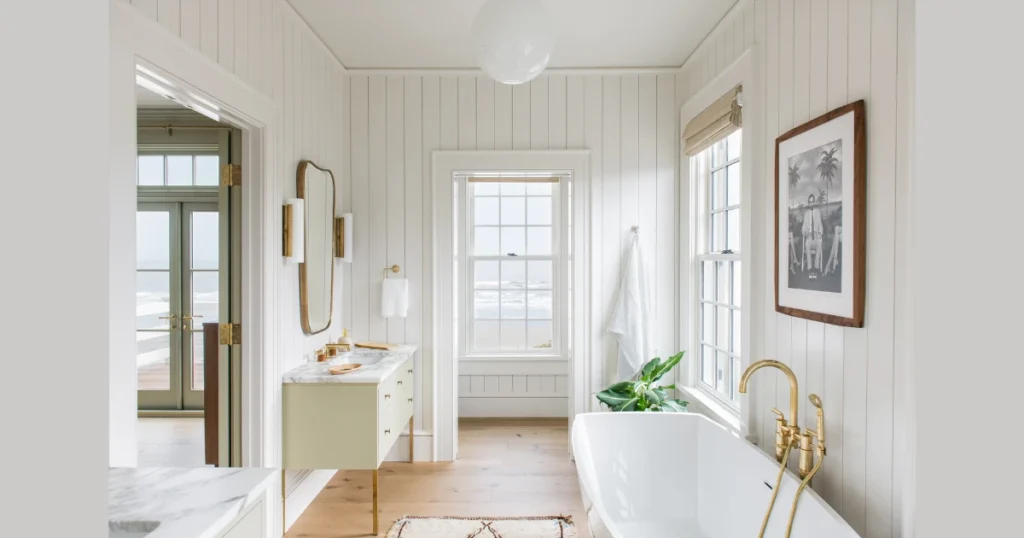
13. Shiplap in a Master Bathroom With a Spa Feel
A master bathroom with shiplap can genuinely feel like a private spa if you approach the design with intention. The key is pairing the shiplap with the right fixtures, lighting, and accessories to create a cohesive, relaxing environment.
Soft white or warm greige shiplap works best for this look. Combine it with a freestanding soaking tub, warm Edison bulb lighting, and natural wood accents like a teak bath mat or wooden shelving.
The goal in a spa-style master bathroom is to minimize visual clutter. Keep the shiplap tone soft, the fixtures simple, and the accessories minimal so the overall room feels calm and intentional rather than busy.
I always recommend adding a small open shelf section to the shiplap wall in a master bathroom. A few neatly arranged towels, a plant, and a candle on those shelves complete the spa aesthetic without any extra renovation work.
14. Shiplap With Open Shelving for Storage and Style
Combining shiplap walls with open floating shelves is one of the most functional and stylish bathroom ideas on this list. The shiplap acts as a beautiful backdrop that makes even basic shelving look like a designer feature.
Mount simple wooden or metal floating shelves directly onto the shiplap wall above the toilet or beside the vanity. That space is often wasted, and open shelving turns it into both storage and display area.
Style the shelves with a mix of practical items like folded towels and baskets, and decorative touches like small plants or candles. The shiplap behind them ties everything together and makes the arrangement look curated rather than cluttered.
This combination also works brilliantly in small bathrooms where built-in storage is not an option. Open shelves on a shiplap wall add storage without eating into the floor space, which is a genuine win in a tight bathroom.
Best Shiplap Styles for Different Bathroom Types
| Bathroom Type | Best Shiplap Style | Recommended Color |
|---|---|---|
| Small Powder Room | Floor-to-ceiling coverage | Deep navy or black |
| Master Bathroom | Accent wall or spa style | Soft white or warm greige |
| Family Bathroom | Two-tone wainscoting style | White lower, sage upper |
| Modern Bathroom | Vertical shiplap | Light gray or white |
| Rustic Bathroom | Horizontal classic shiplap | Natural wood tone or white |
| Contemporary Bathroom | Mixed shiplap and tile | Gray or white |
Conclusion
Bathroom shiplap is one of the most flexible and rewarding design choices you can make in a home renovation. Whether you go bold with floor-to-ceiling dark shiplap in a powder room or keep it subtle with a white accent wall behind your vanity, the result always adds character and warmth that plain walls simply cannot deliver.
The 14 ideas in this article cover every bathroom size, style, and budget. You do not need a massive renovation or a professional contractor to make shiplap work in your bathroom. With the right prep, the right paint, and good ventilation, even a beginner DIY project can produce results worth showing off.
My honest advice is to start with one wall and one idea that genuinely excites you. Do not overthink it. Shiplap is forgiving, relatively affordable, and the results speak for themselves every single time.
FAQs
Yes, you can use shiplap near a shower, but never inside the wet zone where water directly hits. Keep shiplap on dry walls and always seal and prime it properly to handle bathroom humidity.
MDF shiplap and primed pine are the most popular choices for bathrooms. MDF takes paint well and handles humidity better than unfinished solid wood when properly sealed on all sides.
Yes, always use a semi-gloss or satin finish paint for bathroom shiplap. These finishes resist moisture and are much easier to wipe clean compared to flat or eggshell paints.
Prime all four sides of every board before installation, caulk all gaps and edges after installation, and make sure your bathroom has a working exhaust fan. Those three steps prevent the majority of warping issues.
Yes, well-executed shiplap adds visual appeal and perceived value to a home. Buyers respond positively to bathrooms that feel designed and intentional, and shiplap achieves that without a large renovation budget.
Absolutely. Shiplap is one of the more beginner-friendly DIY projects. With basic tools, proper prep work, and a little patience, most homeowners complete a shiplap accent wall in a single weekend.
The cost varies depending on the size of the wall and the material you choose. On average, a DIY shiplap accent wall costs between 100 and 300 dollars in materials, making it one of the most affordable bathroom upgrades available.