
Pumpkin carving is one of those traditions that never gets old. Every fall, I find myself looking for fresh pumpkin carving ideas that go beyond the usual triangle eyes and jagged teeth.
The best part is that whether you’re a beginner or have been carving for years, there are so many ways to create something unique without stressing over perfection.
I’m going to share pumpkin carving designs that range from quick and easy to detailed and show-stopping. Grab your carving kit, a steady hand, and let’s get into it.
1. Star-Map Constellation Pumpkins
I love the idea of turning a pumpkin into a glowing night sky. A constellation pumpkin is simple to make and looks professional without requiring advanced carving skills.
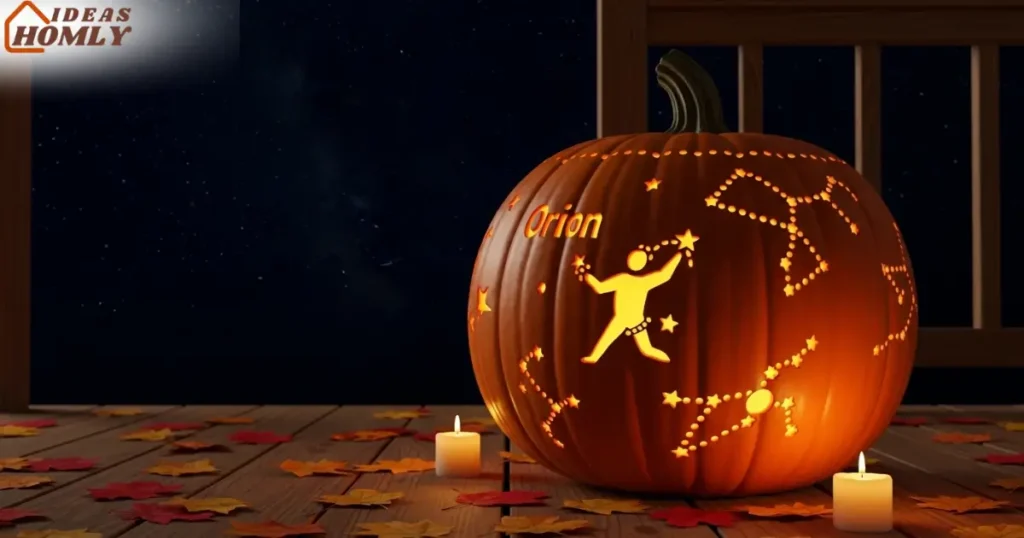
How to carve it: Print out a constellation chart, tape it to your pumpkin, and mark the stars with a push pin. Use a small drill bit or fine carving tool to poke holes where the stars go. When lit, your pumpkin shines like a mini planetarium.
Tools you’ll need: A constellation template, tape, push pin, drill with small bit, LED tea light.
Pro tip: Use multiple pumpkins to create different constellations and line them up on your porch for a full celestial display.
2. Silhouette “Lantern” Pumpkins
Sometimes less is more, and silhouette carving proves that. Instead of cutting all the way through the pumpkin, you etch the surface just enough to let a soft glow peek through.
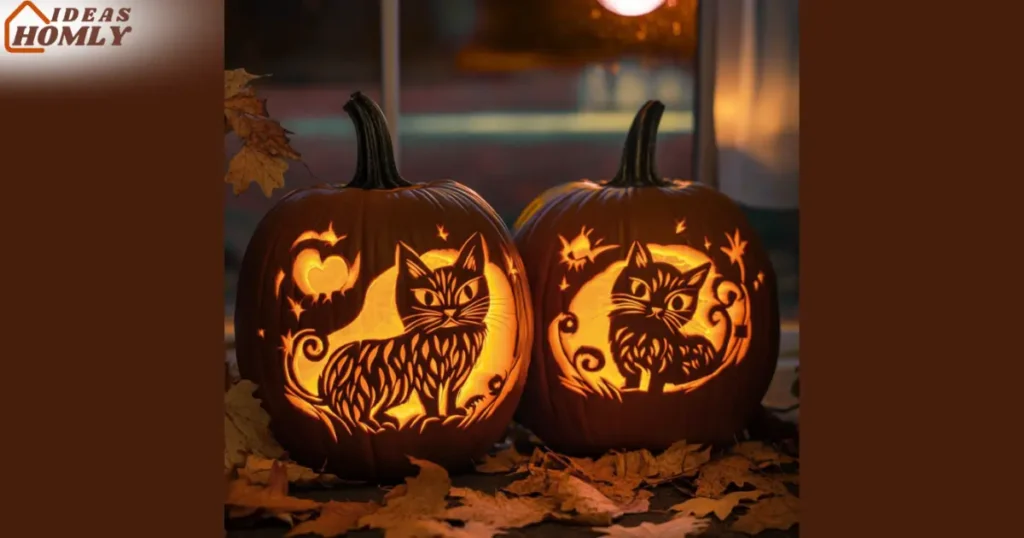
Steps: Choose a bold outline like a cat, bat, or witch hat. Trace the design onto the pumpkin and carefully shave away the top layer of skin. When lit, it looks like a glowing lantern.
Why it works: This style lasts longer than traditional cut-through pumpkins because the pumpkin walls stay thicker. Plus, it gives off a subtle, candlelit effect that feels cozy.
Pro tip: Use a linoleum cutter or a clay sculpting tool to achieve clean edges.
3. House-Number Jack-o’-Lanterns
This one’s both creative and practical. Instead of a regular design, carve your house number into one or two pumpkins and place them by your front door. It doubles as spooky décor and a glowing sign for trick-or-treaters.
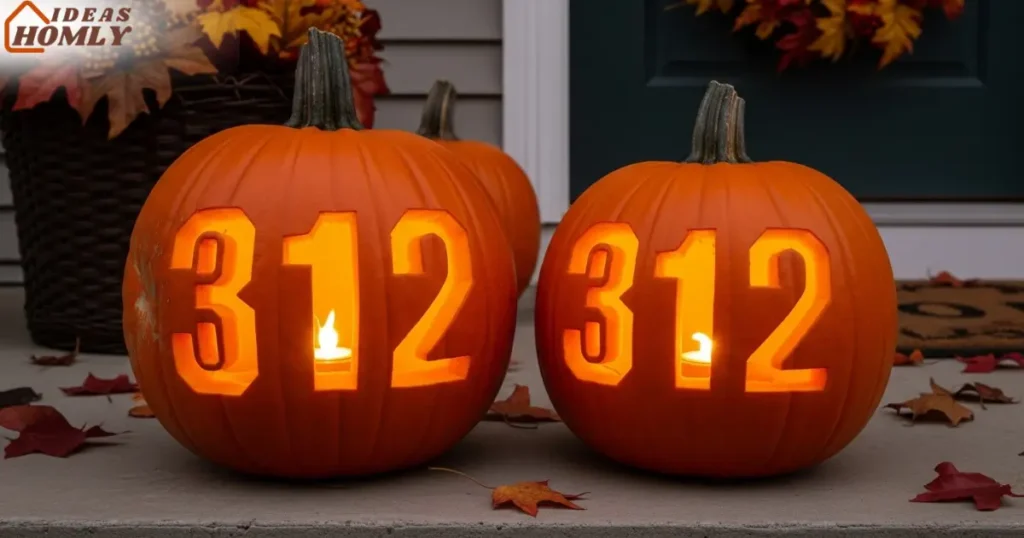
How to do it: Draw your house number in blocky, easy-to-read font. Carve the numbers deeply enough for light to shine through. Place a candle or LED inside.
Tools needed: Sharp carving knife, number stencil (optional), and a battery-powered light.
Pro tip: Spray the inside with a pumpkin preservative or even diluted bleach water to keep it from rotting before Halloween night.
4. Totem Stack Pumpkins
Stacking pumpkins creates instant drama. Carve three or four smaller pumpkins with related designs, then place them on top of each other like a totem pole.
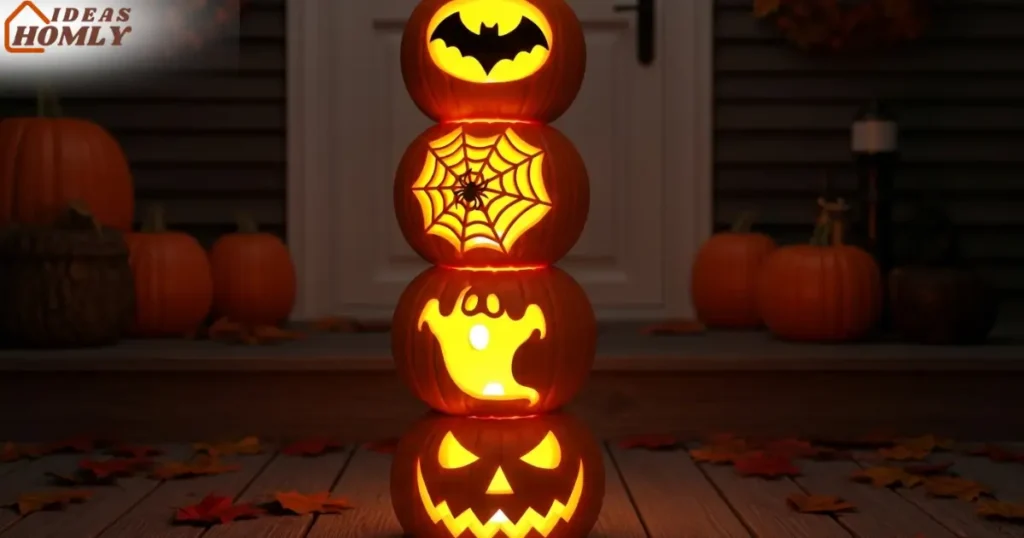
Why I like it: It’s a great way to showcase multiple patterns without spreading them across your yard. For example, carve a ghost, a spiderweb, and a bat, then stack them in order.
How to build it: Cut the bottoms flat so they balance easily. Insert wooden dowels through the center for stability. Once stacked, add lights inside each pumpkin for a glowing tower effect.
Pro tip: Use lightweight craft pumpkins if you want this display to last beyond the season.
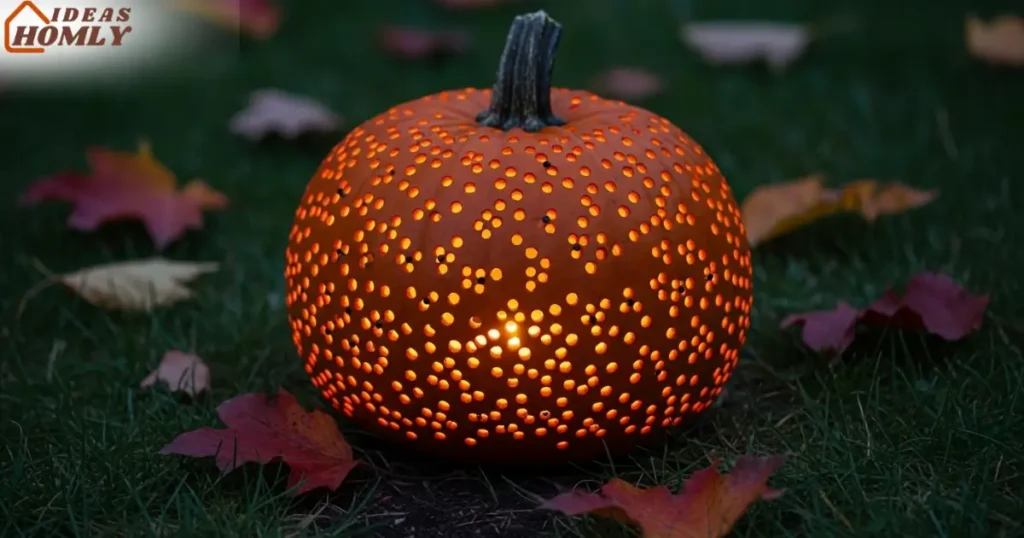
5. Drill-Bit Polka-Dot Luminarias
If freehand carving isn’t your strong suit, this technique is foolproof. Using a drill, you can create evenly spaced holes that transform into glowing polka dots at night.
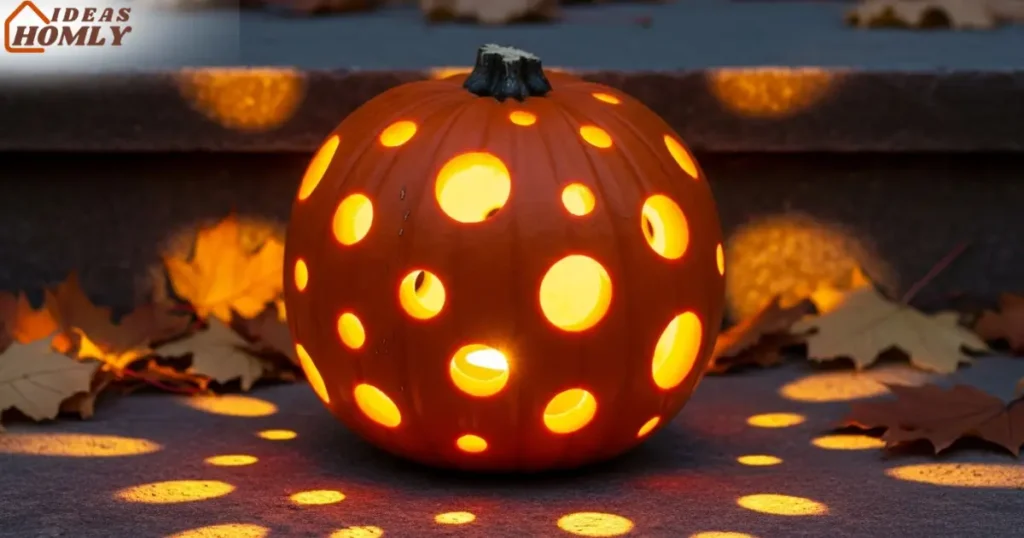
Steps: After hollowing out the pumpkin, use different drill bit sizes to create random or patterned holes. The result is a modern, dotted lantern that looks stylish indoors or outside.
Why it’s great for beginners: No need for steady hands or detailed stencils. The drill does all the work, and the outcome always looks intentional.
Pro tip: Try arranging the holes in spirals or geometric shapes for added flair.
6. Layered “Haunted Window” Scenes
A layered pumpkin looks like a tiny theater set. Instead of cutting straight through, carve different depths into the pumpkin wall so that foreground and background details glow differently.
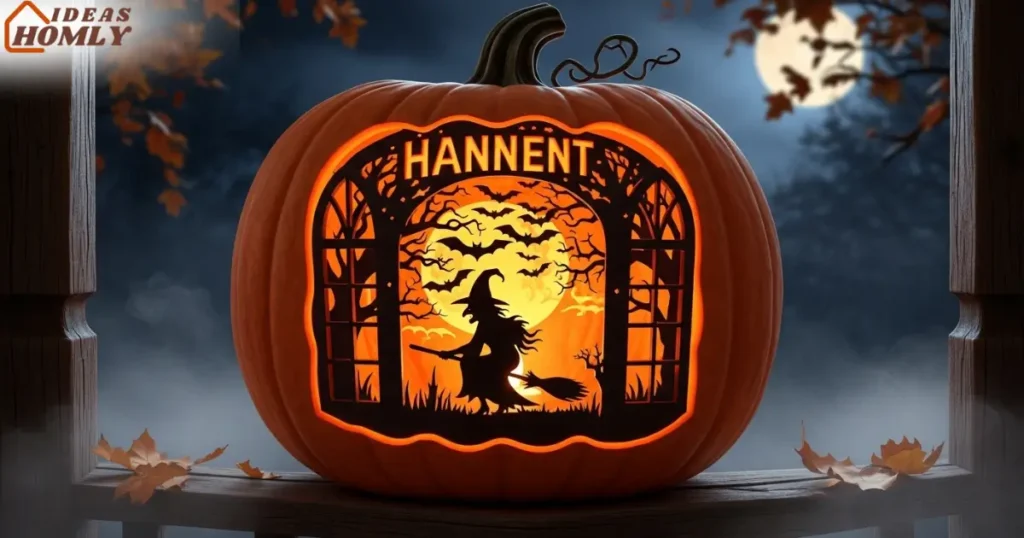
Steps to try: Sketch a simple window shape with spooky figures inside—like a witch in the front and bats flying behind. Carve shallow cuts for the background and deeper cuts for the foreground. When lit, the design feels dimensional.
Tools needed: A small saw, carving gouges, and a steady light source inside the pumpkin.
Pro tip: Use LED puck lights instead of candles because you’ll need strong, steady illumination to show depth.
7. Mix-and-Match Face Templates
If you’re carving with kids or want something playful, mix-and-match faces are a hit. Print out different templates for mustaches, monocles, eyebrows, or goofy teeth. You can create endless expressions without designing from scratch.
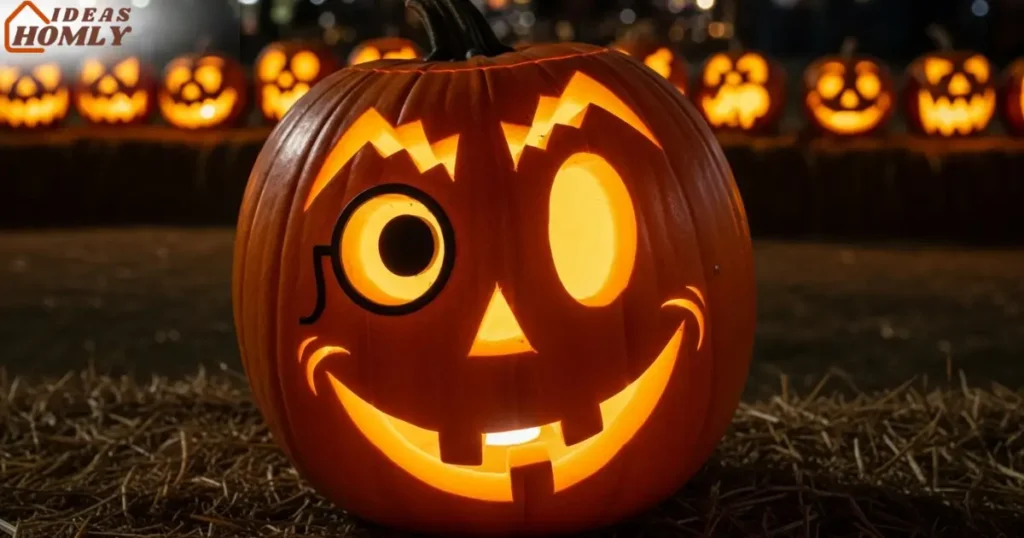
How to do it: Draw or print several facial elements, cut them out, and tape them onto the pumpkin one at a time. Carve them out, and you’ll end up with hilarious results.
Why it works: Each pumpkin ends up with its own personality. If you have a group of them, it feels like they’re having a party on your porch.
Pro tip: Keep the designs bold and simple so they read well at night.
8. Botanical or Lace Etching
Etched pumpkins feel elegant instead of scary, which makes them perfect for dinner parties or autumn weddings. By scraping away only the surface skin, you can carve delicate botanical vines or lace patterns.
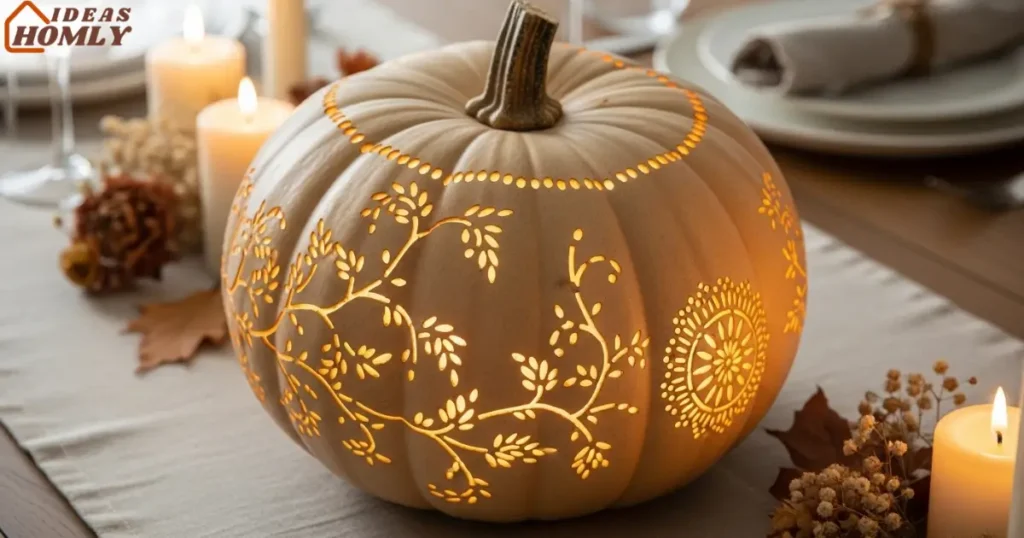
Steps: Use a linoleum cutter or clay sculpting tool to scrape thin lines into the pumpkin. Add small pierced cutouts to highlight certain areas, like flower centers or lace dots.
Why I like it: These designs glow softly, almost like candlelit lacework, and they don’t rot as quickly as fully carved pumpkins.
Pro tip: Metallic paint pens can add extra shimmer to etched lines for a sophisticated look.
9. Emoji Faces
Sometimes, simple works best. Emoji pumpkins are easy, fun, and recognizable for everyone. Whether it’s the laughing face, heart eyes, or even the ghost emoji, they bring instant charm.
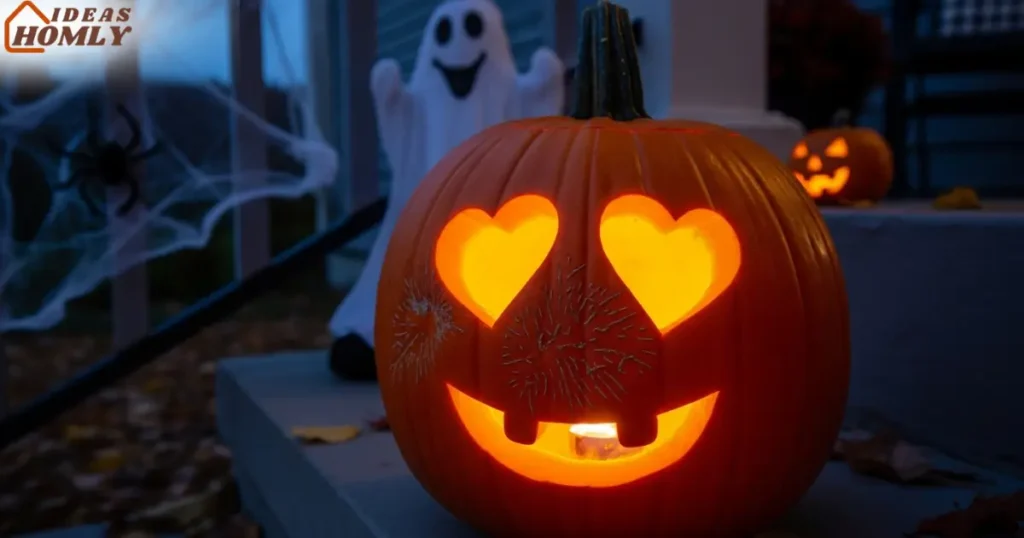
How to carve it: Sketch out the round eyes and mouth shapes. Cut carefully and keep the features bold and minimal. Paint can also help highlight specific details like tears or hearts.
Tools you’ll need: Basic carving knife, small round cookie cutter (optional), and some acrylic paint if you want to add color.
Pro tip: If you’re short on time, carve a few different emojis and line them up, instant conversation starters.
10. Firefly Night-Sky Pumpkins
Tiny perforations across the pumpkin surface create a twinkling effect, like fireflies at night. It’s easy to do but looks magical when lit.
Steps: Use a push pin, awl, or tiny drill bit to poke dozens of small holes randomly across the pumpkin. When you light it, the glow looks like a starry night sky filled with moving fireflies.
Why it stands out: It’s low effort with high payoff. The more holes you make, the more dazzling the result.
Pro tip: Place a small flickering LED light inside for the most realistic effect.
11. Dia de los Muertos Sugar-Skull Pumpkins
Sugar-skull designs are bold, colorful, and instantly recognizable. Carving one into a pumpkin is a great way to blend fall traditions.
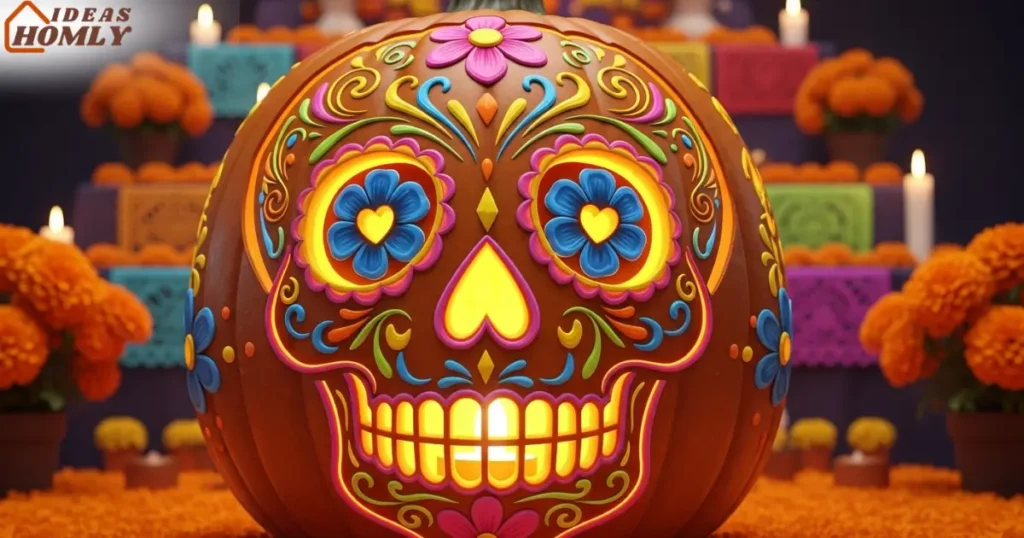
Steps: Outline the skull shape, then carve details like flowers, hearts, and swirls into the face. Add paint or colored tissue paper behind cutouts for extra vibrancy.
Tools you’ll need: Fine carving saws, paint, and stencils if you want symmetry.
Pro tip: Use smaller pumpkins for a “family” of skulls to display together.
12. Cute Last-Minute Minimalist Faces
Sometimes, time runs out before Halloween night. That’s when minimalist pumpkin faces save the day. A few simple shapes can still look charming.

How to do it: Carve just two circles for eyes and a straight line for the mouth. Or go with a winking eye and a curved smile.
Why it works: Minimalist faces are quick, require little cleanup, and still glow beautifully on the porch.
Pro tip: Black paint or markers can add extra expression without more carving.
13. Carved Typography Pumpkins
Words carved into pumpkins make bold statements. “BOO,” “EEK,” or even your family name can stand out better than faces.
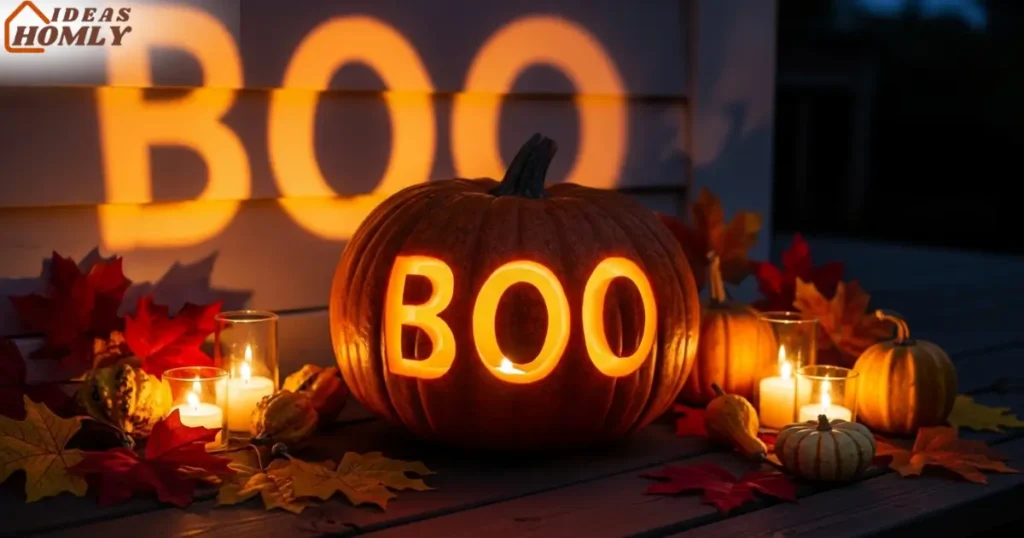
Steps: Trace block letters onto your pumpkin, then carve out the shapes carefully. If you want a more polished look, scrape the surface instead of cutting through.
Why it stands out: Text is readable from far away, so your pumpkin makes an immediate impact.
Pro tip: Use multiple pumpkins to spell out longer words across your porch.
14. Pumpkin Floral Bouquet
Instead of carving just one design, use several pumpkins to create a carved bouquet. Each pumpkin can hold a different flower pattern—roses, daisies, or sunflowers.
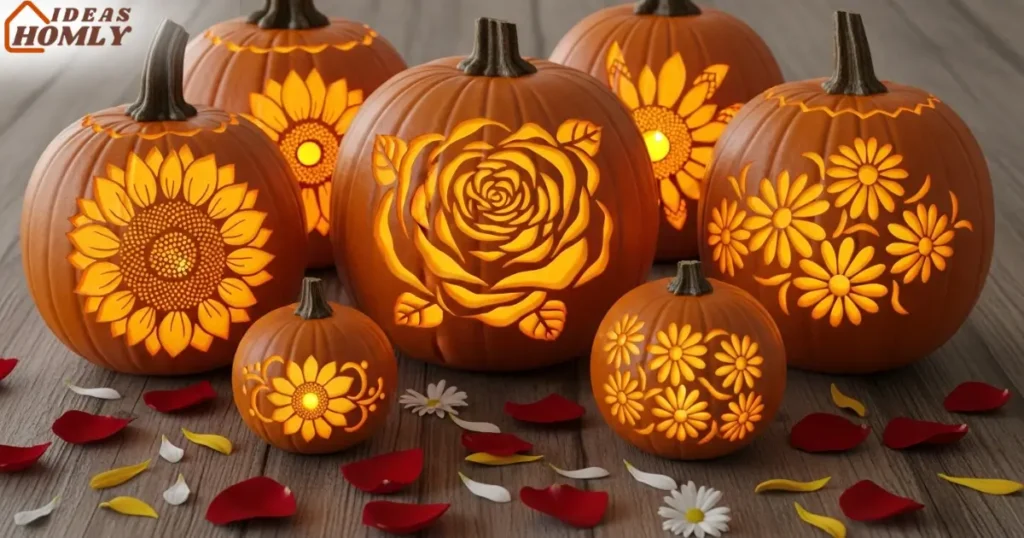
Steps: Use etching for delicate petals and small cutouts for glowing highlights. Arrange them side by side, like a glowing garden.
Why I love it: It looks artistic and adds elegance to Halloween décor instead of just spookiness.
Pro tip: Spray the pumpkins with a clear sealer to keep them fresh longer.
15. Advanced Stencil Showpieces
For carvers who want to push their skills, advanced stencils are the way to go. From movie characters to detailed haunted houses, the possibilities are endless.
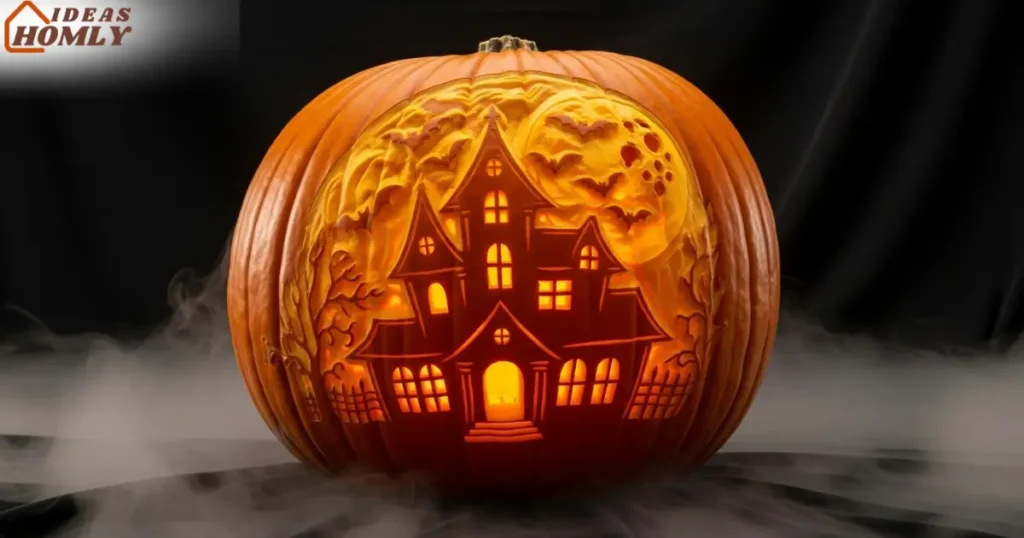
Steps: Tape the stencil to your pumpkin and poke tiny dots along the lines to transfer the design. Then carefully carve with precision tools.
Tools you’ll need: A full pumpkin carving kit, patience, and good lighting.
Pro tip: Download free stencil patterns online for inspiration and adjust them to fit your pumpkin size.
Conclusion
Pumpkin carving is about having fun, not stressing over perfection. Whether you’re poking simple polka dots or tackling detailed stencils, every carved pumpkin adds its own charm to Halloween night.
Some of these designs take minutes, while others require an evening of work, but each one creates a magical glow once the candle goes in.
If you ask me, the best pumpkins are the ones that make people stop, smile, or even laugh a little. So grab a pumpkin, pick one of these ideas, and start carving; you’ll end up with something memorable either way.
FAQs
Beginners should start with drill-bit polka dots or emoji faces. These ideas require minimal tools and don’t need perfect precision. The glow looks great, and the process is stress-free.
After carving, coat the inside with petroleum jelly or a pumpkin preservative spray. Storing it in a cool spot during the day also helps. Keeping it hydrated with a light mist of water prevents early shriveling.
You don’t need fancy gear, but a pumpkin carving kit makes things easier. Basic knives, push pins, or drills work too. The key is having tools that give you control for details.
Kids can help with design, scooping, and decorating, but carving itself should be supervised. Safer alternatives include painting, surface etching, or using no-carve kits with pre-cut accessories.
LED tea lights are the safest option because they don’t generate heat. Flickering versions mimic candlelight. If you want extra brightness, small LED puck lights work really well.
Yes, craft pumpkins made of foam are a fantastic choice. They’re easier to carve, last for years, and let you keep your designs long after Halloween. They’re also lighter, making stacking easier.