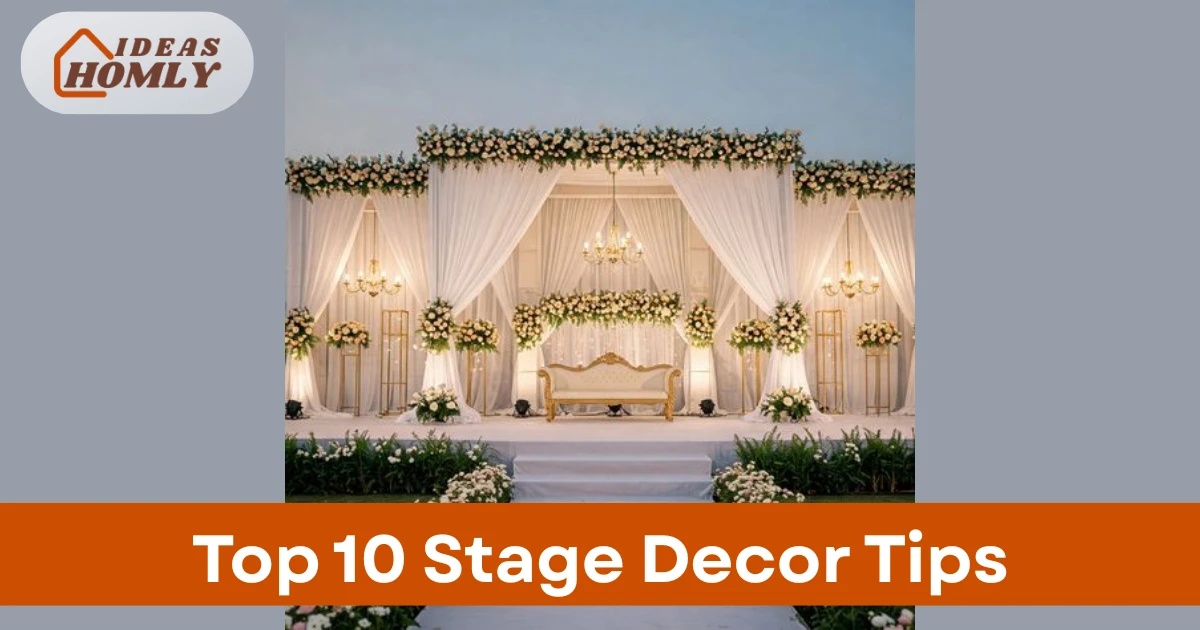
I help people design stunning stages that look expensive without draining their entire event budget. You probably want a focal point that captures attention rather than looking like a messy basement project.
Simple Guidelines for Professional Stage Design
Designing a great stage begins with understanding the specific scale of your venue and your audience size. You must ensure that every guest can see the main action clearly from every single seat.
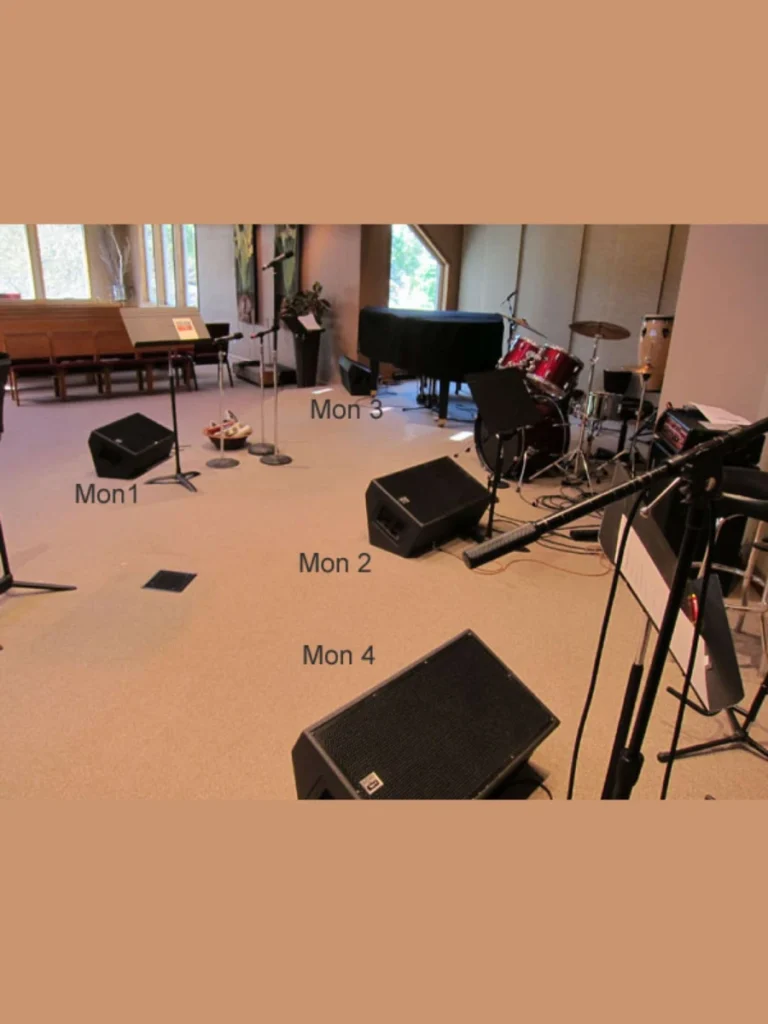
I always start by sketching a rough layout to visualize where the speakers and decor will sit. Planning the floor space ahead of time prevents crowded areas and keeps the movement flowing naturally.
You should prioritize the comfort of the people standing on the platform to ensure a good performance. A stable surface and clear paths are more important than any fancy silk curtain you might buy.
Focus on creating a balanced look that guides the eye toward the center of the performance area. Symmetry helps provide a sense of order that makes even simple setups look like professional work.
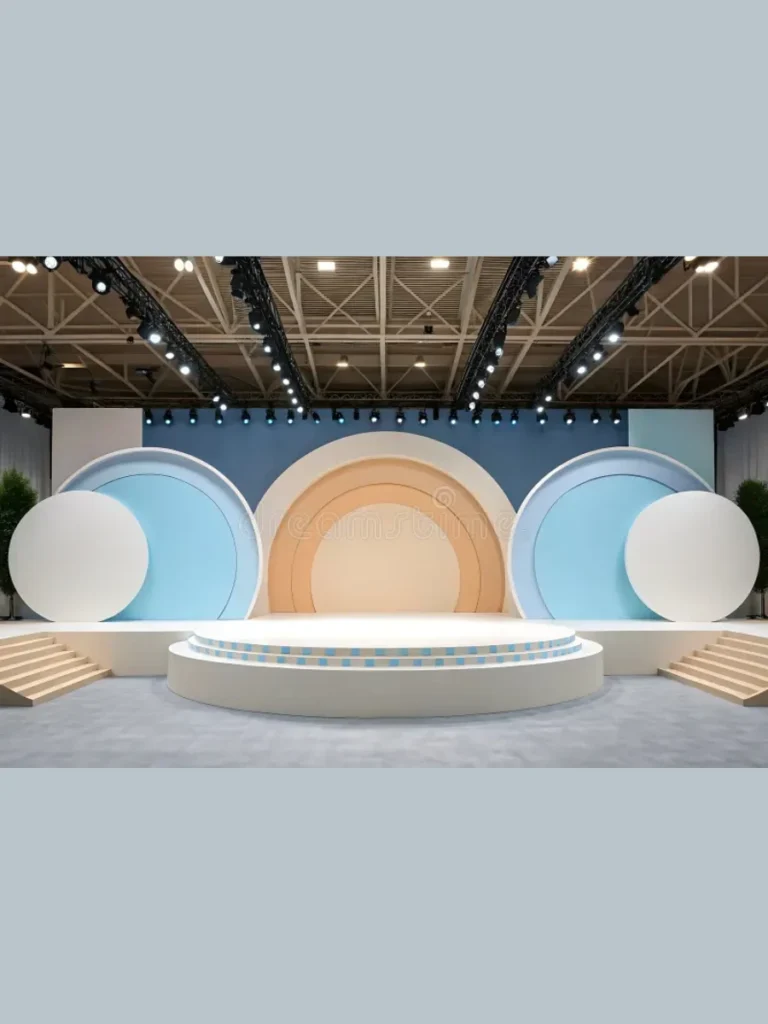
1. Using Depth for 3D Visual Impact
Flat backgrounds are the enemy of good photography and usually look quite boring under bright lights. I suggest layering different materials to create a sense of three dimensional depth on your stage.
You can hang simple fabric drapes a few feet behind your main props for an instant shadow. This gap creates a professional look that hides the flat surface of the back wall.
I use varied heights for my decorative elements to keep the viewer interested in the whole scene. Mixing tall stands with shorter floral arrangements adds a rich texture that flat stages always lack.
Try placing physical objects like columns or pedestals at different distances from the very front edge. This arrangement forces the camera to find a focus point which results in much better event photos.
2. Choosing the Right Backdrop Materials
Selecting the correct fabric can make or break the way your lighting looks during the actual event. I prefer using matte materials that do not reflect harsh glares into the eyes of your guests.
Heavy velvet drapes provide a luxury feel and help block out unwanted light from the backstage area. They also help with sound quality by absorbing echoes that often bounce around large empty halls.
I often suggest using tension fabric or spandex because it stays smooth and resists messy wrinkles perfectly. These materials are very affordable and look incredibly sleek when stretched tight over a metal frame.
Avoid using thin plastic sheets that look cheap and crinkle loudly whenever someone walks past them. High quality fabric is a small investment that pays off in the overall professional appearance.
3. Creating Layers with Smart Lighting
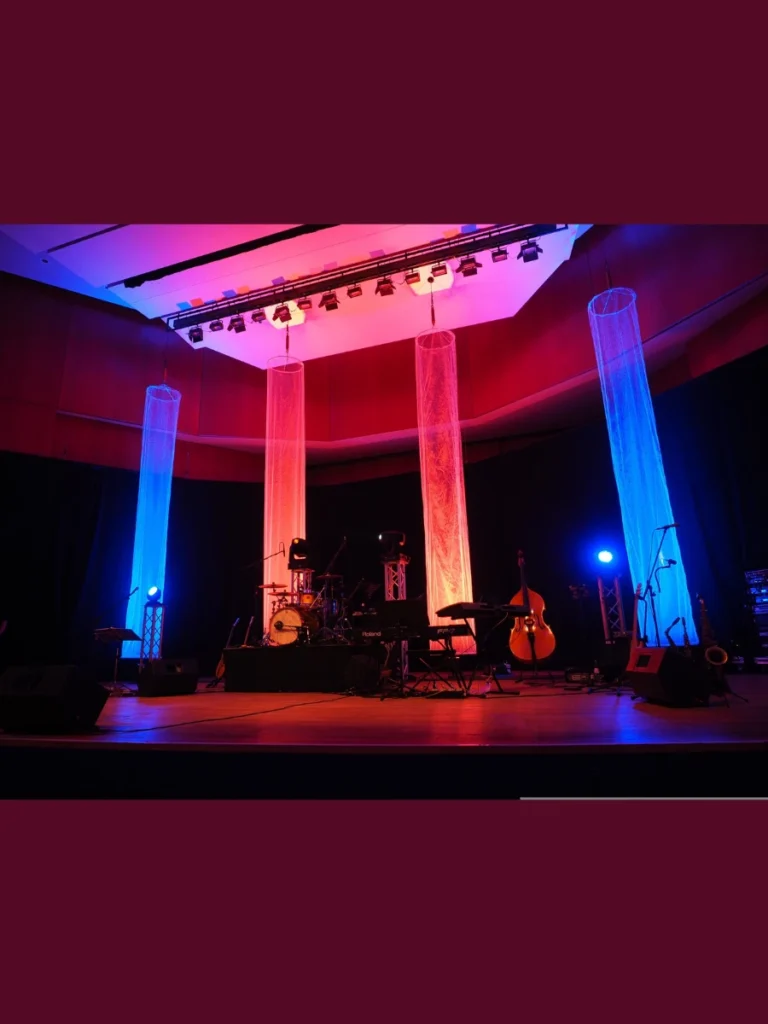
Lighting is the most powerful tool in my kit for changing the mood of any stage. I never rely on just the house lights because they wash out all the beautiful colors.
Uplighting involves placing small LED lamps on the floor to shine colorful beams up the back wall. This technique adds a dramatic flair and makes simple white drapes look like a custom design.
You should use spotlights to highlight the main speakers while keeping the background slightly more dim. This contrast ensures that the audience stays focused on the person talking instead of the decor.
I love using warm white bulbs for faces to avoid making people look washed out or sickly. Correct bulb temperature is a secret trick that professional stage designers use for every major show.
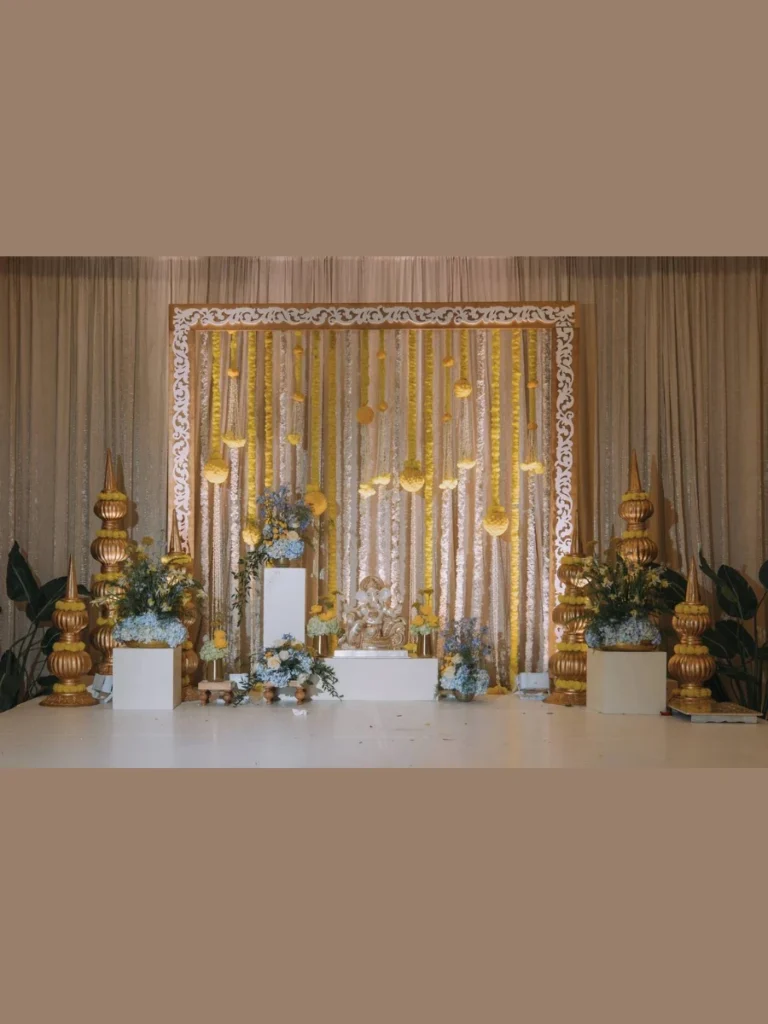
4. Incorporating Organic Elements and Greenery
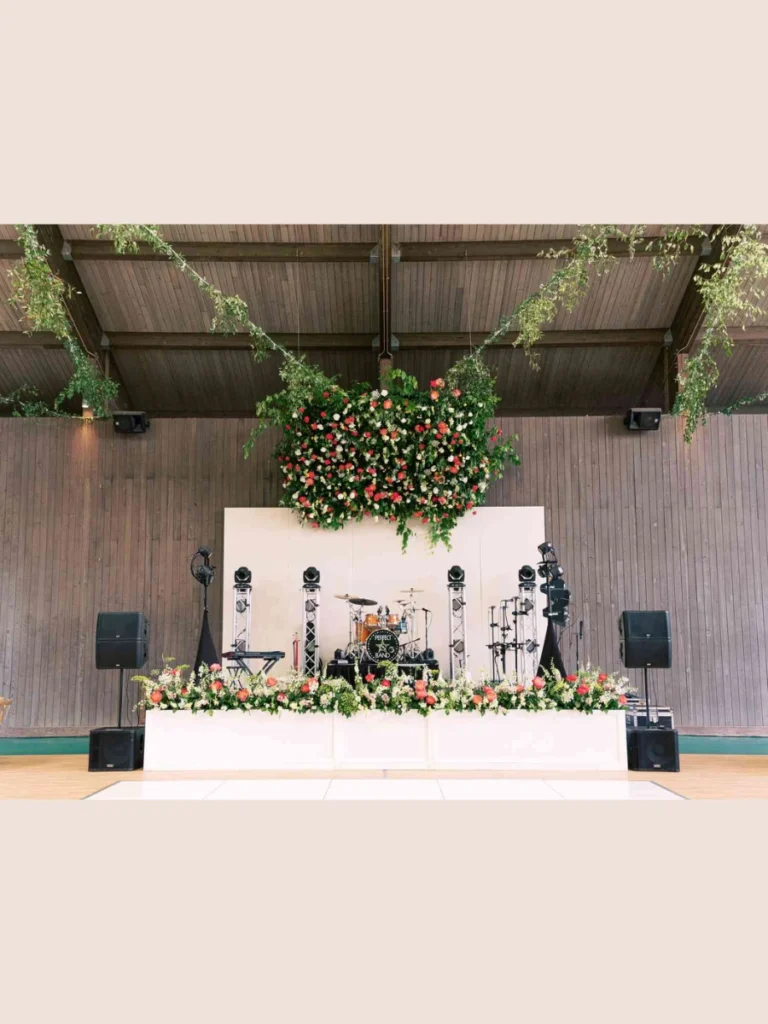
Adding plants is the fastest way to make a cold stage feel warm and inviting. I use large potted ferns to hide ugly equipment like speaker stands and tangled power cables.
Tall branches in heavy vases provide height and a modern look for more minimalist event themes. They fill up empty vertical space without blocking the view of the people on the stage.
I prefer using real plants when possible because they look much better in high resolution photos. If the budget is tight high quality silk leaves can work if you hide the stems.
Floral arrangements should sit at the base of the stage to soften the transition from floor. This creates a natural border that looks professional and keeps the focus on the main platform.
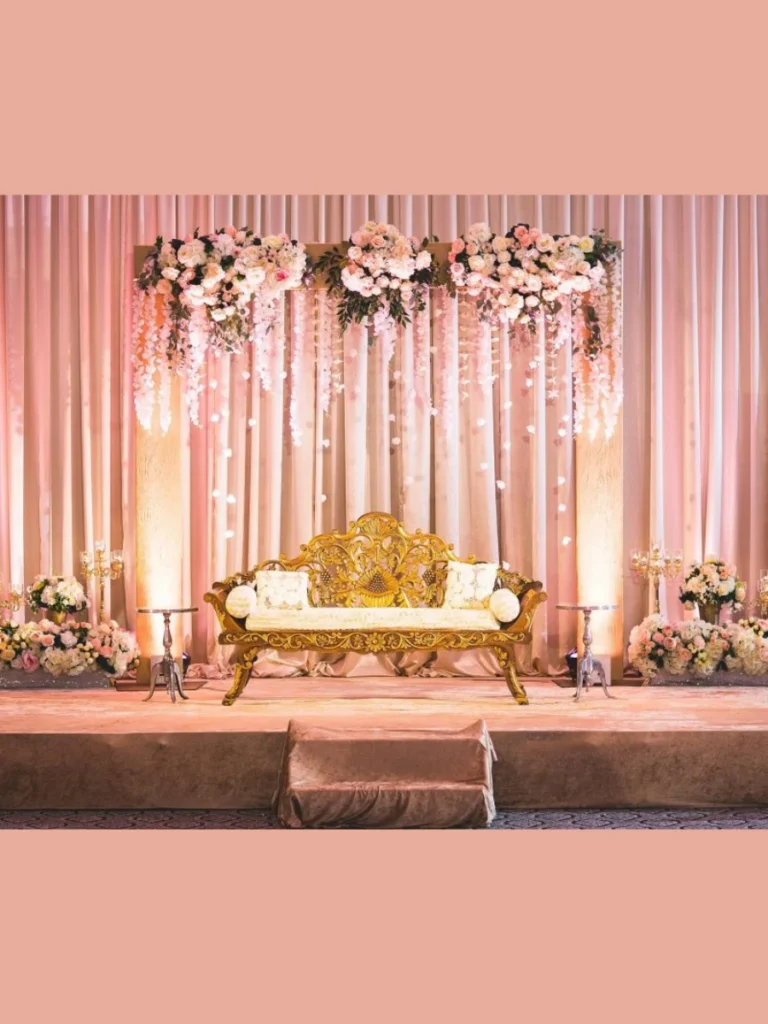
5. Strategic Furniture Selection for Comfort

The chairs you choose for a stage must look good from every angle including the back. I avoid bulky office chairs that hide the speaker and make the stage look very cluttered.
Low profile armchairs or simple bar stools are my top choices for a clean and modern. They allow the audience to see the speaker’s body language which builds a much better connection.
I match the furniture color to the backdrop to create a cohesive and well planned look. Contrasting colors can work if you want a specific piece to stand out as a feature.
Make sure the furniture is stable and does not creak when someone sits down or moves. Nothing ruins a quiet speech faster than a loud squeaky chair during a very important moment.
6. Managing Cables for a Clean Finish
Loose wires are the quickest way to make a professional stage look like a total disaster. I use gaffer tape to secure every cord firmly to the floor along the stage edges.
Hide your power strips behind large decorative props or inside painted wooden boxes for a cleaner look. Keeping these items out of sight ensures that your photos look polished and completely distraction free.
I run my cables in straight lines rather than letting them cross in a messy bird nest. This organization makes it much easier to troubleshoot a technical problem if a light stops working.
You can use fabric sleeves that match your carpet color to camouflage the necessary wiring paths. A hidden wire system shows your audience that you care about every tiny detail of the event.
7. Using Symmetry to Balance the Visuals
Human eyes naturally find comfort in balanced designs that look stable and very well organized. I place matching floral pillars on both sides of the center to create a professional frame.
A symmetrical layout helps ground the stage and makes the main speaker the obvious focal point. You should measure the distance between items to ensure the spacing is exactly even on both sides.
I avoid placing large heavy objects on only one side because it makes the stage look tilted. Balance does not mean identical items but the visual weight must feel even to the viewers.
Using pairs of lights or matching pedestals provides a classic look that works for almost any theme. It is a safe and effective way to ensure your stage looks intentionally designed.
8. Creating Branding with Custom Signage
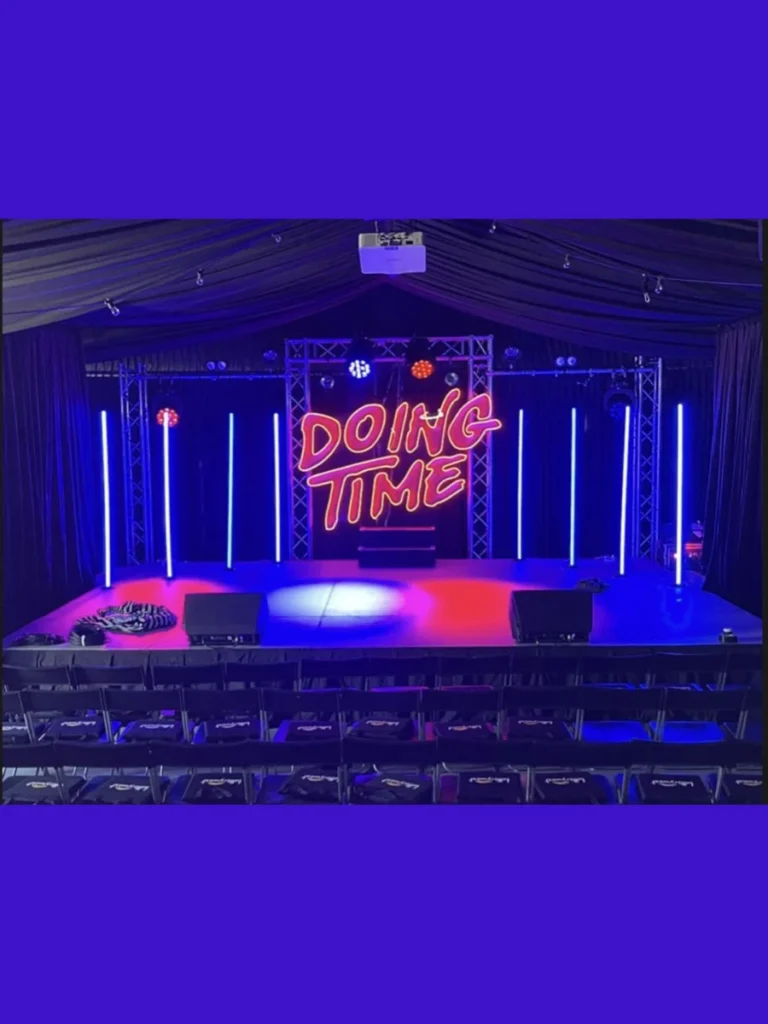
Your stage is the best place to display a company logo or a custom event name. I prefer using matte signs that do not reflect the camera flash during important photo sessions.
Foam cutouts are lightweight and easy to hang from a backdrop frame using simple clear wire. They add a professional layer of branding that makes the event feel much more official.
I place the main sign slightly above head height so it remains visible behind the standing speakers. This ensures your brand is in every single photo shared on social media after the show.
You should choose a font that is easy to read from the very back of the room. High contrast colors between the letters and the background make the message pop for every guest.
9. Adding Texture with Geometric Shapes
Modern stages often use 3D wall panels to add a sense of luxury and architectural style. I love how these panels catch the light and create interesting shadows throughout the entire event.
You can build simple wooden triangles or boxes and paint them in your main accent colors. These shapes provide a contemporary vibe that feels much more current than traditional heavy fabric curtains.
I arrange these geometric pieces at different depths to make the stage feel like an art. This approach works perfectly for tech conferences or modern music performances that need a cool edge.
Lighting these shapes from the side reveals their texture and makes the stage look very expensive. It is a clever way to fill space without using expensive floral arrangements or heavy drapes.
10. Incorporating Digital Elements and Screens
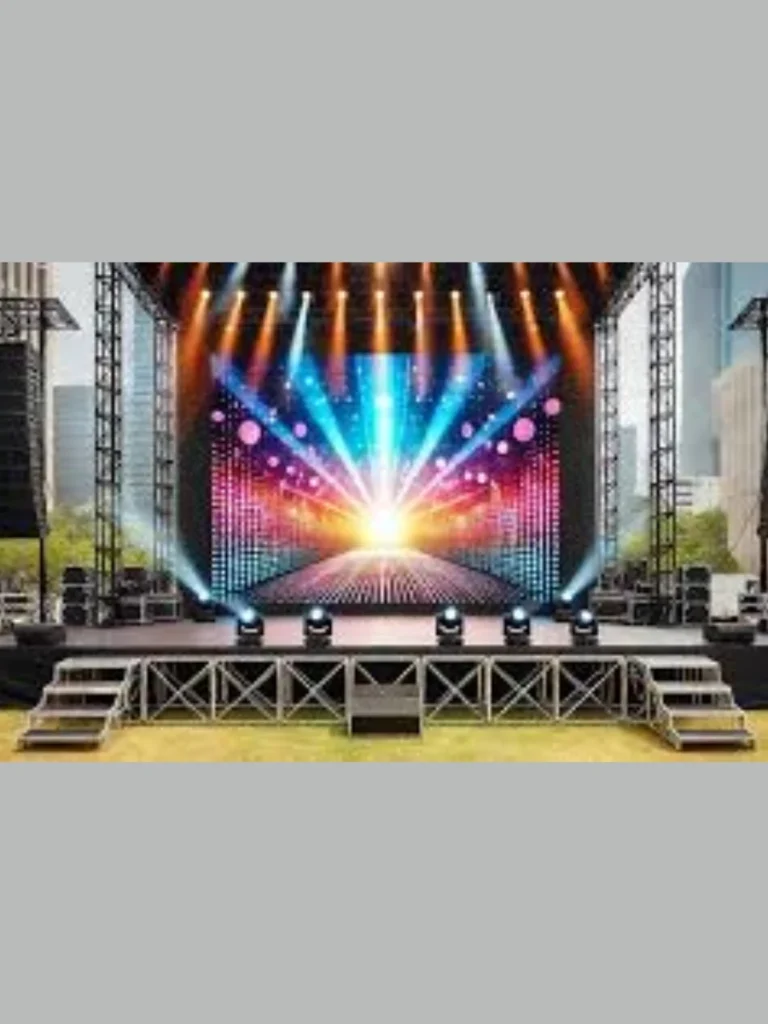
Using an LED screen as a backdrop allows you to change the scenery with one click. I find this helpful for events that have different speakers with unique topics or moods.
Make sure the screen brightness is not so high that it blinds the audience or the. Testing the visuals before the doors open is a mandatory step for any high tech stage.
I surround digital screens with physical decor like plants to blend the technology into the room. This softening effect makes the screen feel like a part of the design rather than a TV.
Static images work better than fast videos which can distract the audience from the live speaker. Choose simple textures or slow moving gradients to keep the energy focused on the stage.
Quick Stage Decor Material Comparison
| Material Type | Best Use Case | Benefit |
| Velvet Drapes | Formal Weddings | Light blocking and sound absorption |
| LED Par Lights | Atmosphere | Changes room color instantly |
| Foam Boards | DIY Props | Lightweight and easy to paint |
| Natural Greens | Outdoor Events | Adds life and organic texture |
Professional Event Stage Setup Guide
I always suggest a trial run of your setup at least one day before the guests arrive. This allows you to see how the light hits your decor and make small adjustments.
Safety is your main priority when building any platform or hanging heavy items from a ceiling. Check every bolt and weight bag to ensure the structure remains stable during the entire show.
I carry a small kit with scissors and extra tape for any last minute decor emergencies. Being prepared for a loose curtain or a fallen prop will save your sanity.
Take a photo of the finished stage from the back row to check the overall visibility. If you can see the focal point clearly then your design is a success.
Final Thoughts on Stage Decor Success
Creating a memorable stage is about making the people on it feel like the stars. I hope these tips help you build a space that looks professional and feels welcoming.
Focus on the lighting and the layout first because they are the foundation of style. Once those are right you can add the smaller details that bring your vision.
I love seeing a DIY project turn into something that looks like it cost thousands. Trust your creative eye and do not be afraid to try something a bit different.
Your event deserves a stage that stays in the minds of your guests long after. Good luck with your next project and enjoy the process of creating something truly beautiful.
FAQs
Use gaffer tape that matches the floor color and hide power strips behind decor. Running wires in straight lines along the edges keeps the center of the stage clear.
Use mirrors or light-colored backdrops and place your decor at different depths for a 3D. Keeping the furniture low and simple also prevents the space from looking too crowded.
Yes, but you must ensure they stay hydrated and are secured so they do not tip. I suggest using heavy vases and choosing hardy varieties that won’t wilt under hot stage lights.
LED uplights are the most affordable way to change the entire look of a room. They are easy to set up and can turn a plain wall into a colorful.
The backdrop should be at least eight feet tall to ensure it covers the entire camera. For larger venues you may need to go higher to keep the ceiling out of.